
Razorpay is a payment gateway that enables Indian businesses to accept online payments from customers using a wide range of payment methods, including credit and debit cards, net banking, UPI, and digital wallets. It is known to be one of the major platforms for accepting payment in India.
In this tutorial, you will learn how to integrate Razorpay with a Flutter app and enable it to accept payments.
The official Razorpay Flutter package only supports Android and iOS platforms. But in this article, you will also learn to integrate Razorpay with Flutter Web using JavaScript interoperability for Dart 🚀. Follow along to learn more.
App Overview
The final app we will build throughout this tutorial will mainly consist of a single page, Home Page. Here, we will take the user information required for the checkout and start the payment process with Razorpay as the Checkout button is tapped.
Once the checkout process is done using the Razorpay dialog, we will receive the response and can verify whether the transaction was successful.
If the transaction was successful, we'd show a SnackBar with the text: "Payment successful", otherwise show "Payment failed".
Create a Flutter app
Let's get started by creating a new Flutter project.
To create a Flutter app, you can either use an IDE (like VS Code, IntelliJ, or Android Studio) or just run the following command inside your terminal:
flutter create razorpay_demoflutter command, you should have Flutter SDK installed on your system. If you don't have it installed, follow the steps here.Open the project using your favorite IDE and navigate to the lib/main.dart file. By default, Flutter creates a demo counter app project.
Replace the entire code with the following:
import 'package:flutter/material.dart';

import 'home_page.dart';

void main() {
  runApp(const MyApp());
}

class MyApp extends StatelessWidget {
  const MyApp({super.key});

  @override
  Widget build(BuildContext context) {
    return MaterialApp(
      title: 'Flutter Razorpay Demo',
      debugShowCheckedModeBanner: false,
      theme: ThemeData(
        primarySwatch: Colors.pink,
      ),
      home: const HomePage(),
    );
  }
}
Create another file inside the lib directory called home_page.dart. In this file, we'll define the UI code for the app's Home Page.
For now, add a simple StatefulWidget called HomePage:
import 'package:flutter/material.dart';

class HomePage extends StatefulWidget {
  const HomePage({super.key});

  @override
  State<HomePage> createState() => _HomePageState();
}

class _HomePageState extends State<HomePage> {
  @override
  void initState() {
    // Initializing code here
    super.initState();
  }

  @override
  void dispose() {
    // Disposing code here
    super.dispose();
  }

  @override
  Widget build(BuildContext context) {
  	// UI code here
    return Scaffold(
      backgroundColor: Colors.white,
    );
  }
}
We will update the HomePage code later on in this article.
Setup Razorpay
To use Razorpay inside your app, you need to create a Razorpay account. If you already have an account, you can log in here.
Once you are logged in to your account, it will take you to the Razorpay Dashboard. Make sure you turn on the Test Mode.

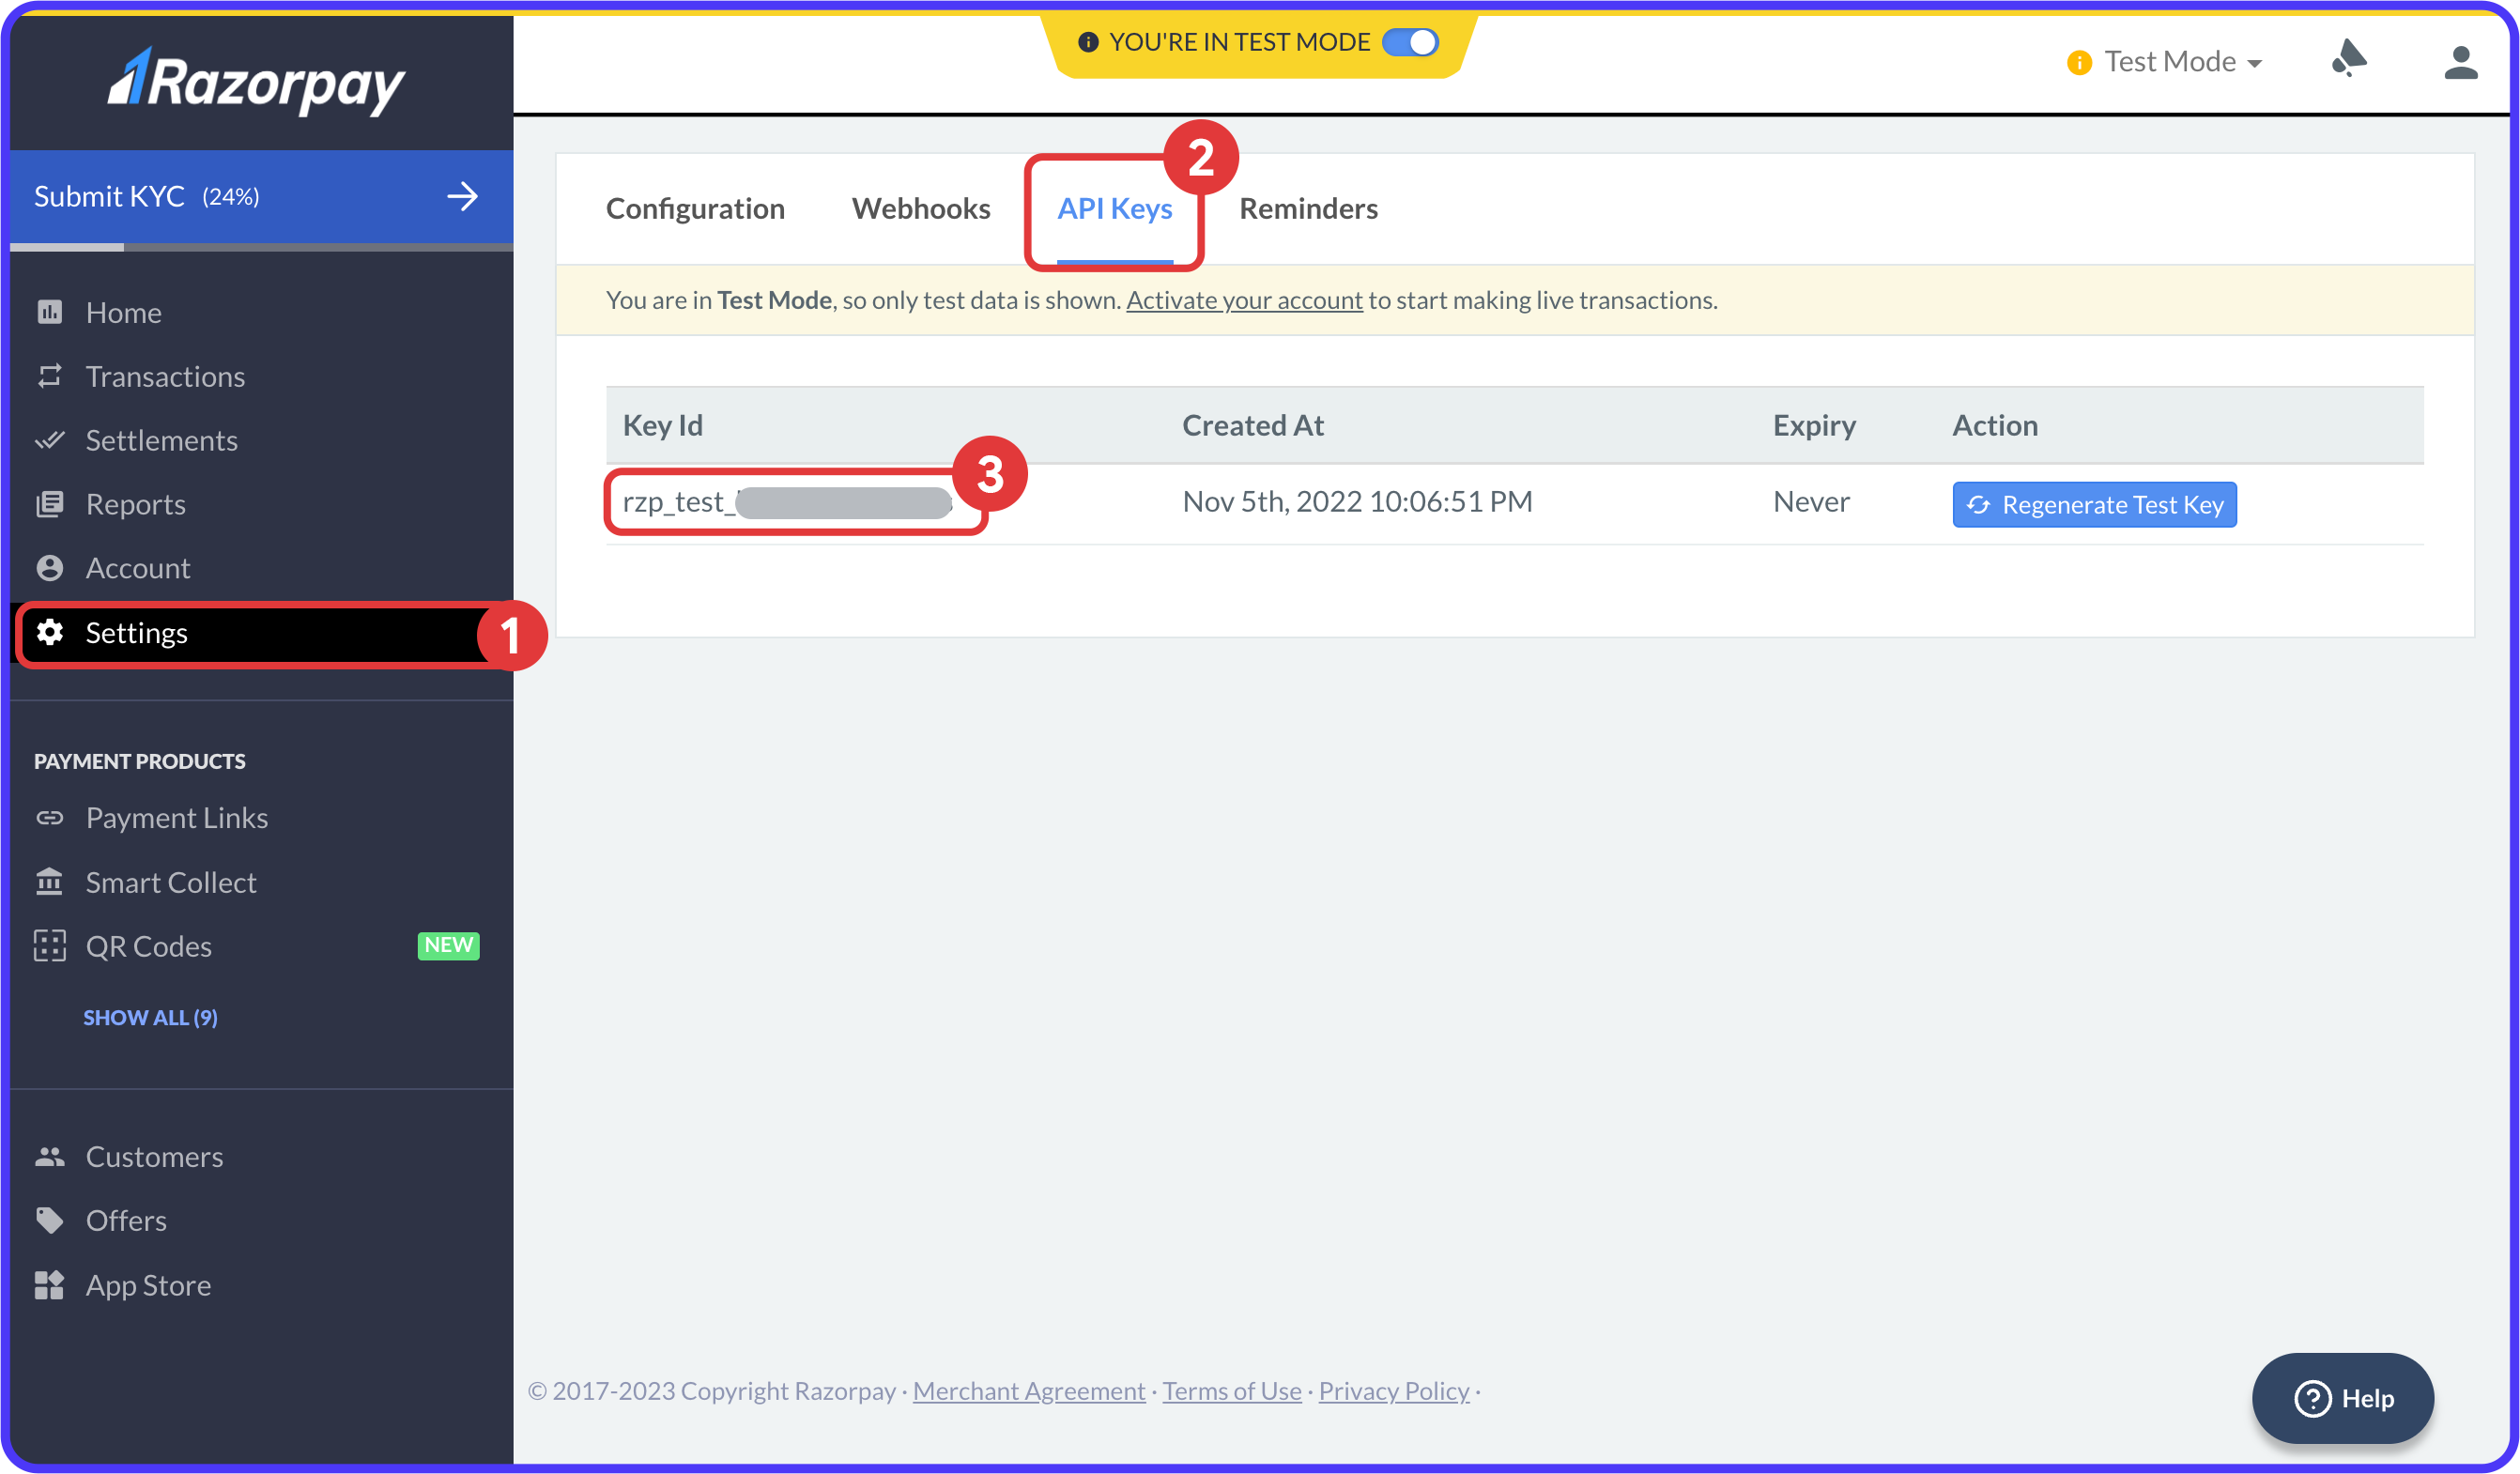
Next, you need to generate a test API Key to access the Razorpay APIs in Test Mode:
- Select the Settings page from the left menu.
- Go to the API Keys tab.
- Click Generate Test Key. Copy/download the generated Key Id and Key Secret (visible only once), and store them in a safe place.
You will need both of these while accessing the Razorpay APIs inside the Cloud Functions.
Now that we have the Razorpay setup complete, let's create a Firebase project where we'll be deploying the Cloud Functions.
Create Firebase project
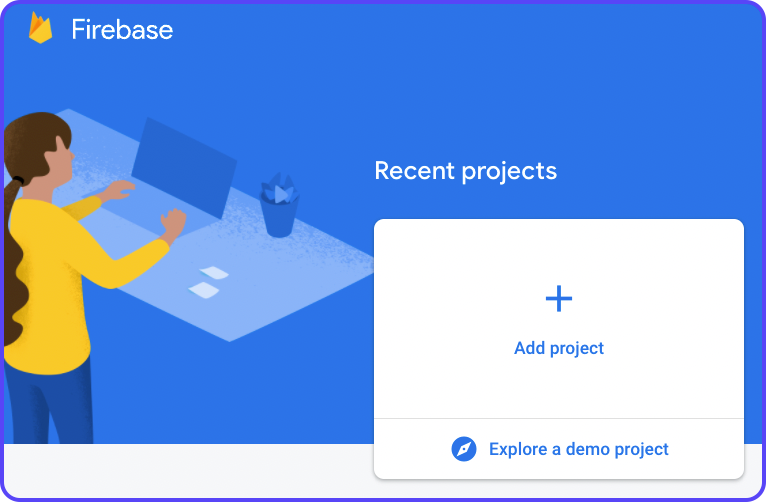
Follow the steps below to create a Firebase project:
- Go to Firebase Console. You'll need to log in using your Google account.
- Click Add project.
3. Give a name to your project and click Continue.
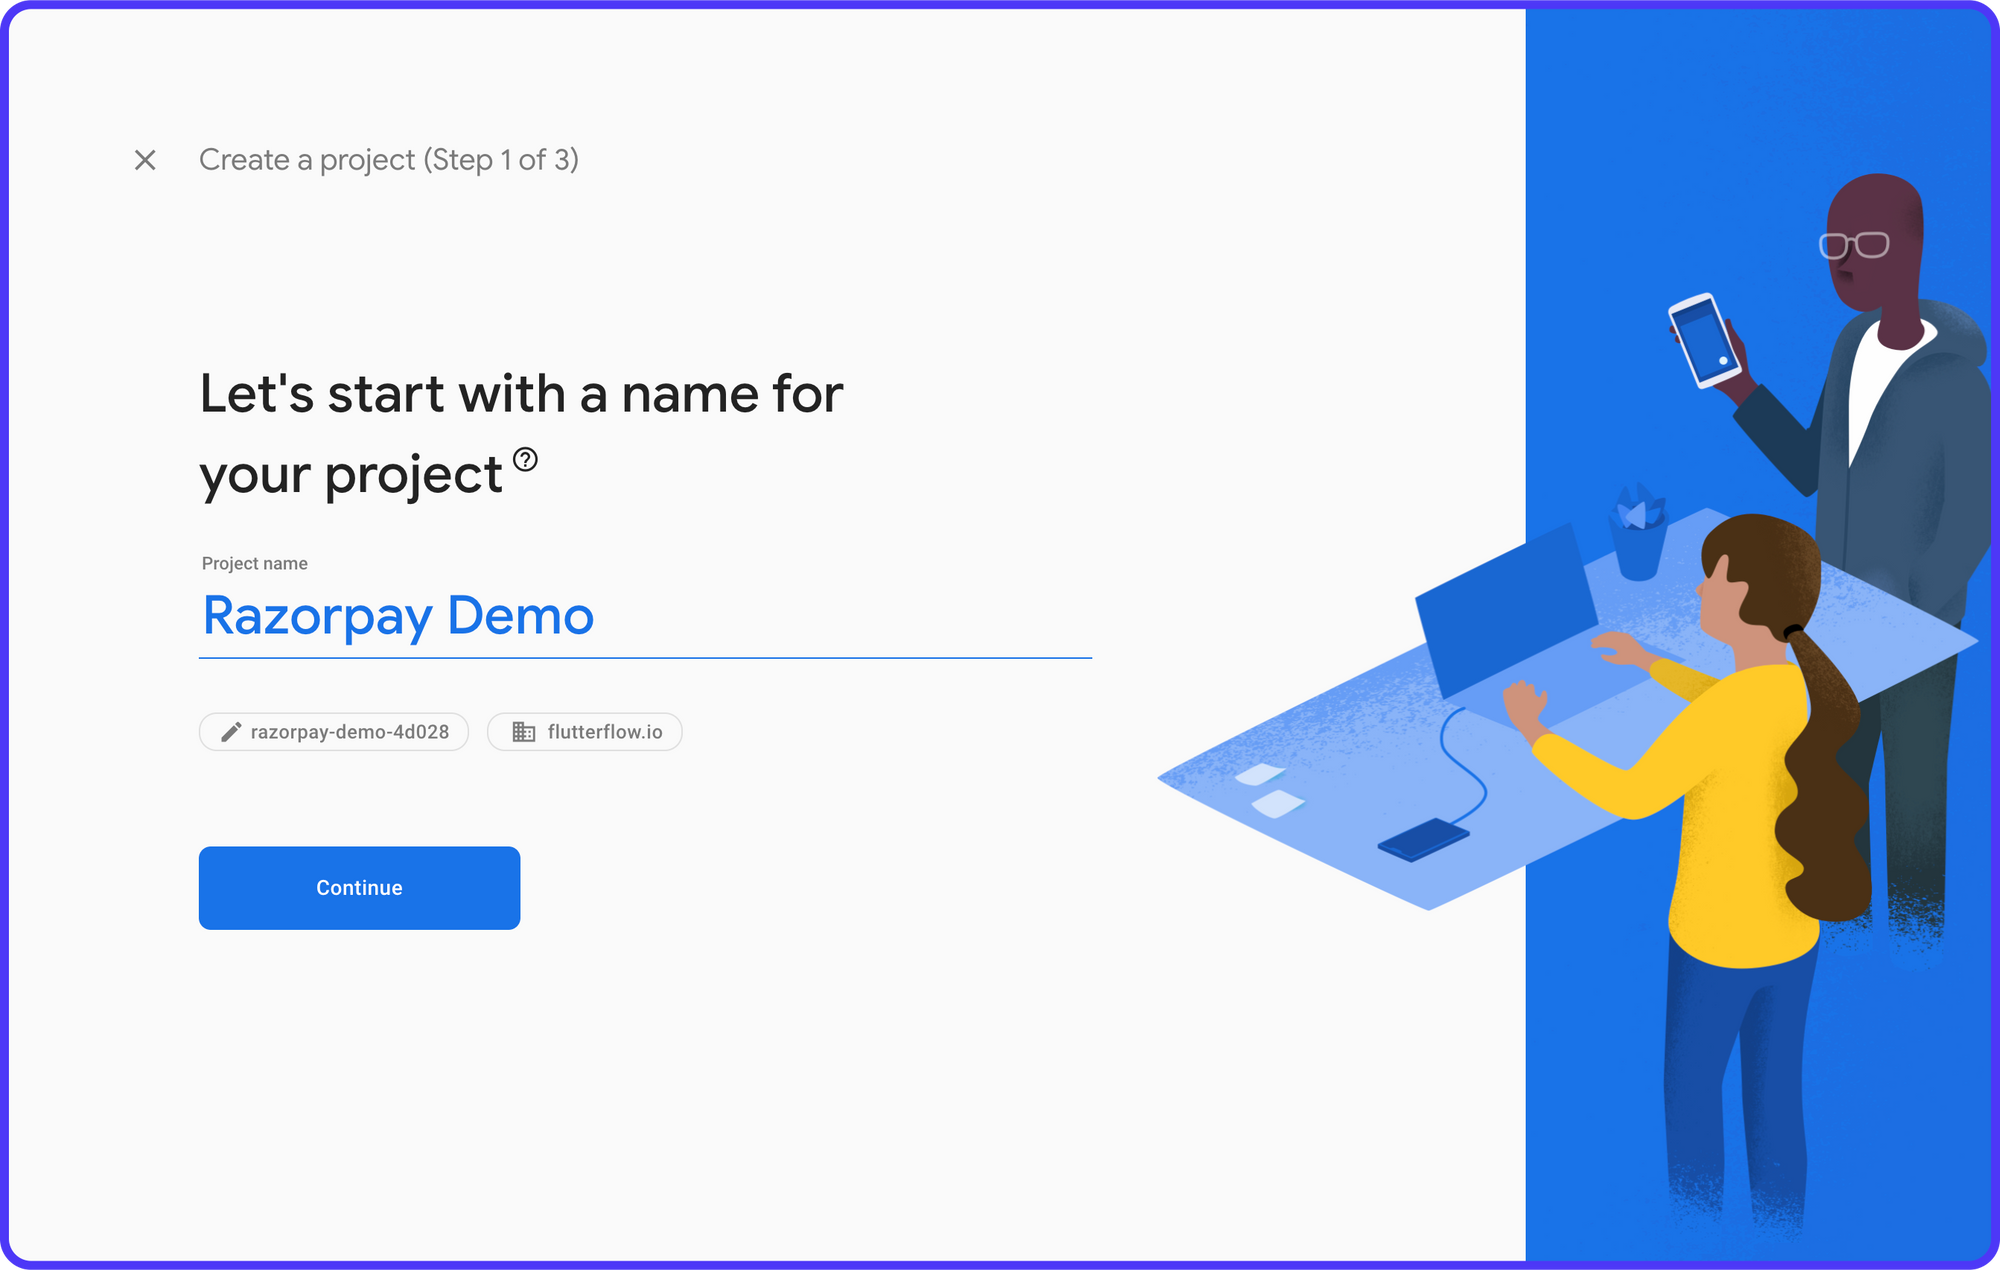
4. Disable Google Analytics as this is just a demo project. But if you are using Firebase for any production application, enabling analytics is recommended. Click Create project.

5. It will take a few moments to create the project. Once it's ready, click Continue.
This will navigate you to the Firebase dashboard page.
For using Cloud Functions, your project should be in the Blaze Plan. By default, every Firebase project is in Spark Plan.
Click on Upgrade from the left menu, select the Blaze Plan, and configure/choose a billing account.

Now, you are ready to write and deploy Cloud Functions!
Configure Cloud Functions
Razorpay requires you to maintain a backend server to generate the order ID securely and verify the signature after checkout. Today, we'll be using Firebase Cloud Functions for making those API calls, which prevents the hassle of maintaining a server, helping us to achieve a completely serverless architecture.
To get started with Cloud Functions, you'll need to install the Firebase CLI. You can find the installation guide on this page.
Once you have the Firebase CLI installed on your system, you can access it with the firebase command, run the following to test if it's working:
firebase --versionIf the version is printed on the console, then you are good to proceed.
Log in to Firebase using the following command:
firebase loginThis will open a webpage in your browser from where you have to sign in to the Google account you used to access Firebase.
The following steps will guide you through the configuration process of Cloud Functions:
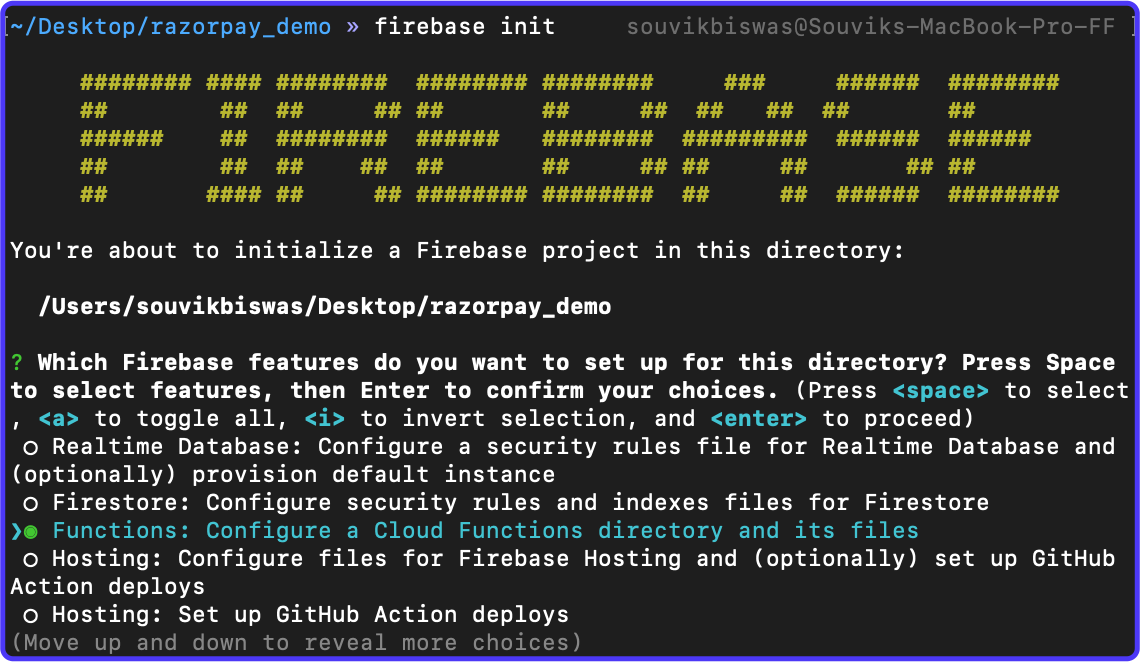
1. Navigate to your Flutter project directory and run the following command to start initializing Cloud Functions:
firebase init2. Among the features of setup, select Functions.
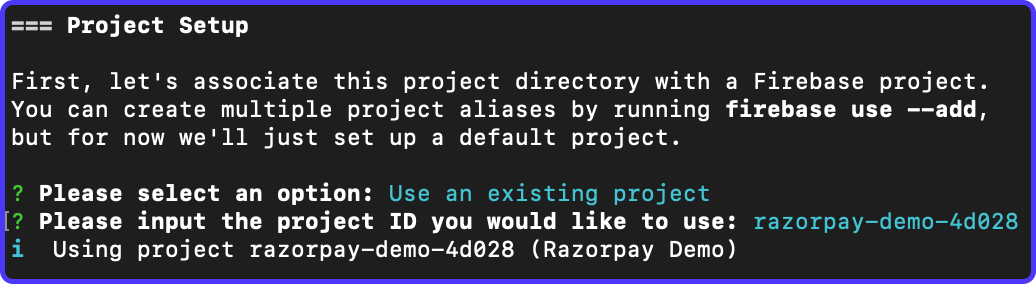
3. In Project Setup, choose to Use an existing project and select the Firebase project you created earlier.
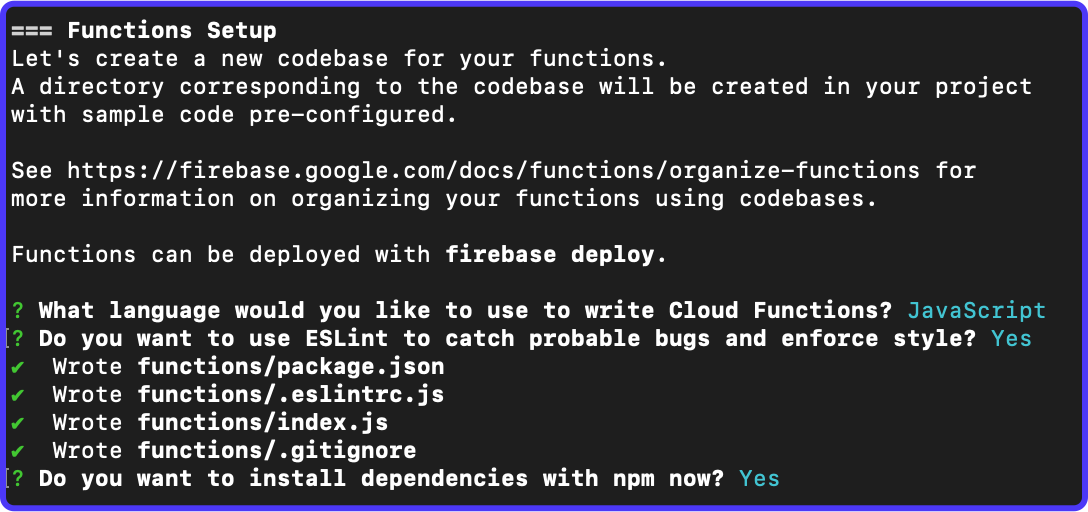
- In Functions Setup, use the following:
- Language: JavaScript
- ESLint enable: Yes
- Install dependencies: Yes
Once the initialization process completes, you will find a new folder is generated inside your Flutter project directory called functions:
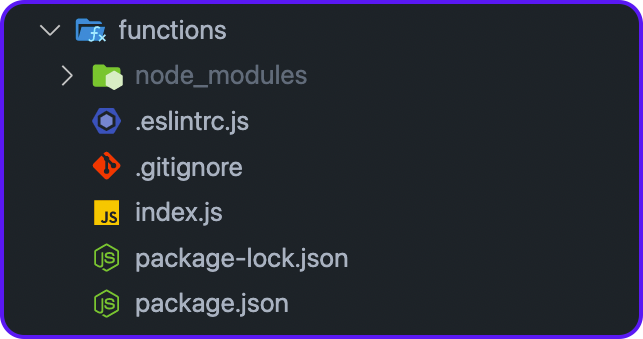
Here, index.js is the file where you have to write the functions. You will find all the dependencies of the Cloud Functions inside the package.json file.
Writing Functions
You will require two Cloud Functions for using the Razorpay APIs:
createOrder: For creating an order. You will need the order ID, that's present in the response, during the checkout process.verifySignature: For verifying the authenticity of the transaction. It is done after the checkout process is complete. This is a MANDATORY step.
Let's start writing the functions.
First, you need to install the required dependency. We only need the razorpay npm package:
cd functions
npm i razorpay
npm i @babel/eslint-parser --save-dev@babel/eslint-parser dependency is required for the ESLint.This will add the dependencies to your package.json file.
You need to import the required dependencies inside the index.js file. Add the following code:
const functions = require("firebase-functions");
const Razorpay = require("razorpay");
const crypto = require("crypto");
Initialize Razorpay using:
const razorpay = new Razorpay({
  key_id: functions.config().razorpay.key_id,
  key_secret: functions.config().razorpay.key_secret,
});Next, we'll generate an order using razorpay.orders.create() function by passing an amount, currency, receipt, and description. We will return the response received from this call (this will contain the order ID).
exports.createOrder = functions.https.onCall(async (data, context) => {
  try {
    const order = await razorpay.orders.create({
      amount: data.amount,
      currency: data.currency,
      receipt: data.receipt,
      notes: {
        description: data.description,
      },
    });

    return order;
  } catch (err) {
    console.error(`${err}`);
    throw new functions.https.HttpsError(
        "aborted",
        "Could not create the order",
    );
  }
});
Add another function for verifying the signature and confirming the transaction's authenticity. The steps required for the payment signature verification are described in the Razorpay documentation here.
We'll need to send the order ID (received from the createOrder Cloud Function), and payment ID & signature (received as the response after a successful checkout process). This function will return a boolean based on whether the verification was successful.
exports.verifySignature = functions.https.onCall(async (data, context) => {
  const hmac = crypto.createHmac(
      "sha256",
      functions.config().razorpay.key_secret,
  );
  hmac.update(data.orderId + "|" + data.paymentId);
  const generatedSignature = hmac.digest("hex");
  const isSignatureValid = generatedSignature == data.signature;
  return isSignatureValid;
});Deploying to Firebase
Before deploying the functions, you must define the Key ID and the Key Secret as config variables. Run the following command:
firebase functions:config:set razorpay.key_id="<KEY_ID>" razorpay.key_secret="<KEY_SECRET>"<KEY_ID> and <KEY_SECRET> with the values you generated as the Test API Key.Modify the .eslintrc.js file to include the parserOptions:
module.exports = {
  root: true,
  env: {
    es6: true,
    node: true,
  },
  extends: [
    "eslint:recommended",
    "google",
  ],
  rules: {
    quotes: ["error", "double"],
  },
  parserOptions: {
    sourceType: "module",
    ecmaVersion: 8,
    ecmaFeatures: {
      jsx: true,
      experimentalObjectRestSpread: true,
    },
  },
};
Now, use this command to deploy the functions:
firebase deploy --only functions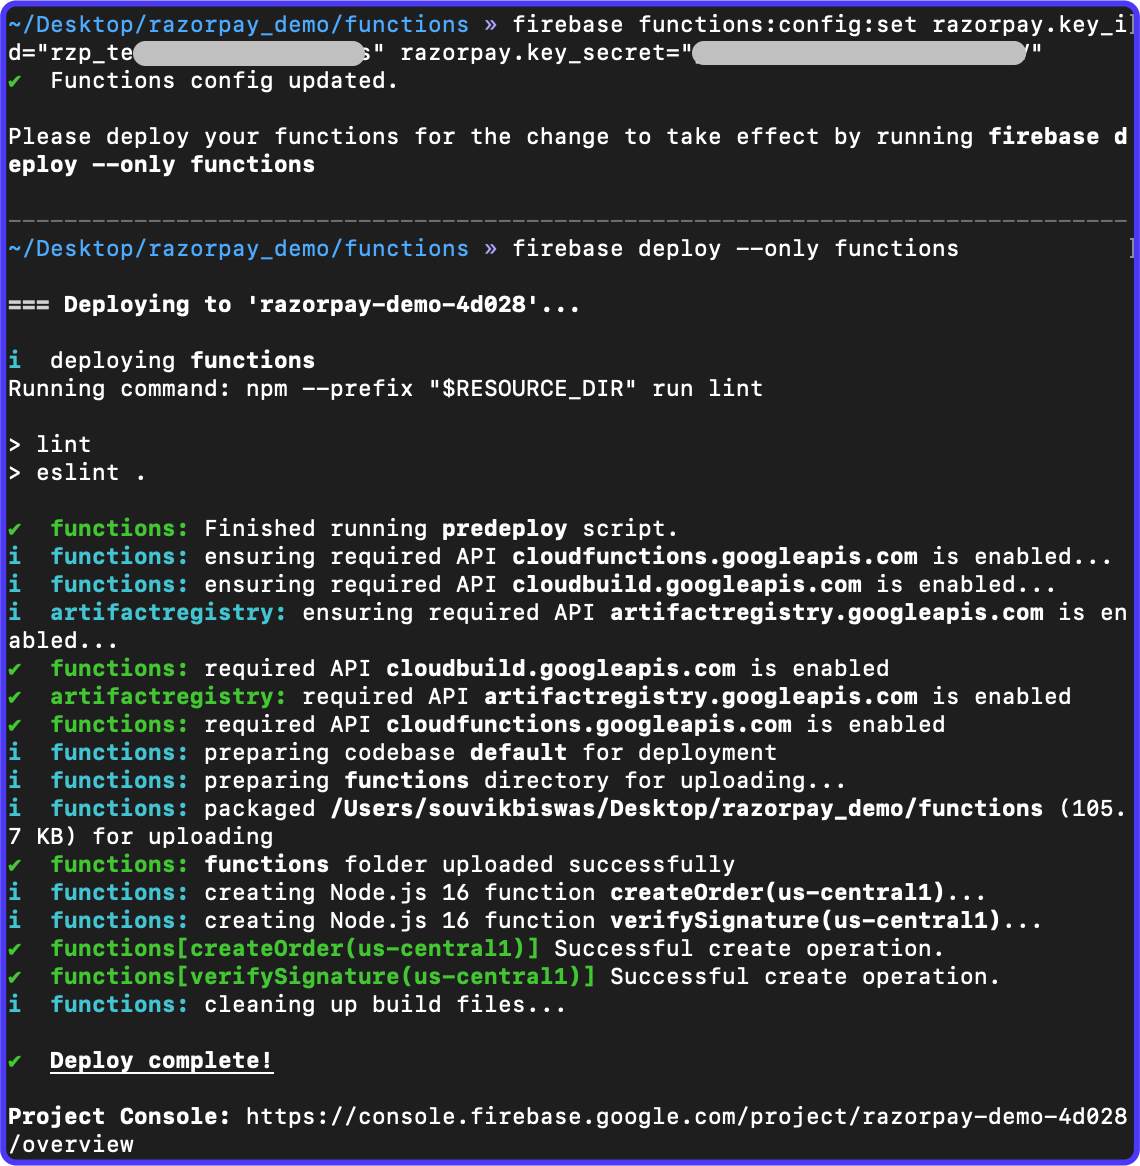
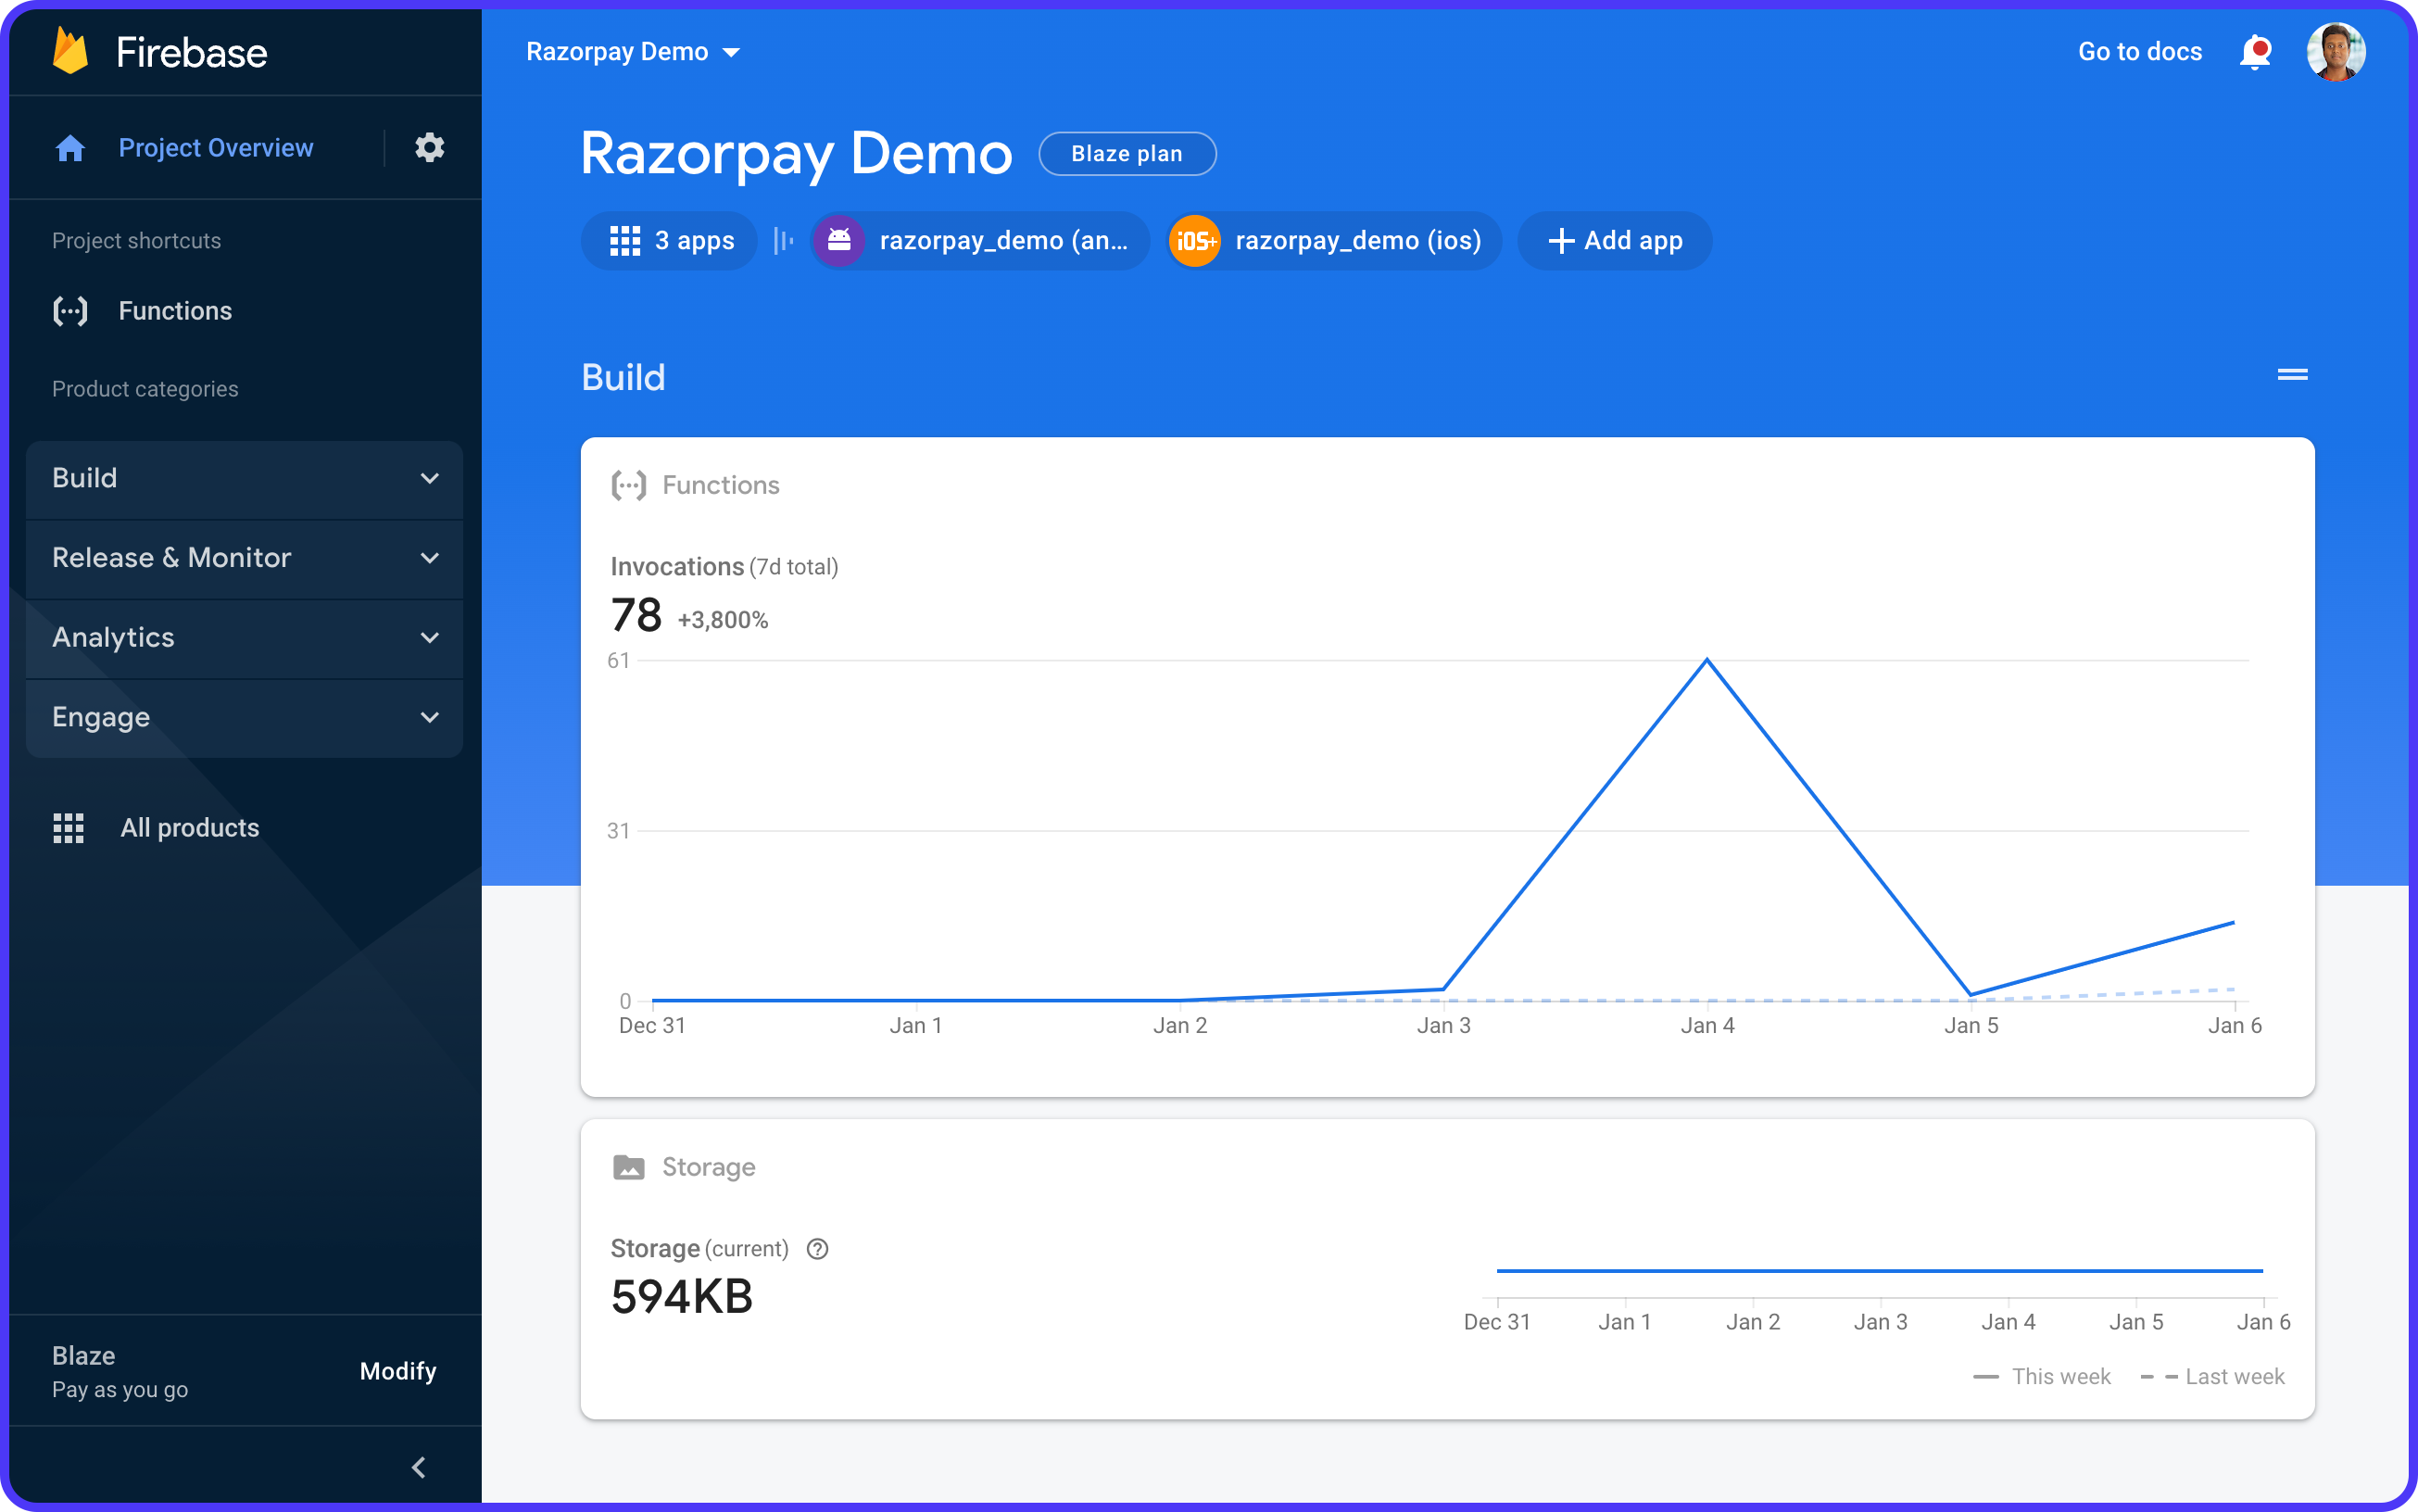
After a successful deployment of the Cloud Function, you should be able to see them on the Firebase Functions page.
Connect Firebase with Flutter
To use Firebase services inside your Flutter app, you should have the following CLI tools installed on your system:
- Firebase CLI: For accessing the Firebase projects (already configured).
- FlutterFire CLI: Helps in the Dart-only configuration of Firebase.
Install FlutterFire CLI using the following command:
dart pub global activate flutterfire_cliBefore configuring Firebase, install the firebase_core plugin in your Flutter project by running the following command:
flutter pub add firebase_coreTo start configuring Firebase, run the following command from the root directory of your Flutter app:
flutterfire configureYou'll be prompted to select the Firebase project and the platforms (select Android, iOS, and Web platform) for which you want to configure your Flutter app.
Once the configuration is complete, it will generate the firebase_options.dart file inside the lib directory.
Now, go back to your Flutter project and open the main.dart file. Add the following inside the main function (mark the main as async):
import 'package:firebase_core/firebase_core.dart';
import 'package:razorpay_demo/firebase_options.dart';

void main() async {
  WidgetsFlutterBinding.ensureInitialized();

  await Firebase.initializeApp(
    options: DefaultFirebaseOptions.currentPlatform,
  );

  runApp(const MyApp());
}
Build app interface
As discussed earlier, the app will primarily consist of just a single page, Home Page. Before we start building the UI, add one required image by creating a new folder inside the root directory of your project called assets (you can download the image here):
Let's have a closer look at the Home Page to understand the layout and the widgets required:
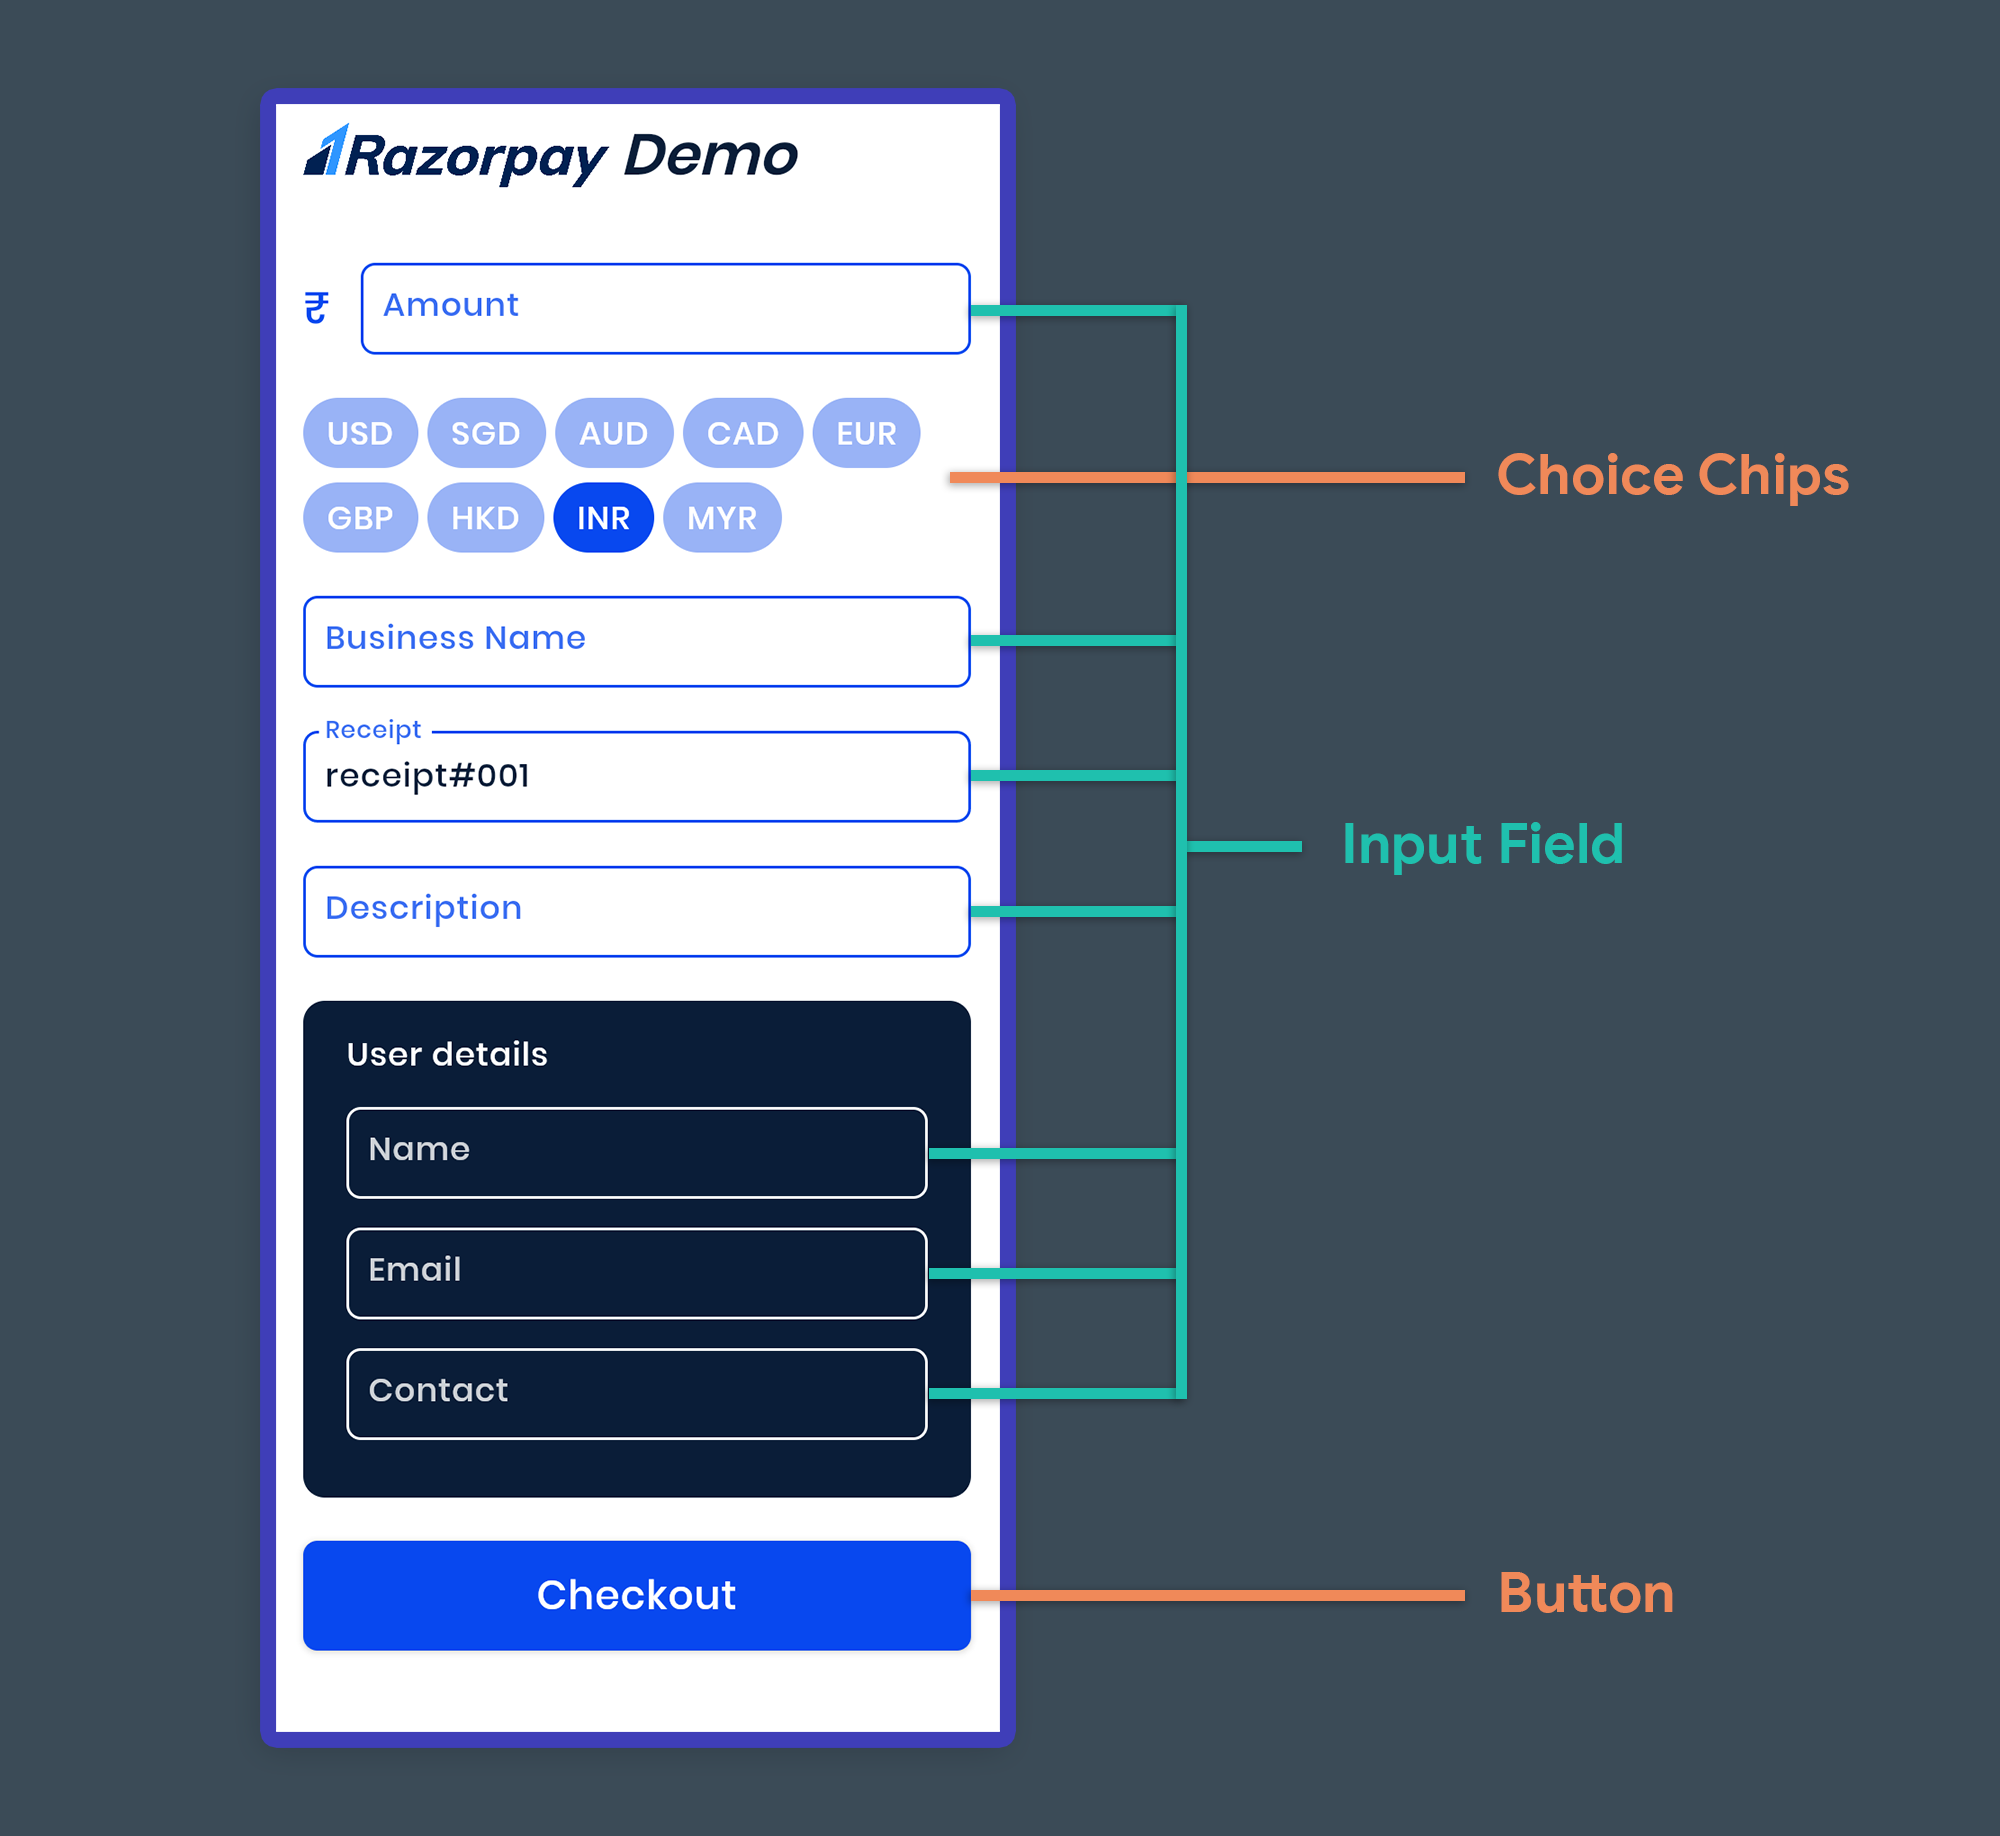
Time to start building the user interface!
To have our colors easily accessible throughout the project, let's add a res/palette.dart file inside the lib directory, and store the required custom colors here:
import 'package:flutter/material.dart';

class Palette {
  static const Color blueDark = Color(0xFF0a1d38);
  static const Color blueMedium = Color(0xFF0848ef);
  static const Color blue = Color(0xFF3395ff);
}
Navigate to the home_page.dart file. Add the following code inside the build() method of _HomePageState class which will serve as the initial structure:
import 'package:razorpay_demo/res/palette.dart';

// ...

class _HomePageState extends State<HomePage> {
  // ...

  @override
  Widget build(BuildContext context) {
    return GestureDetector(
      onTap: () => FocusScope.of(context).unfocus(),
      child: Scaffold(
        backgroundColor: Colors.white,
        appBar: AppBar(
          elevation: 0,
          backgroundColor: Colors.white,
          title: Row(
            children: [
              Image.asset(
                'assets/razorpay_logo.png',
                height: 36,
              ),
              const SizedBox(width: 6),
              const Text(
                'Demo',
                style: TextStyle(
                  color: Palette.blueDark,
                  fontSize: 32,
                  fontStyle: FontStyle.italic,
                  fontWeight: FontWeight.w600,
                ),
              )
            ],
          ),
        ),
        body: Stack(
          children: [
            // TODO: Add the Input Fields, Choice Chips, Button,
            // and an ErrorBar for showing any validation error
          ],
        ),
      ),
    );
  }
}
Taking user inputs
For taking the user inputs, we will use TextFormField widgets.
To have a customized TextFormField widget, which we will re-use for each of the user inputs, create a new file called input_field.dart inside lib/widget folder.
Define a class called InputField:
import 'package:flutter/material.dart';
import 'package:flutter/services.dart';
import 'package:razorpay_demo/res/palette.dart';

class InputField extends StatelessWidget {
  const InputField({
    super.key,
    required this.controller,
    required this.hintText,
    this.textInputFormatter,
    required this.inputType,
    required this.inputAction,
    required this.label,
    this.leading,
    this.validator,
    this.primaryColor = Palette.blueMedium,
    this.textColor = Palette.blueDark,
    this.errorColor = Colors.red,
    this.textCapitalization = TextCapitalization.none,
    this.maxLines = 1,
  });

  final TextEditingController controller;
  final String hintText;
  final TextInputFormatter? textInputFormatter;
  final Widget? leading;
  final TextInputType inputType;
  final TextInputAction inputAction;
  final String? Function(String?)? validator;
  final String label;
  final Color primaryColor;
  final Color textColor;
  final Color errorColor;
  final TextCapitalization textCapitalization;
  final int? maxLines;

  @override
  Widget build(BuildContext context) {
    return TextFormField(
      maxLines: maxLines,
      controller: controller,
      textCapitalization: textCapitalization,
      style: TextStyle(
        color: textColor,
        fontSize: 18,
        fontWeight: FontWeight.w500,
        letterSpacing: 0.6,
      ),
      decoration: InputDecoration(
        icon: leading,
        hintText: hintText,
        label: Text(
          label,
          style: TextStyle(
            color: primaryColor.withOpacity(0.8),
            fontSize: 18,
            fontWeight: FontWeight.w500,
            letterSpacing: 0.6,
          ),
        ),
        hintStyle: TextStyle(
          color: primaryColor.withOpacity(0.4),
          fontWeight: FontWeight.normal,
          fontSize: 18,
          letterSpacing: 0.6,
        ),
        enabledBorder: OutlineInputBorder(
          borderSide: BorderSide(
            color: primaryColor,
            width: 1.5,
          ),
          borderRadius: BorderRadius.circular(8),
        ),
        focusedBorder: OutlineInputBorder(
          borderSide: BorderSide(
            color: primaryColor,
            width: 3,
          ),
          borderRadius: BorderRadius.circular(8),
        ),
        errorBorder: OutlineInputBorder(
          borderSide: BorderSide(
            color: errorColor,
            width: 1.5,
          ),
          borderRadius: BorderRadius.circular(8),
        ),
        focusedErrorBorder: OutlineInputBorder(
          borderSide: BorderSide(
            color: errorColor,
            width: 3,
          ),
          borderRadius: BorderRadius.circular(8),
        ),
        errorStyle: TextStyle(color: errorColor),
        contentPadding: const EdgeInsets.fromLTRB(12, 16, 12, 16),
      ),
      cursorColor: primaryColor,
      keyboardType: inputType,
      textInputAction: inputAction,
      inputFormatters:
          textInputFormatter != null ? [textInputFormatter!] : null,
      validator: validator,
    );
  }
}
Go back to the home_page.dart file. Initialize the TextEditingController(s) required for each of the TextFormField widgets:
class _HomePageState extends State<HomePage> {
  late final TextEditingController _amountController;
  late final TextEditingController _businessNameController;
  late final TextEditingController _receiptController;
  late final TextEditingController _descriptionController;
  late final TextEditingController _userNameController;
  late final TextEditingController _userEmailController;
  late final TextEditingController _userContactController;

  @override
  void initState() {
    _amountController = TextEditingController();
    _businessNameController = TextEditingController();
    _receiptController = TextEditingController(text: 'receipt#001');
    _descriptionController = TextEditingController();
    _userNameController = TextEditingController();
    _userEmailController = TextEditingController();
    _userContactController = TextEditingController();
    super.initState();
  }

  @override
  Widget build(BuildContext context) {...}
}
Use the InputField widget:
import 'package:flutter/services.dart';
import 'package:razorpay_demo/widgets/input_field.dart';
class _HomePageState extends State<HomePage> {
// ...
@override
Widget build(BuildContext context) {
return GestureDetector(
onTap: () => FocusScope.of(context).unfocus(),
child: Scaffold(
backgroundColor: Colors.white,
appBar: AppBar(...),
body: Stack(
children: [
Padding(
padding: const EdgeInsets.symmetric(horizontal: 16.0),
child: ListView(
physics: const BouncingScrollPhysics(),
children: [
const SizedBox(height: 8),
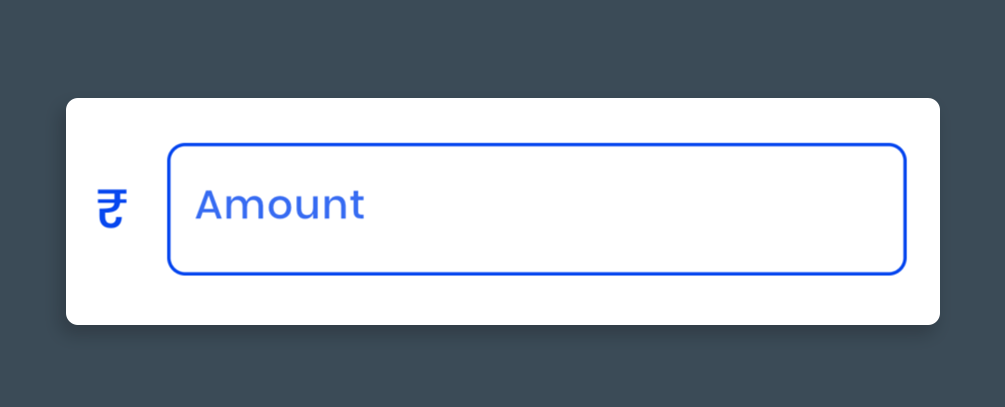
// Amount field
InputField(
controller: _amountController,
label: 'Amount',
hintText: 'Enter amount',
inputType: TextInputType.number,
inputAction: TextInputAction.next,
leading: Text(
currencies.values.elementAt(_choiceChipValue),
style: const TextStyle(
color: Palette.blueMedium,
fontSize: 24,
fontWeight: FontWeight.w500,
),
),
// Allow only two decimals digits
textInputFormatter: FilteringTextInputFormatter.allow(
RegExp(r'^\d+\.?\d{0,2}'),
),
validator: Validator.amount,
),
// TODO: Add "Currency choice chips" here
// Business Name field
InputField(...),
// Receipt field
InputField(...),
// Description field
InputField(...),
// User detail Inputs: Name, Email, Contact
Container(
decoration: BoxDecoration(
borderRadius: BorderRadius.circular(12),
color: Palette.blueDark,
),
child: Padding(
padding: const EdgeInsets.symmetric(
horizontal: 24.0,
vertical: 16.0,
),
child: Column(
crossAxisAlignment: CrossAxisAlignment.start,
children: [
const Text(
'User details',
style: TextStyle(
color: Colors.white,
fontSize: 18,
fontWeight: FontWeight.w500,
letterSpacing: 0.6,
),
),
// User Name field
InputField(...),
// User Email field
InputField(...),
// User Contact field
InputField(...),
],
),
),
),
// TODO: Add "Checkout" button
],
),
),
],
),
),
);
}
}
For the currency symbol placed in the leading of the TextFormField, we can define a Map variable for this demo:
  final currencies = {
    'USD': '\$',
    'SGD': 'S\$',
    'AUD': 'A\$',
    'CAD': 'C\$',
    'EUR': '€',
    'GBP': '£',
    'HKD': 'HK\$',
    'INR': '₹',
    'MYR': 'RM',
  };
Notice we have also used a validator inside the Amount InputField. To define the validators, you can create a new file called validator.dart inside the lib/utils folder.
Define a class called Validator containing functions for validating each of the TextFormField(s):
class Validator {
  static String? amount(String? input) {
    if (input == null || input.isEmpty) {
      return 'Please enter an amount';
    }

    final value = double.tryParse(input) ?? 0.0;
    if (value <= 0.0) {
      return 'Enter an amount greater than 0';
    }

    return null;
  }

  // ...
}
The above code shows the validator for the amount field. Similarly, you can define the validators for the other fields as well.
Finally, for the validation to work, you need to wrap all the fields inside a Form widget and pass a GlobalKey to it.
Define a global key:
class _HomePageState extends State<HomePage> {
  final _formKey = GlobalKey<FormState>();

  //...
}
Wrap the ListView containing the InputField widgets with a Form:
  @override
  Widget build(BuildContext context) {
    return GestureDetector(
      onTap: () => FocusScope.of(context).unfocus(),
      child: Scaffold(
        backgroundColor: Colors.white,
        appBar: AppBar(...),
        body: Stack(
          children: [
            Padding(
              padding: const EdgeInsets.symmetric(horizontal: 16.0),
              child: Form(
                key: _formKey,
                child: ListView(
                  physics: const BouncingScrollPhysics(),
                  children: [
                    const SizedBox(height: 8),
                    InputField(...)
Currency selector

We will be using ChoiceChip widgets for showing each of the selectable currencies, and they will be placed inside a Wrap widget to let them wrap to the following line when there's not much horizontal space to fit all the ChoiceChips.
Define a variable called _choiceChipValue for storing the currently selected currency:
int _choiceChipValue = 7; // INR initiallyDisplay the currency ChoiceChip(s):
Wrap(
  runSpacing: 8,
  children: List.generate(
    currencies.length,
    (index) => Padding(
      padding: const EdgeInsets.only(right: 5.0),
      child: ChoiceChip(
        label: Text(currencies.keys.toList()[index]),
        selected: _choiceChipValue == index,
        backgroundColor:
            Palette.blueMedium.withOpacity(0.4),
        selectedColor: Palette.blueMedium,
        padding: const EdgeInsets.symmetric(
          horizontal: 5,
          vertical: 8,
        ),
        labelStyle: const TextStyle(
          color: Colors.white,
          fontSize: 18,
          fontWeight: FontWeight.w500,
          letterSpacing: 0.6,
        ),
        onSelected: (value) {
          if (value) {
            setState(() => _choiceChipValue = index);
          }
        },
      ),
    ),
  ),
)
When any of the ChoiceChip is selected, the new index is stored in the _choiceChipValue variable.
Checkout button
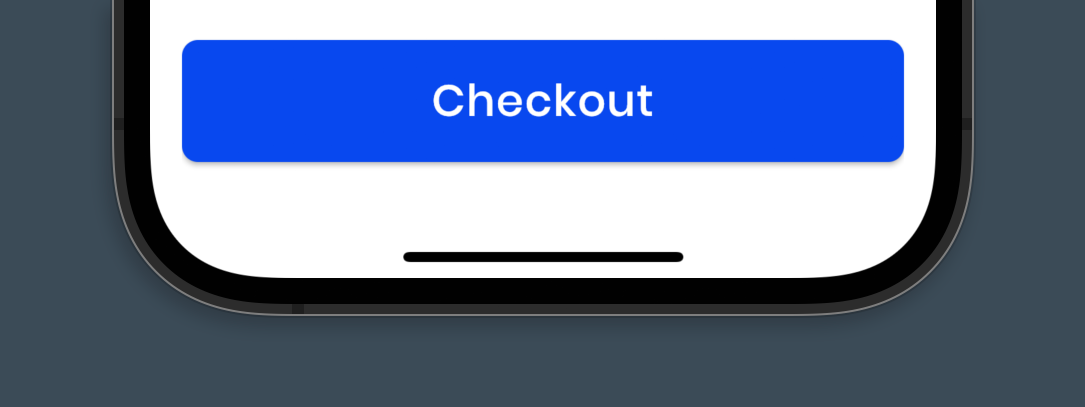
We will use a simple ElevatedButton widget as the checkout button:
ElevatedButton(
  style: ElevatedButton.styleFrom(
    backgroundColor: Palette.blueMedium,
    disabledBackgroundColor:
        Palette.blueMedium.withOpacity(0.4),
    shape: RoundedRectangleBorder(
      borderRadius: BorderRadius.circular(8),
    ),
  ),
  onPressed: () {
  	// TODO: Start the checkout process
  },
  child: const Padding(
    padding: EdgeInsets.all(14.0),
    child: Text(
      'Checkout',
      style: TextStyle(
        color: Colors.white,
        fontSize: 22,
        fontWeight: FontWeight.w500,
        letterSpacing: 0.6,
      ),
    ),
  ),
)
In the above code, inside the onPressed method, we need to validate all the fields and then start the checkout process. We'll implement this in the next section.
Showing errors
Add the following to the onPressed callback of the "Checkout" button:
ElevatedButton(
// ...
onPressed: () {
if (_formKey.currentState!.validate()) {
// TODO: Start the checkout process
} else {
_showErrorBar(timeoutSeconds: 4);
}
},
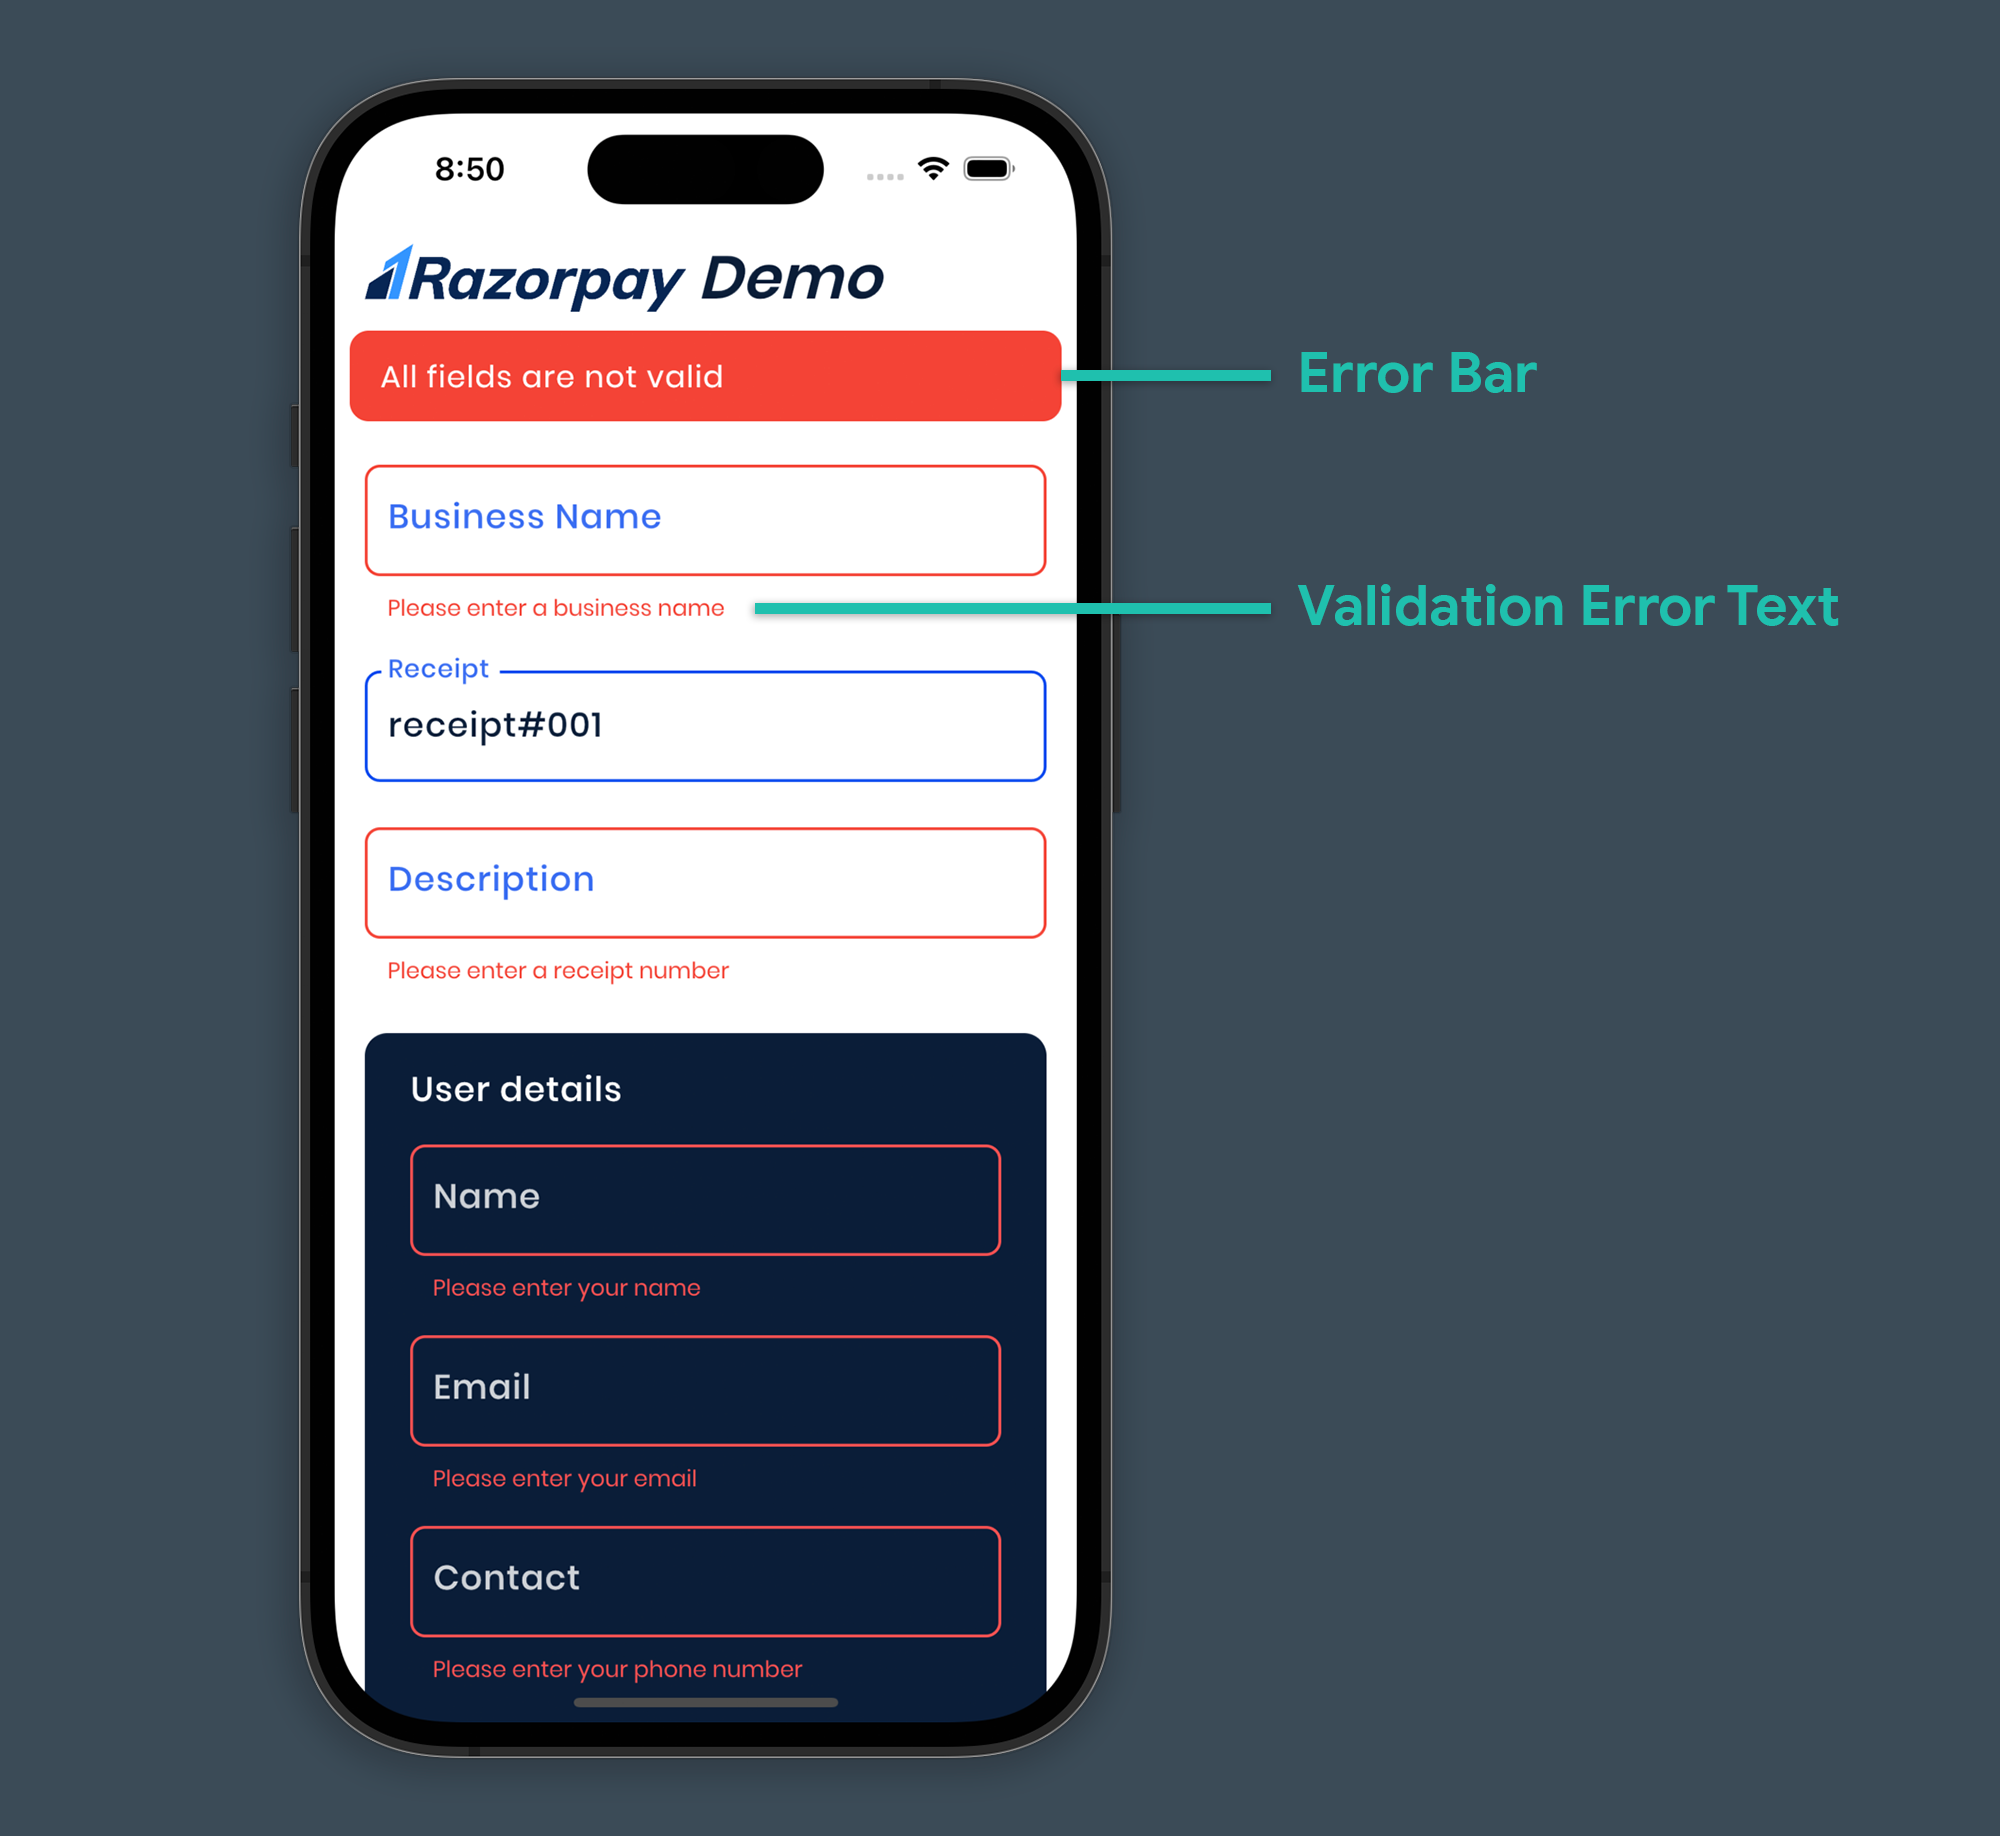
)In the above code, we have used the validate() method on the Form using the _formKey to validate all the fields. If the validation is successful (no errors), we'll proceed with the checkout. Otherwise, this will automatically show the error messages below each of the TextFormField(s) as per the validation methods we defined earlier. And, we'll also show a floating error message on top of the screen using the _showErrorBar method.
The method can be implemented like this:
import 'dart:async';

class _HomePageState extends State<HomePage> {
  // Boolean to store the current visibility state of the error bar
  bool _isErrorBarVisible = false;
  Timer? _timer;

  // ...

  void _showErrorBar({required int timeoutSeconds}) {
    setState(() => _isErrorBarVisible = true);
    var start = timeoutSeconds;
    const oneSec = Duration(seconds: 1);
    _timer = Timer.periodic(
      oneSec,
      (Timer timer) {
        if (start == 0) {
          timer.cancel();
          setState(() => _isErrorBarVisible = false);
        } else {
          start--;
        }
      },
    );
  }

  // ...
}
Create a new file called error_bar.dart inside lib/widgets directory and add the following code for the ErrorBar widget:
import 'package:flutter/material.dart';

class ErrorBar extends StatelessWidget {
  const ErrorBar({
    Key? key,
    required bool isErrorBarVisible,
  })  : _isErrorBarVisible = isErrorBarVisible,
        super(key: key);

  final bool _isErrorBarVisible;

  @override
  Widget build(BuildContext context) {
    return AnimatedOpacity(
      opacity: _isErrorBarVisible ? 1 : 0,
      duration: const Duration(milliseconds: 300),
      child: Padding(
        padding: const EdgeInsets.symmetric(horizontal: 8.0),
        child: Container(
          width: double.maxFinite,
          decoration: BoxDecoration(
            color: Colors.red,
            borderRadius: BorderRadius.circular(10),
          ),
          child: const Padding(
            padding: EdgeInsets.symmetric(
              horizontal: 16.0,
              vertical: 12.0,
            ),
            child: Text(
              'All fields are not valid',
              style: TextStyle(
                color: Colors.white,
                fontSize: 16,
                fontWeight: FontWeight.w400,
                letterSpacing: 0.6,
              ),
            ),
          ),
        ),
      ),
    );
  }
}
Now, we'll use this widget inside the HomePage:
import 'package:razorpay_demo/widgets/error_bar.dart';

class _HomePageState extends State<HomePage> {
  // ...
  @override
  Widget build(BuildContext context) {
    return GestureDetector(
      onTap: () => FocusScope.of(context).unfocus(),
      child: Scaffold(
        // ...
        body: Stack(
          children: [
            // ...
            // Widget showing the error bar
            ErrorBar(isErrorBarVisible: _isErrorBarVisible),
          ],
        ),
      ),
    );
  }
}
Integrate Razorpay
Now that we have the basic UI of the app done, it's time to start integrating Razorpay. First, you need to add the following dependencies to your Flutter project:
- razorpay_flutter: Flutter package for Razorpay SDK.
- cloud_functions: For using Firebase Cloud Functions inside Flutter.
Add these two dependencies by running the following command:
flutter pub add razorpay_flutter cloud_functionsThis will add these two packages to the pubspec.yaml file of your Flutter project.
We need to complete two more steps before we start the actual Razorpay integration:
- Creating the required model classes, and
- Defining a new widget called
ProgressBottomSheetthat we'll show as a bottom sheet while processing the payment.
Model classes
The model classes will help us easily store and access the order details, Razorpay responses, etc.
Create a new folder inside the lib directory called models. We will be storing all the model class files inside this folder.
OrderDetails
Class for storing all the order details we have taken as inputs from the user.
- Define a new file called
order_details.dart. - Add the code for this class from here.
RazorpayOptions
Class for storing the options that can be passed while doing a Razorpay checkout.
- Define a new file called
razorpay_options.dart. - Add the code for this class from here.
RazorpayResponse
Class for storing the Razorpay response object after a checkout process is complete.
- Define a new file called
razorpay_response.dart. - Add the code for this class from here.
ProcessingOrder
Class for storing the details received from the createOrder function call.
- Define a new file called
processing_order.dart. - Add the code for this class from here.
Progress Bottom Sheet widget
Create a new file called progress_bottom_sheet.dart inside the lib/widgets directory. First, define an enum inside this file called PaymentStatus which will store the different possible payment statuses.
enum PaymentStatus {
  idle,
  processing,
  success,
  failed,
}
Add the ProgressBottomSheet class as follows:
import 'package:flutter/material.dart';
import 'package:razorpay_demo/models/order_details.dart';
import 'package:razorpay_demo/res/palette.dart';
// ...
class ProgressBottomSheet extends StatefulWidget {
const ProgressBottomSheet({
Key? key,
required this.orderDetails,
required this.onPaymentStateChange,
}) : super(key: key);
final OrderDetails orderDetails;
final Function(PaymentStatus) onPaymentStateChange;
@override
State<ProgressBottomSheet> createState() => _ProgressBottomSheetState();
}
class _ProgressBottomSheetState extends State<ProgressBottomSheet> {
late final OrderDetails _orderDetails;
late PaymentStatus _paymentStatus;
@override
void initState() {
_orderDetails = widget.orderDetails;
super.initState();
}
Widget circularProgressIndicator() => const SizedBox(
height: 26,
width: 26,
child: CircularProgressIndicator(
valueColor: AlwaysStoppedAnimation<Color>(
Colors.white,
),
strokeWidth: 3,
),
);
@override
Widget build(BuildContext context) {
final Color backgroundColor;
final String text;
final Widget trailingWidget;
// Set the variable values based on the payment status
switch (_paymentStatus) {
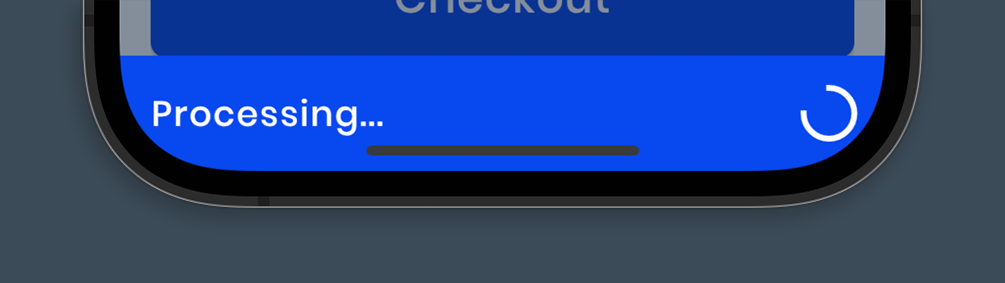
case PaymentStatus.processing:
backgroundColor = Palette.blueMedium;
text = 'Processing...';
trailingWidget = circularProgressIndicator();
break;
case PaymentStatus.success:
backgroundColor = Colors.green;
text = 'Payment successful';
trailingWidget = CircleAvatar(
backgroundColor: Colors.green.shade900,
child: const Icon(
Icons.check,
color: Colors.white,
size: 26,
),
);
break;
case PaymentStatus.failed:
backgroundColor = Colors.red;
text = 'Payment Failed';
trailingWidget = CircleAvatar(
backgroundColor: Colors.red.shade800,
child: const Icon(
Icons.close,
color: Colors.white,
size: 26,
),
);
break;
default:
backgroundColor = Palette.blueMedium;
text = 'Processing...';
trailingWidget = circularProgressIndicator();
break;
}
// UI for the bottom sheet
return Container(
width: double.maxFinite,
color: backgroundColor,
child: Column(
mainAxisSize: MainAxisSize.min,
crossAxisAlignment: CrossAxisAlignment.start,
children: [
if (_paymentStatus == PaymentStatus.processing)
LinearProgressIndicator(
backgroundColor: backgroundColor,
color: Palette.blueDark.withOpacity(0.5),
minHeight: 5,
),
Padding(
padding: const EdgeInsets.symmetric(
horizontal: 16.0,
vertical: 16.0,
),
child: Row(
mainAxisAlignment: MainAxisAlignment.spaceBetween,
children: [
Text(
text,
style: const TextStyle(
color: Colors.white,
fontSize: 18,
fontWeight: FontWeight.w500,
letterSpacing: 0.8,
),
),
trailingWidget,
],
),
),
],
),
);
}
}In the above code, there are two main parameters that we have defined inside the ProgressBottomSheet widget:
orderDetails: For passing theOrderDetailsobject required for processing the checkout.onPaymentStateChange: Callback for returning the currentPaymentStatus.
Razorpay initialization
Define two variables inside the _ProgressBottomSheetState class, one for storing the Razorpay object and the other for storing FirebaseFunctions object:
import 'package:razorpay_flutter/razorpay_flutter.dart';
import 'package:cloud_functions/cloud_functions.dart';

class _ProgressBottomSheetState extends State<ProgressBottomSheet> {
  late final Razorpay _razorpay;
  late final FirebaseFunctions _functions;
Define a method for initializing Razorpay:
_initializeRazorpay() {
  _paymentStatus = PaymentStatus.idle;
  _razorpay = Razorpay();
  // Razorpay event listeners
  _razorpay.on(Razorpay.EVENT_PAYMENT_SUCCESS, _handlePaymentSuccess);
  _razorpay.on(Razorpay.EVENT_PAYMENT_ERROR, _handlePaymentError);
  _razorpay.on(Razorpay.EVENT_EXTERNAL_WALLET, _handleExternalWallet);
}

Future<void> _handlePaymentSuccess(PaymentSuccessResponse response) async {}

void _handlePaymentError(PaymentFailureResponse response) {}

void _handleExternalWallet(ExternalWalletResponse response) {}
Here, we have initialized Razorpay, set the payment status to idle initially, and registered the event listeners that will help us to handle different cases of the checkout process:
_handlePaymentSuccesswill be triggered if checkout is successful._handlePaymentErrorwill be triggered in case of any error during the checkout process._handleExternalWalletwill be triggered when an external wallet (FreeCharge, MobiKwik, ...) is used to complete the transaction.
Inside initState() initialize the variables and call the _initializeRazorpay() method:
class _ProgressBottomSheetState extends State<ProgressBottomSheet> {
  // ...

  @override
  void initState() {
    _orderDetails = widget.orderDetails;
    _functions = FirebaseFunctions.instance;
    _initializeRazorpay();
    super.initState();
  }
Close all the Razorpay event listeners inside the dispose() method:
@override
  void dispose() {
    _razorpay.clear();
    super.dispose();
  }
Checkout method
Create a method called _checkoutOrder() inside the _ProgressBottomSheetState class.
import 'dart:developer';

import 'package:razorpay_demo/secrets.dart';
import 'package:razorpay_demo/models/processing_order.dart';
import 'package:razorpay_demo/models/razorpay_options.dart';

class _ProgressBottomSheetState extends State<ProgressBottomSheet> {
  ProcessingOrder? _processingOrderDetails;
  // ...

  Future<void> _checkoutOrder({
    required int amount, // Enter the amount in the smallest currency
    required String currency, // Eg: INR
    required String receipt, // Eg: receipt#001
    required String businessName, // Eg: Acme Corp.
    required Prefill prefill,
    String description = '',
    int timeout = 60, // in seconds
  }) async {
    setState(() => _processingOrderDetails = null);
    // Step 1: Create the order
    try {
      final result = await _functions.httpsCallable('createOrder').call(
        <String, dynamic>{
          'amount': amount,
          'currency': currency,
          'receipt': receipt,
          'description': description,
        },
      );
      final responseData = result.data as Map<String, dynamic>;
      final orderDetails = ProcessingOrder.fromMap(responseData);
      log('ORDER ID: ${orderDetails.id}');
      setState(() => _processingOrderDetails = orderDetails);
    } on FirebaseFunctionsException catch (error) {
      log('ERROR: ${error.code} (${error.details}): ${error.message}');
    }

    if (_processingOrderDetails != null) {
      // Step 2: Define the RazorpayOptions
      final options = RazorpayOptions(
        key: RazorpaySecret.keyId,
        amount: amount,
        businessName: businessName,
        orderId: _processingOrderDetails!.id!,
        description: description,
        timeout: timeout,
        prefill: prefill,
        retry: Retry(enabled: false),
      ).toMap();

      // Step 3: Start the checkout (by opening dialog)
      _razorpay.open(options);
    }
  }
We have passed the required parameters to the _checkoutOrder() method. There are three steps that are performed inside this method:
- Create an order using the
createOrderCloud Function and store the response as aProcessingOrderobject. If the object is not null proceed to the next steps. - Define Razorpay options to customize the checkout process. You also need to pass the Razorpay Key ID here.
- Start checkout by calling the
open()method on the Razorpay object and passing the options.
For storing the Razorpay Key ID, you can create a new file inside the lib directory called secrets.dart, and store it like this:
class RazorpaySecret {
  static const keyId = '<KEY_ID_HERE>';
}
We will call the _checkoutOrder method right after initializing Razorpay:
@override
void initState() {
  // ...
  _initializeRazorpay();
  _checkoutOrder(
    amount: _orderDetails.amount,
    currency: _orderDetails.currency,
    businessName: _orderDetails.businessName,
    receipt: _orderDetails.receipt,
    description: _orderDetails.description,
    prefill: _orderDetails.prefill,
  );
  super.initState();
}
Handle successful checkout
Once the checkout process is successful, we first need to ascertain whether the signature is correct. Define a method called _verifySignature():
Future<bool> _verifySignature({
  required String orderId,
  required String paymentId,
  required String signature,
}) async {
  try {
    final result = await _functions.httpsCallable('verifySignature').call(
      <String, dynamic>{
        'orderId': orderId,
        'paymentId': paymentId,
        'signature': signature,
      },
    );
    return result.data;
  } on FirebaseFunctionsException catch (error) {
    log('ERROR: ${error.code} (${error.details}): ${error.message}');
  }
  return false;
}
We have used the verifySignature Cloud Function for the signature verification.
Inside the _handlePaymentSuccess method, call the _verifySignature method and then set the payment status based on that:
Future<void> _handlePaymentSuccess(PaymentSuccessResponse response) async {
  // When payment succeeds
  log('Payment successful');
  log(
    'RESPONSE: ${response.orderId}, ${response.paymentId}, ${response.signature}',
  );
  bool isValid = await _verifySignature(
      orderId: _processingOrderDetails?.id ?? '',
      paymentId: response.paymentId ?? '',
      signature: response.signature ?? '');
  if (isValid) {
    setState(() => _paymentStatus = PaymentStatus.success);
  } else {
    setState(() => _paymentStatus = PaymentStatus.failed);
  }
  widget.onPaymentStateChange(_paymentStatus);
  Future.delayed(
    const Duration(seconds: 2),
    () => Navigator.of(context).pop(),
  );
}
We can use the onPaymentStateChange callback to update the payment status. And the bottom sheet is closed once the status is updated.
Handle checkout error
In case of a failed checkout attempt, we'll update the PaymentStatus to failed and close the bottom sheet.
void _handlePaymentError(PaymentFailureResponse response) {
  // When payment fails
  log('Payment error');
  log('RESPONSE (${response.code}): ${response.message}, ${response.error}');
  setState(() {
    _processingOrderDetails = null;
    _paymentStatus = PaymentStatus.failed;
  });
  widget.onPaymentStateChange(_paymentStatus);
  Future.delayed(
    const Duration(seconds: 2),
    () => Navigator.of(context).pop(),
  );
}
Handle external wallet usage
You can define any additional action you want to perform when using an external wallet. But for this demo, we will just add a log statement inside the _handleExternalWallet method:
void _handleExternalWallet(ExternalWalletResponse response) {
  // When an external wallet was selected
  log('Payment external wallet');
  log('RESPONSE: ${response.walletName}');
}
Start checkout
Now, go back to the HomePage class. Create a method called _onTapCheckout() inside the _HomePageState class:
import 'package:razorpay_demo/models/order_details.dart';
import 'package:razorpay_demo/models/razorpay_options.dart';
import 'package:razorpay_demo/widgets/progress_bottom_sheet.dart';

class _HomePageState extends State<HomePage> {
  late PaymentStatus _paymentStatus;

  // ...

  Future<void> _onTapCheckout() async {
    setState(() => _paymentStatus = PaymentStatus.processing);
    await showModalBottomSheet(
      context: context,
      barrierColor: Palette.blueDark.withOpacity(0.5),
      isDismissible: false,
      builder: (context) {
        final order = OrderDetails(
          amount: (double.parse(_amountController.text) * 100).toInt(),
          currency: currencies.keys.toList()[_choiceChipValue],
          businessName: _businessNameController.text,
          receipt: _receiptController.text,
          description: _descriptionController.text,
          prefill: Prefill(
            userName: _userNameController.text,
            userEmail: _userEmailController.text,
            userContact: _userContactController.text,
          ),
        );
        return ProgressBottomSheet(
          orderDetails: order,
          onPaymentStateChange: (status) =>
              setState(() => _paymentStatus = status),
        );
      },
    );
    setState(() => _paymentStatus = PaymentStatus.idle);
  }
Here, we have opened the ProgressBottomSheet using the showModalBottomSheet() method. And once the bottom sheet is closed, the PaymentStatus is again set to idle.
Inside the "Checkout" button, in case all the fields are valid, call the _onTapCheckout method:
ElevatedButton(
  // ...
  onPressed: () {
    if (_formKey.currentState!.validate()) {
      _onTapCheckout();
    } else {
      _showErrorBar(timeoutSeconds: 4);
    }
  },
),
Add web platform support
As discussed earlier, the razorpay_flutter package only supports Android and iOS platforms. Today, we're going to implement Razorpay for the web platform as well!
There are certain challenges that we need to overcome in order to achieve this, we will go step by step through the entire process. Hang on tight and follow the steps!
JavaScript code
From the root directory to your project, go to the web folder and open the index.html file. Add the Razorpay web library towards the end of the <body> tag like this:
<body>
  // ...
  <script src="https://checkout.razorpay.com/v1/checkout.js"></script>
</body>
Add a new folder called src inside web directory and create a file named payment.js inside it.
Inside this file, we'll create a checkout() method to handle the checkout process on web:
function checkout(optionsStr) {
    var options = JSON.parse(optionsStr);
    var isProcessing = true;
    options["modal"] = {
        "escape": false,
        // Handle if the dialog is dismissed
        "ondismiss": function () {
            // The callback should only be triggered if the dialog
            // is dismissed manually
            if (isProcessing) {
                let responseStr = JSON.stringify({
                    'isSuccessful': false,
                    'errorCode': 'MODAL_DISMISSED',
                    'errorDescription': 'Razorpay payment modal dismissed'
                });
                handleWebCheckoutResponse(responseStr);
            }
        }
    };
    // Handling successful transaction
    options.handler = function (response) {
        let responseStr = JSON.stringify({
            'isSuccessful': true,
            'orderId': response.razorpay_order_id,
            'paymentId': response.razorpay_payment_id,
            'signature': response.razorpay_signature
        });
        isProcessing = false;
        handleWebCheckoutResponse(responseStr);
    }
    // Initialize Razorpay
    let razorpay = new Razorpay(options);
    // Handling failed transaction
    razorpay.on('payment.failed', function (response) {
        let responseStr = JSON.stringify({
            'isSuccessful': false,
            'errorCode': response.error.code,
            'errorDescription': response.error.description,
        });
        isProcessing = false;
        handleWebCheckoutResponse(responseStr);
    });
    // Start checkout process
    razorpay.open();
}
Here, the handleWebCheckoutResponse() is a function that we are going to implement in Dart as a JS interop (that lets JS directly call a Dart function). The rest of the code is quite similar to the Dart implementation, the above comments inside the code should be enough to understand what's going on.
Import this script in index.html file:
<body>
  // ...
  <script src="https://checkout.razorpay.com/v1/checkout.js"></script>
  <script src="src/payment.js"></script>
</body>
Dart code: JS interop
Add a new Dart package, js, by running the following command:
flutter pub add jsNow comes the tricky part, any file importing this package and using JS interop can't be compiled for Android or iOS platforms (only web compilation is possible). So, we need to import that file only when compiled for web.
Luckily there's a way to achieve that in Dart!
Create a new folder inside the lib/utils directory called razorpay_client. First, create an abstract class called RazorpayCheckoutBase inside a new file razorpay_checkout.dart:
abstract class RazorpayCheckoutBase {
  void checkout(
    Map<String, dynamic> options,
    Function(String) webCheckoutResponse,
  );
}
Next, create a new file called razorpay_checkout_stub.dart and define RazorpayCheckout class that extends the abstract class:
import 'package:razorpay_demo/utils/razorpay_client/razorpay_checkout.dart';

class RazorpayCheckout extends RazorpayCheckoutBase {
  @override
  void checkout(
    Map<String, dynamic> options,
    Function(String) webCheckoutResponse,
  ) {
    throw Exception("Stub implementation");
  }
}
This is the file that would be imported while it's being compiled for Android or iOS because we won't be using this checkout method anyways for the mobile platforms.
Finally, define another file called razorpay_checkout_web.dart. In this file, first import the js package and define two JS function signatures:
import 'package:js/js.dart';

@JS('handleWebCheckoutResponse')
external set handleWebCheckoutResponse(Function(String data) f);

@JS('checkout')
external checkoutWeb(String optionsStr);
In the above code:
handleWebCheckoutResponseis the method that we are calling from the JS side, andcheckoutis the JS method that we are calling from the Dart side.
Define the RazorpayCheckout class:
import 'dart:convert';

import 'package:razorpay_demo/utils/razorpay_client/razorpay_checkout.dart';

class RazorpayCheckout extends RazorpayCheckoutBase {
  @override
  void checkout(
    Map<String, dynamic> options,
    Function(String) webCheckoutResponse,
  ) async {
    handleWebCheckoutResponse = allowInterop(webCheckoutResponse);
    checkoutWeb(jsonEncode(options));
  }
}
Here the webCheckoutResponse is the function that will be triggered when handleWebCheckoutResponse function is called on the JS side. Using the following line of code, we have initialized the JS interop:
handleWebCheckoutResponse = allowInterop(webCheckoutResponse);Then, we called the checkout JS method by passing the options:
checkoutWeb(jsonEncode(options));Modification to use web checkout
Go to the ProgressBottomSheet class, and create a new method called _webCheckoutResponse():
import 'package:razorpay_demo/models/razorpay_response.dart';

class _ProgressBottomSheetState extends State<ProgressBottomSheet> {
  void _webCheckoutResponse(String data) {
    final checkoutResponse = RazorpayResponse.fromJson(data);
    if (checkoutResponse.isSuccessful) {
      _handlePaymentSuccess(PaymentSuccessResponse(
        checkoutResponse.paymentId,
        checkoutResponse.orderId,
        checkoutResponse.signature,
      ));
    } else {
      _handlePaymentError(PaymentFailureResponse(
        Razorpay.UNKNOWN_ERROR,
        Razorpay.EVENT_PAYMENT_ERROR,
        {
          'errorCode': checkoutResponse.errorCode,
          'errorDescription': checkoutResponse.errorDescription,
        },
      ));
    }
  }
Import the correct RazorpayCheckout class file:
import 'package:razorpay_demo/utils/razorpay_client/razorpay_checkout_stub.dart'
    if (dart.library.html) 'package:razorpay_demo/utils/razorpay_client/razorpay_checkout_web.dart';
If the dart.library.html is present, it means the app is being compiled on web, and only then the razorpay_checkout_web.dart file is imported.
Initialize the RazorpayCheckout:
class _ProgressBottomSheetState extends State<ProgressBottomSheet> {
  late final RazorpayCheckout _razorpayCheckout;

  @override
  void initState() {
    // ...
    _razorpayCheckout = RazorpayCheckout();
    super.initState();
  }
This method will be used to handle the checkout for the web platform. Inside the _checkoutOrder() method, modify the code to use this method:
import 'package:flutter/foundation.dart';

Future<void> _checkoutOrder({
  required int amount,
  required String currency,
  required String receipt,
  required String businessName,
  required Prefill prefill,
  String description = '',
  int timeout = 60,
}) async {
  // ...
  if (_processingOrderDetails != null) {
    // ...
    // Modify the code as follows:
    if (kIsWeb) {
      _razorpayCheckout.checkout(options, _webCheckoutResponse);
    } else {
      _razorpay.open(options);
    }
  }
}
And inside the _initializeRazorpay() method, only initialize the Razorpay events if it's run on Android or iOS:
_initializeRazorpay() {
  _paymentStatus = PaymentStatus.idle;
  _razorpay = Razorpay();
  if (!kIsWeb) {
    _razorpay.on(Razorpay.EVENT_PAYMENT_SUCCESS, _handlePaymentSuccess);
    _razorpay.on(Razorpay.EVENT_PAYMENT_ERROR, _handlePaymentError);
    _razorpay.on(Razorpay.EVENT_EXTERNAL_WALLET, _handleExternalWallet);
  }
}
App in action
The app should be ready to run on the web platform!
But before you run the app on Android and iOS device, there are certain platform-specific configurations you need to complete.
Android Configuration
From the root project directory, go to android/app/build.gradle file and update the minSdkVersion to 19:
android {
    defaultConfig {
        minSdkVersion 19
    }
  }
}
iOS Configuration
From the root project directory, go to ios/Podfile file and uncomment the following line to use the platform version 11.0:
platform :ios, '11.0'As we have used the Razorpay Test API Key, the app would be running in a sandboxed mode which will let you simulate a successful or failed transaction.
You should be able to see your test transactions on the Razorpay Dashboard by going to the Transactions > Payments page.
Conclusion
Woohoo! 🎉 You have successfully integrated an entire checkout flow in your Flutter app using Razorpay. And the app works on mobile as well as web platforms!
Once you are done testing your Razorpay integration and you are ready to go live, follow this checklist:
- Complete KYC (or, the Activation Form) to get access to the Razorpay Live API.
- Log into the Razorpay Dashboard and switch to Live Mode on the menu.
- Navigate to Settings → API Keys → Generate Key to generate the API Key for Live Mode.
- Replace the Test API Key with the Live Key in the Flutter app's checkout and the Firebase Cloud Functions (and re-deploy the functions).
Razorpay + FlutterFlow integration coming soon 🙌
