Introduction
A referral system is a powerful tool for any type of application, as it allows you to track user signups and see who invited new users to join through their referral link. Whether you're building a social network, a loyalty program, or any other type of application, a referral system can help drive growth and engagement.
In this tutorial, we will go over the steps to set up a referral system in your FlutterFlow app, so you can start seeing the benefits of referrals in action.
Let's get started!
Building a Referral System in FlutterFlow
To start, navigate to an account creation page within your FlutterFlow app, as this is where we'll want the referral to take place.
Step 1 - Create a Page Parameter
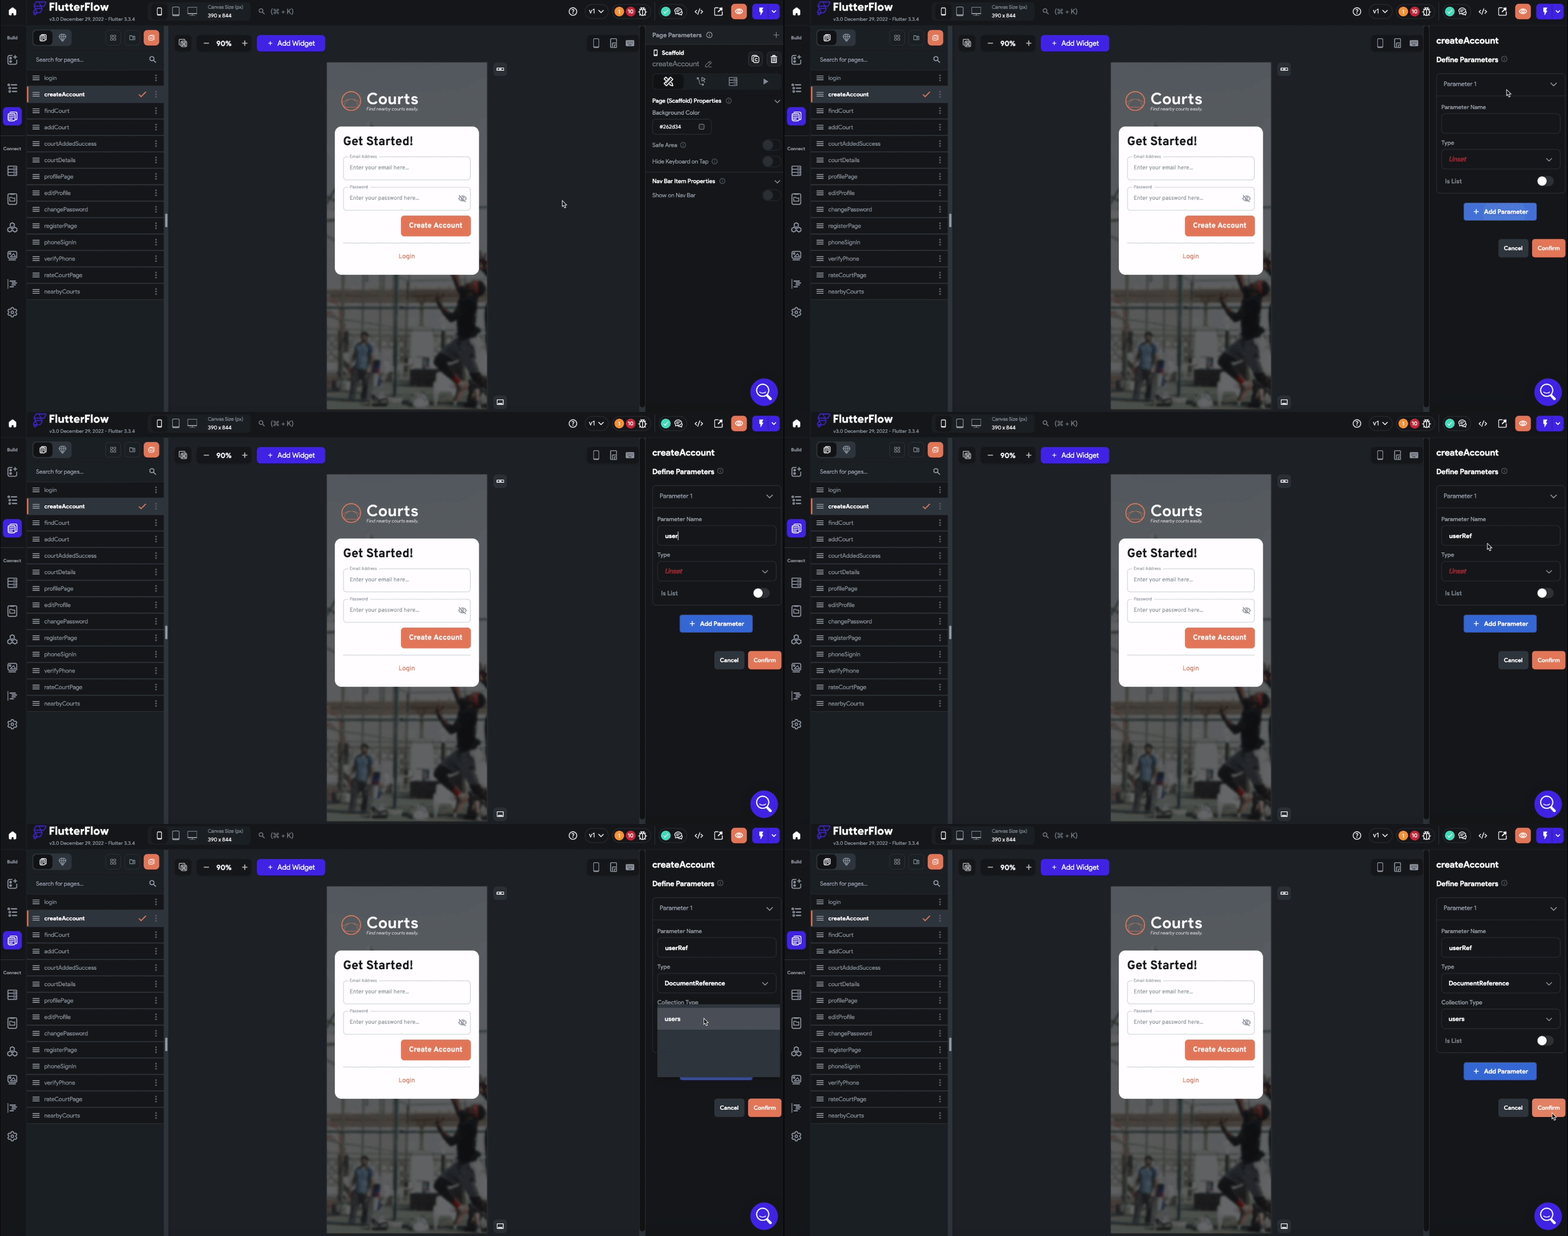
The first step is to add a new Page Parameter. Click on the "+" button on the top right and select "+ Add Parameter." Name the parameter userRef, and set the type to Document Reference with the collection being users. Click "Confirm" to finish this step.
Step 2 - Create a Local State Variable
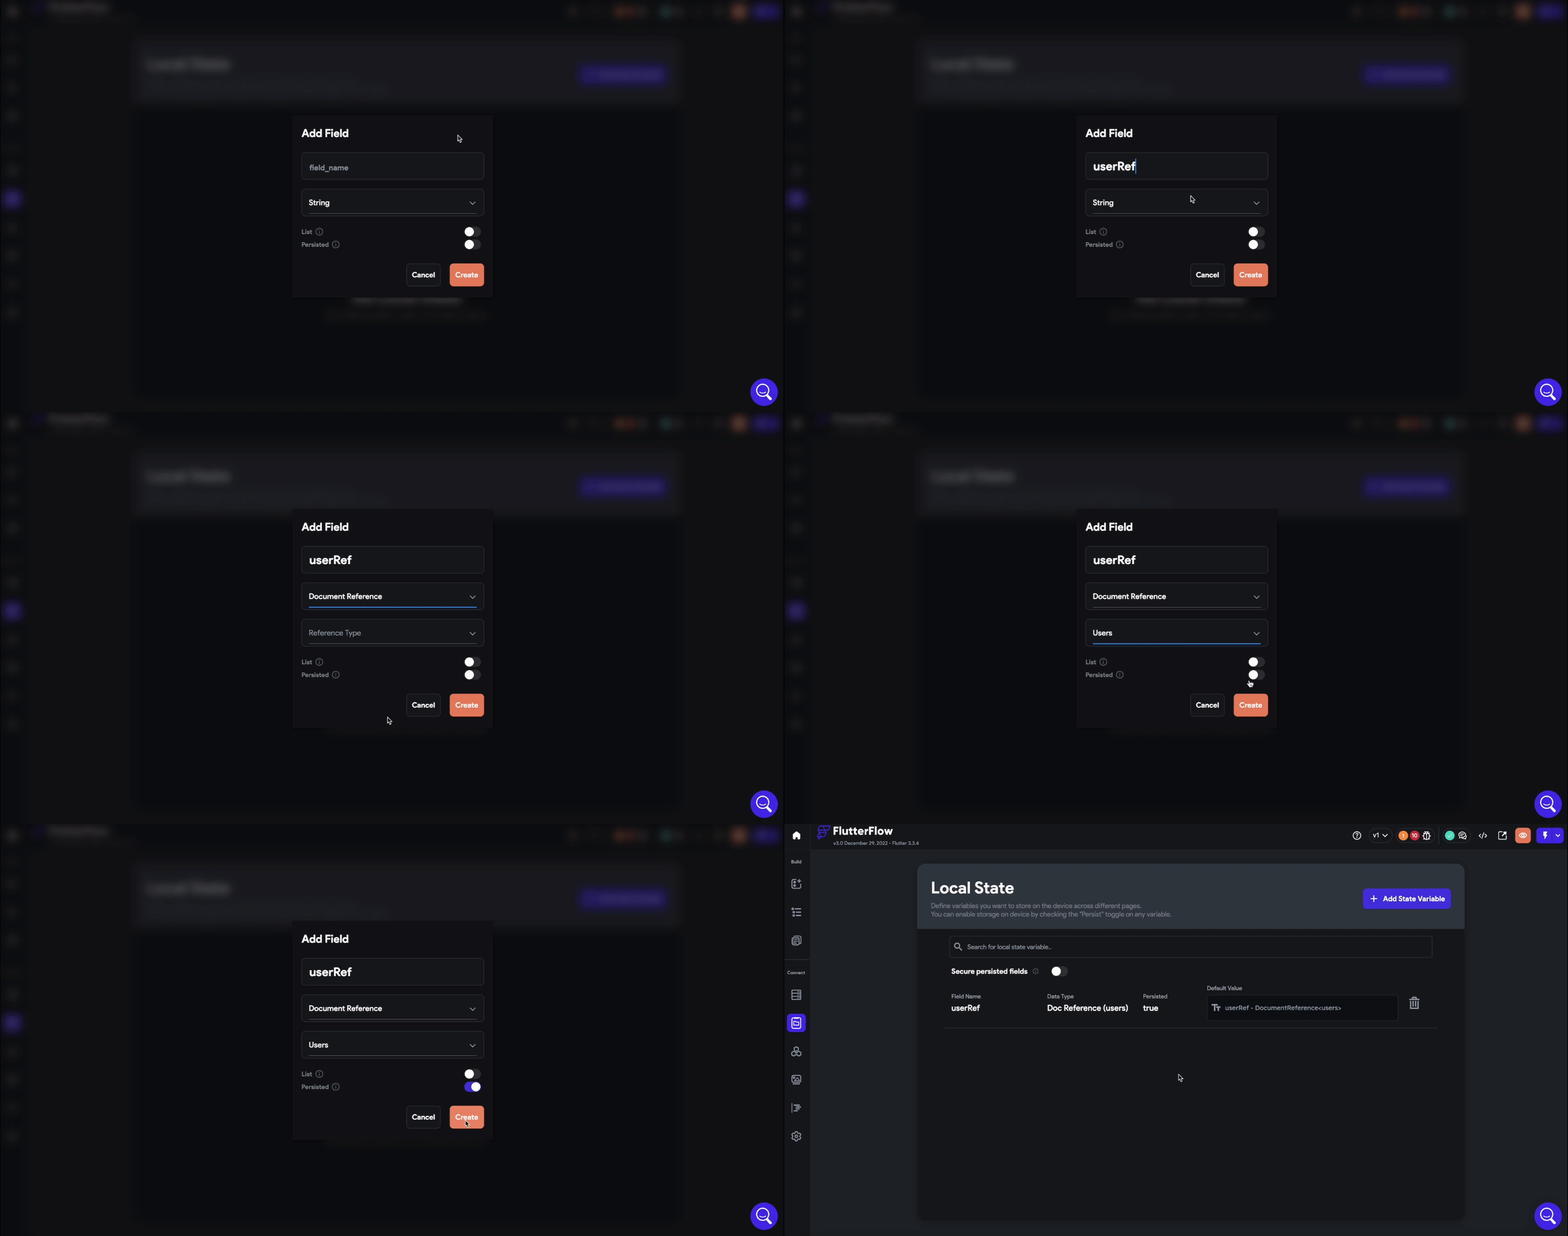
Next, create a Local State variable to store this referral information in case the user navigates away from the account creation page. Name the variable userRef and set it as a Document Reference in the users collection. Make sure to turn on Persisted so that the variable is stored even if the user closes the browser and returns to sign up at a later time. Leave the Default Value blank, as you only want to store a referral if one is provided during a page visit.
Step 3 - Storing User Reference on Page Visit
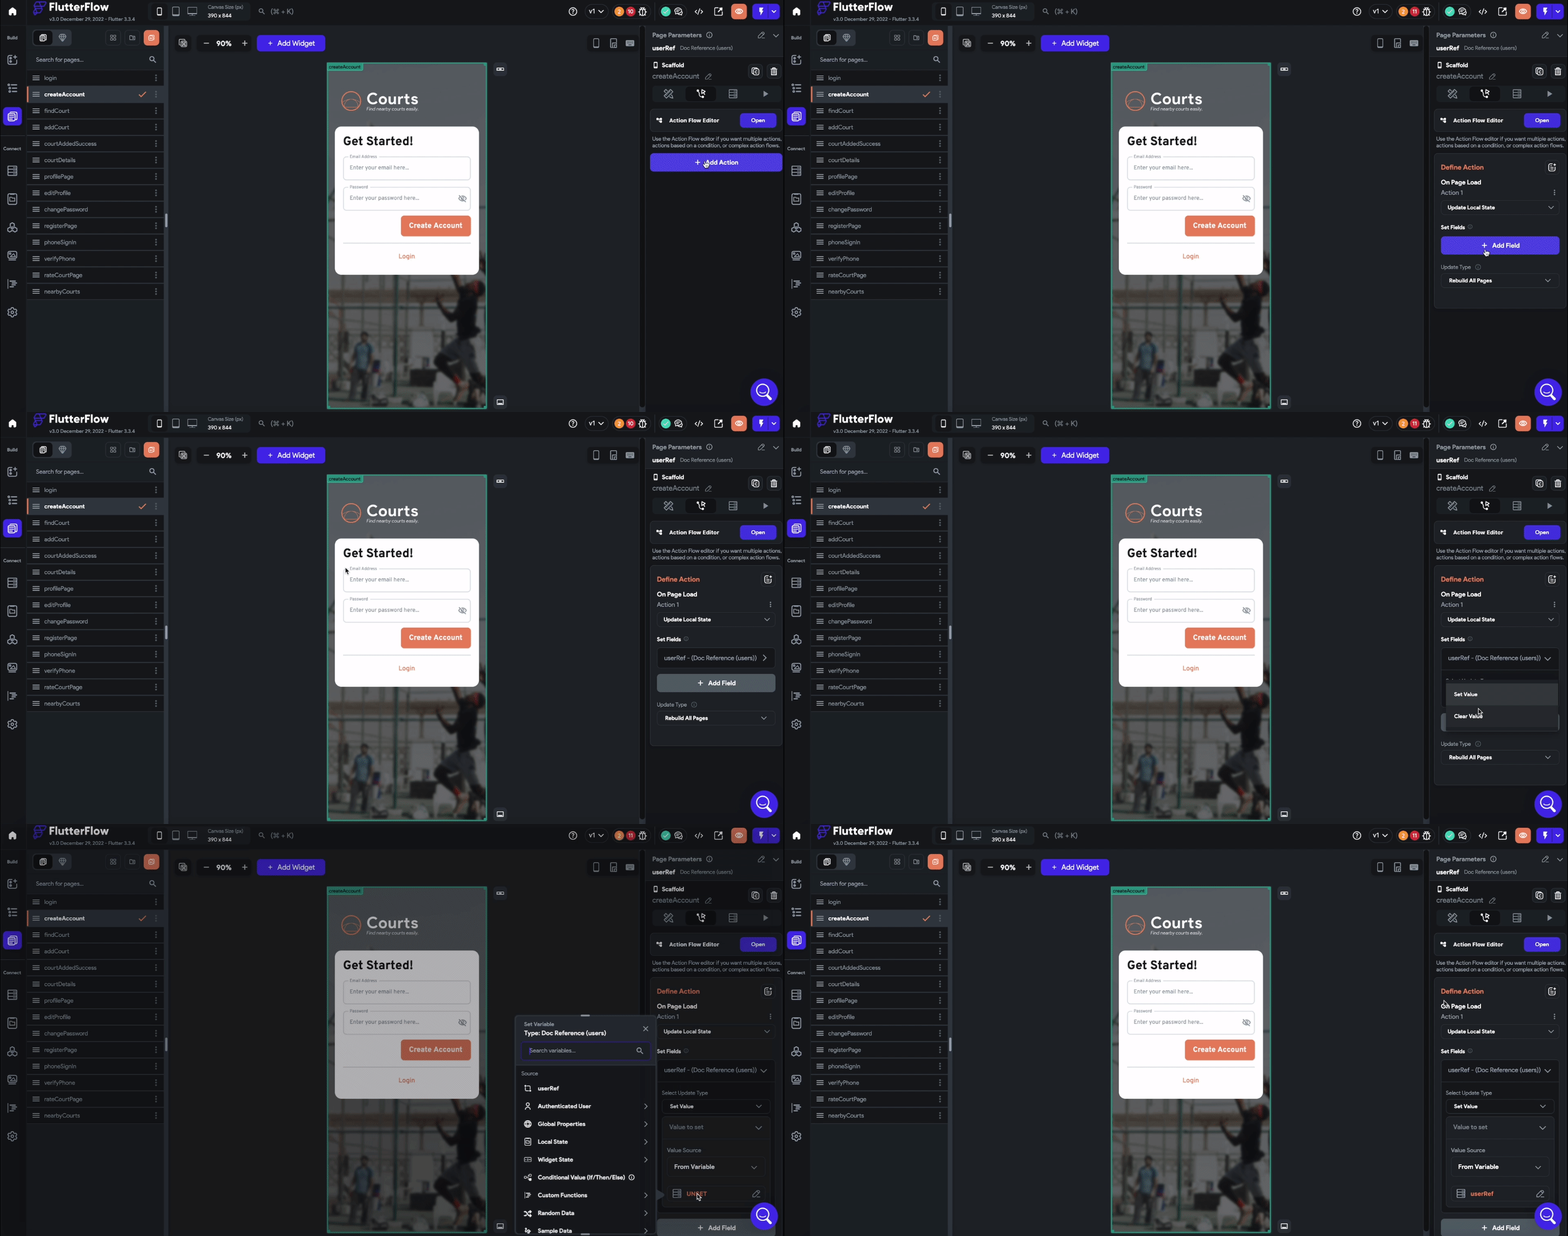
Now, go back to the account creation page and add an Update Local State action. Set the field to the new userRef variable and set the value from the userRef page parameter created in Step 1. This will take the referral information from the link and store it as a Local Variable for use during the signup process or in other areas of the app.
Step 4 - Setting Up Firebase User Documents
Next, head over to the Firebase section of FlutterFlow to create the fields for storing the referral information.
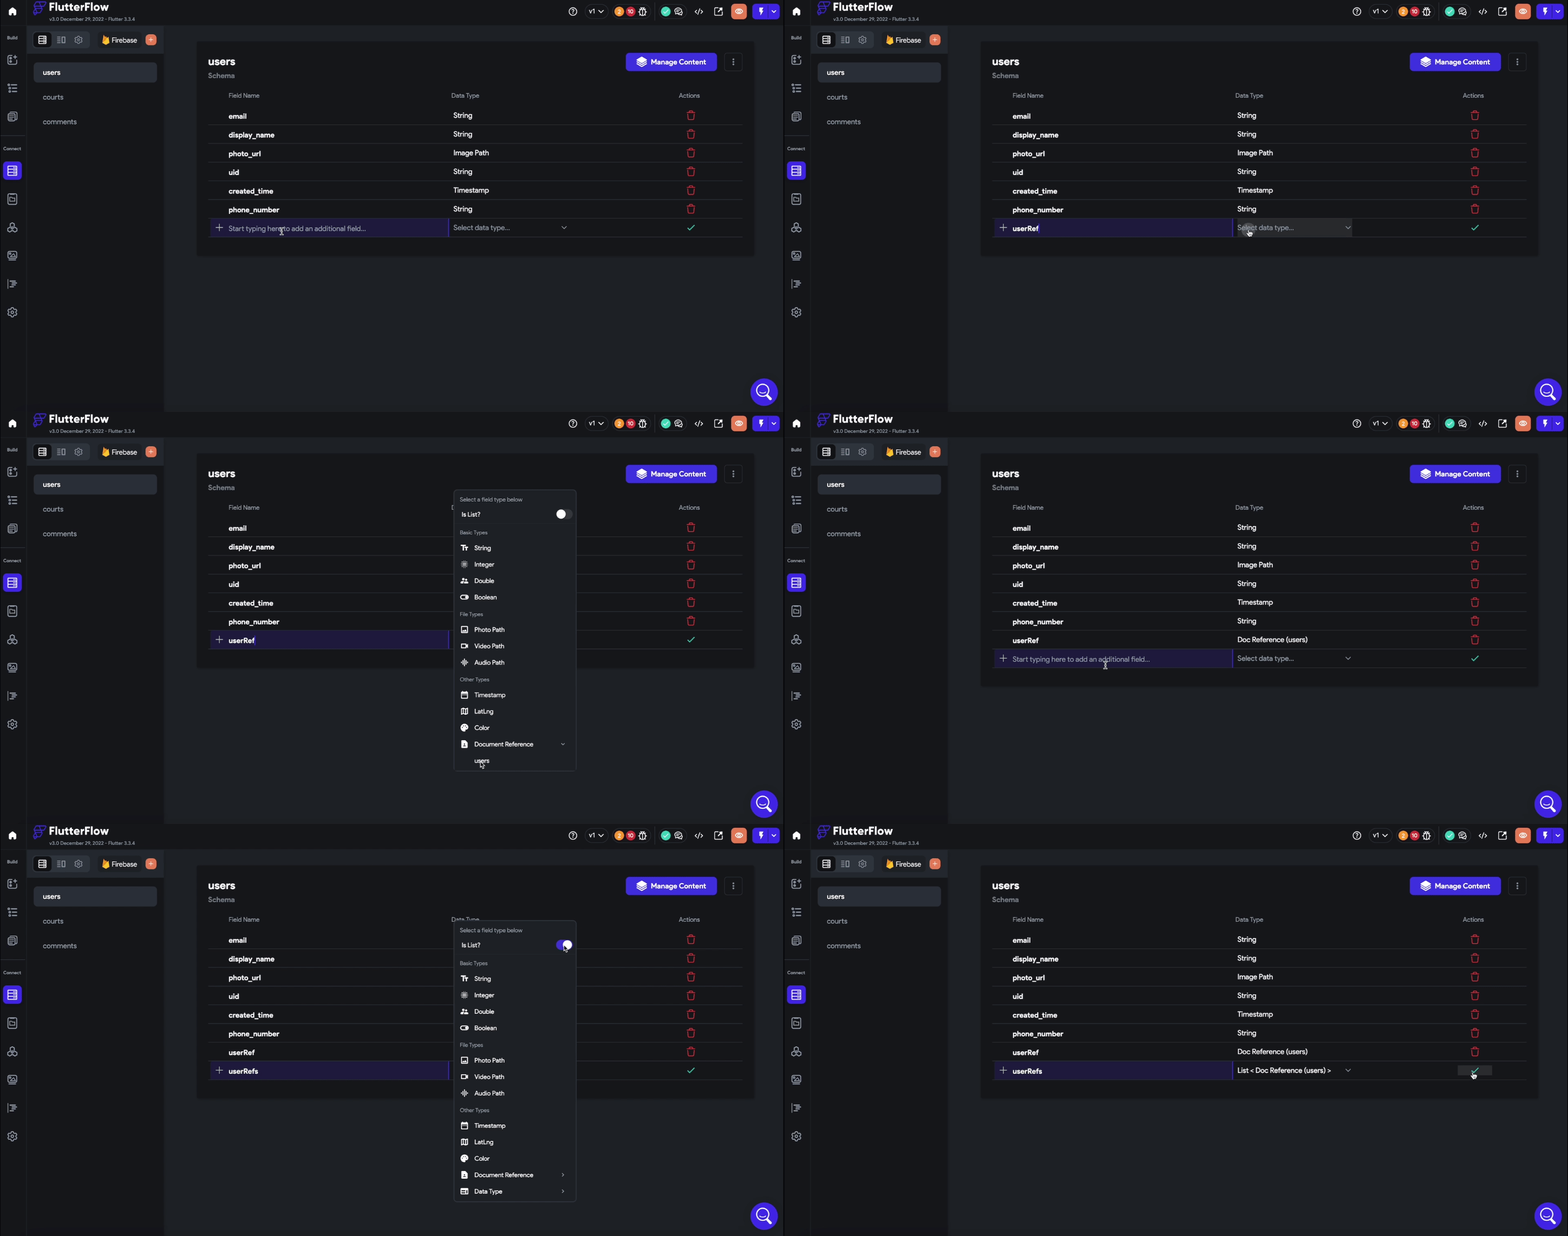
In the users collection, add two new variables:
userRefwhich will be a Document Reference to store the person who referred the user signing up, anduserRefswhich will be a List of Document References of users to store everyone the user has referred.
Step 5 - Confirming User Referral During Action
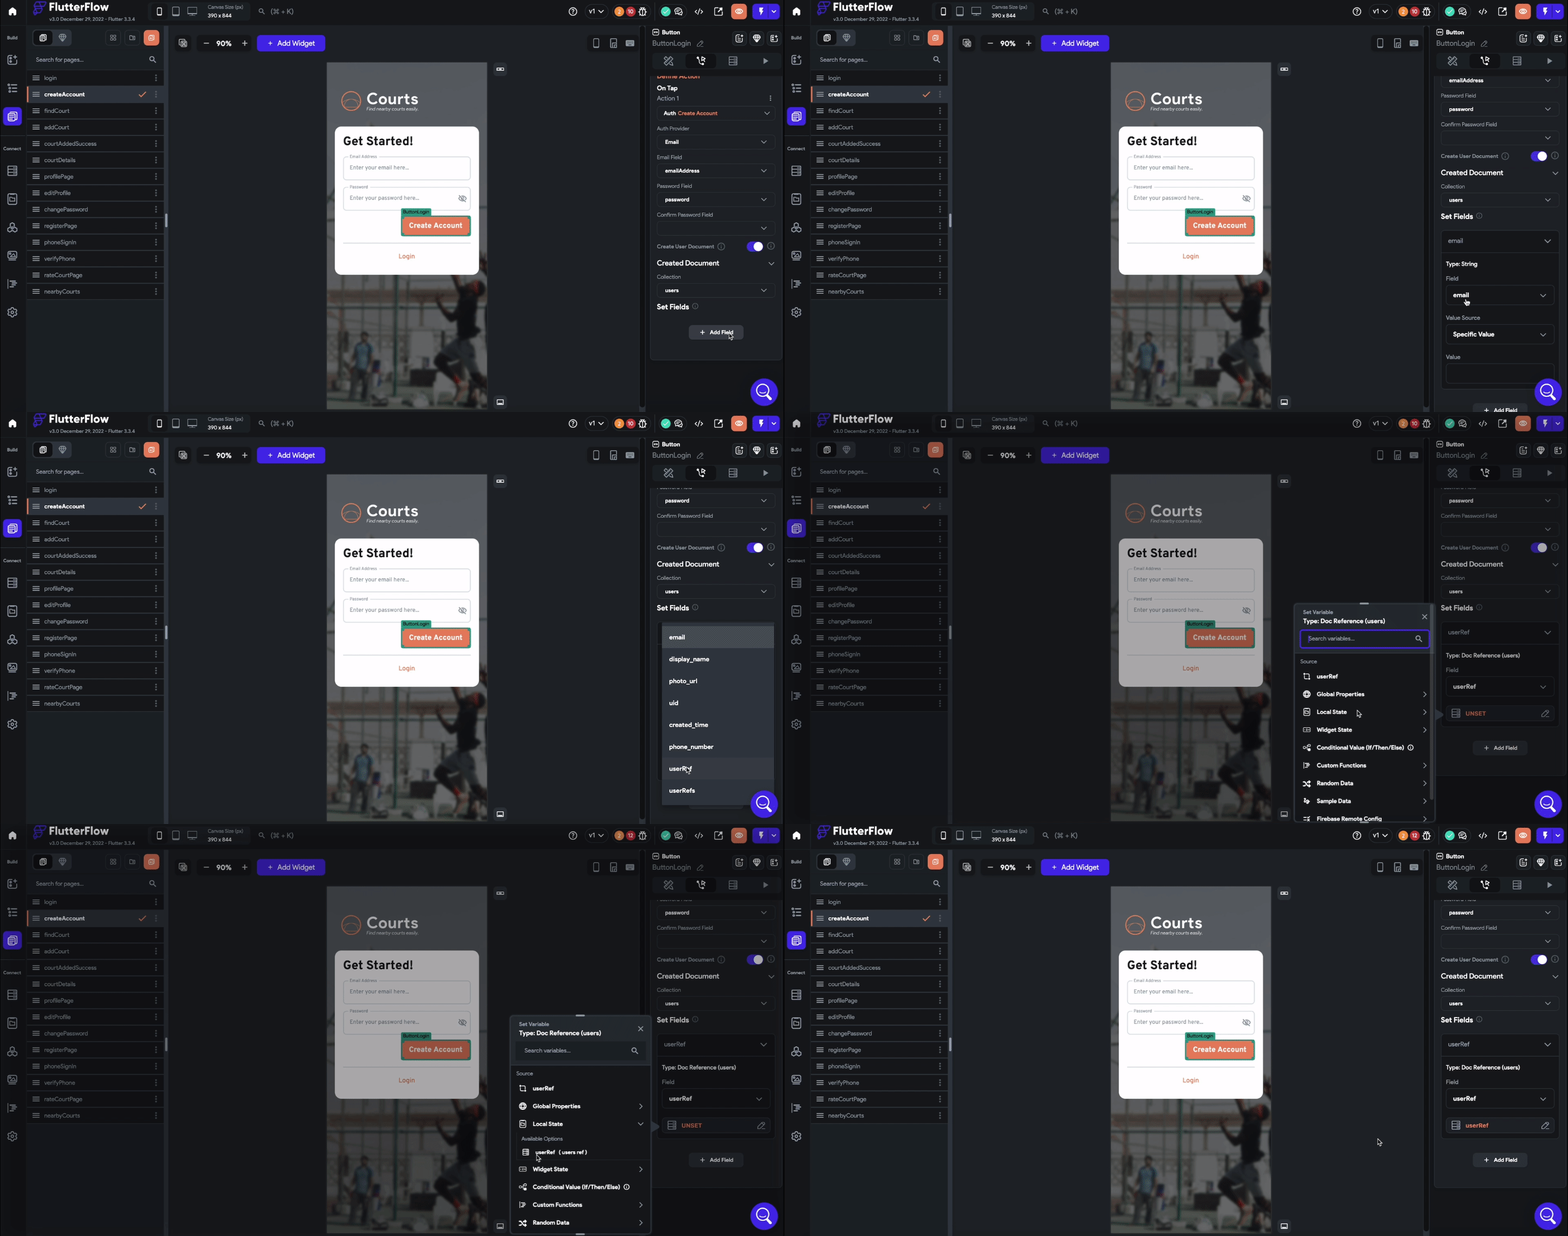
Now, go back to the account creation page, add a button and add the Create Account action. Add a new field to set userRef to the Local State userRef variable. This will store the referral information in the user's account once it is created.
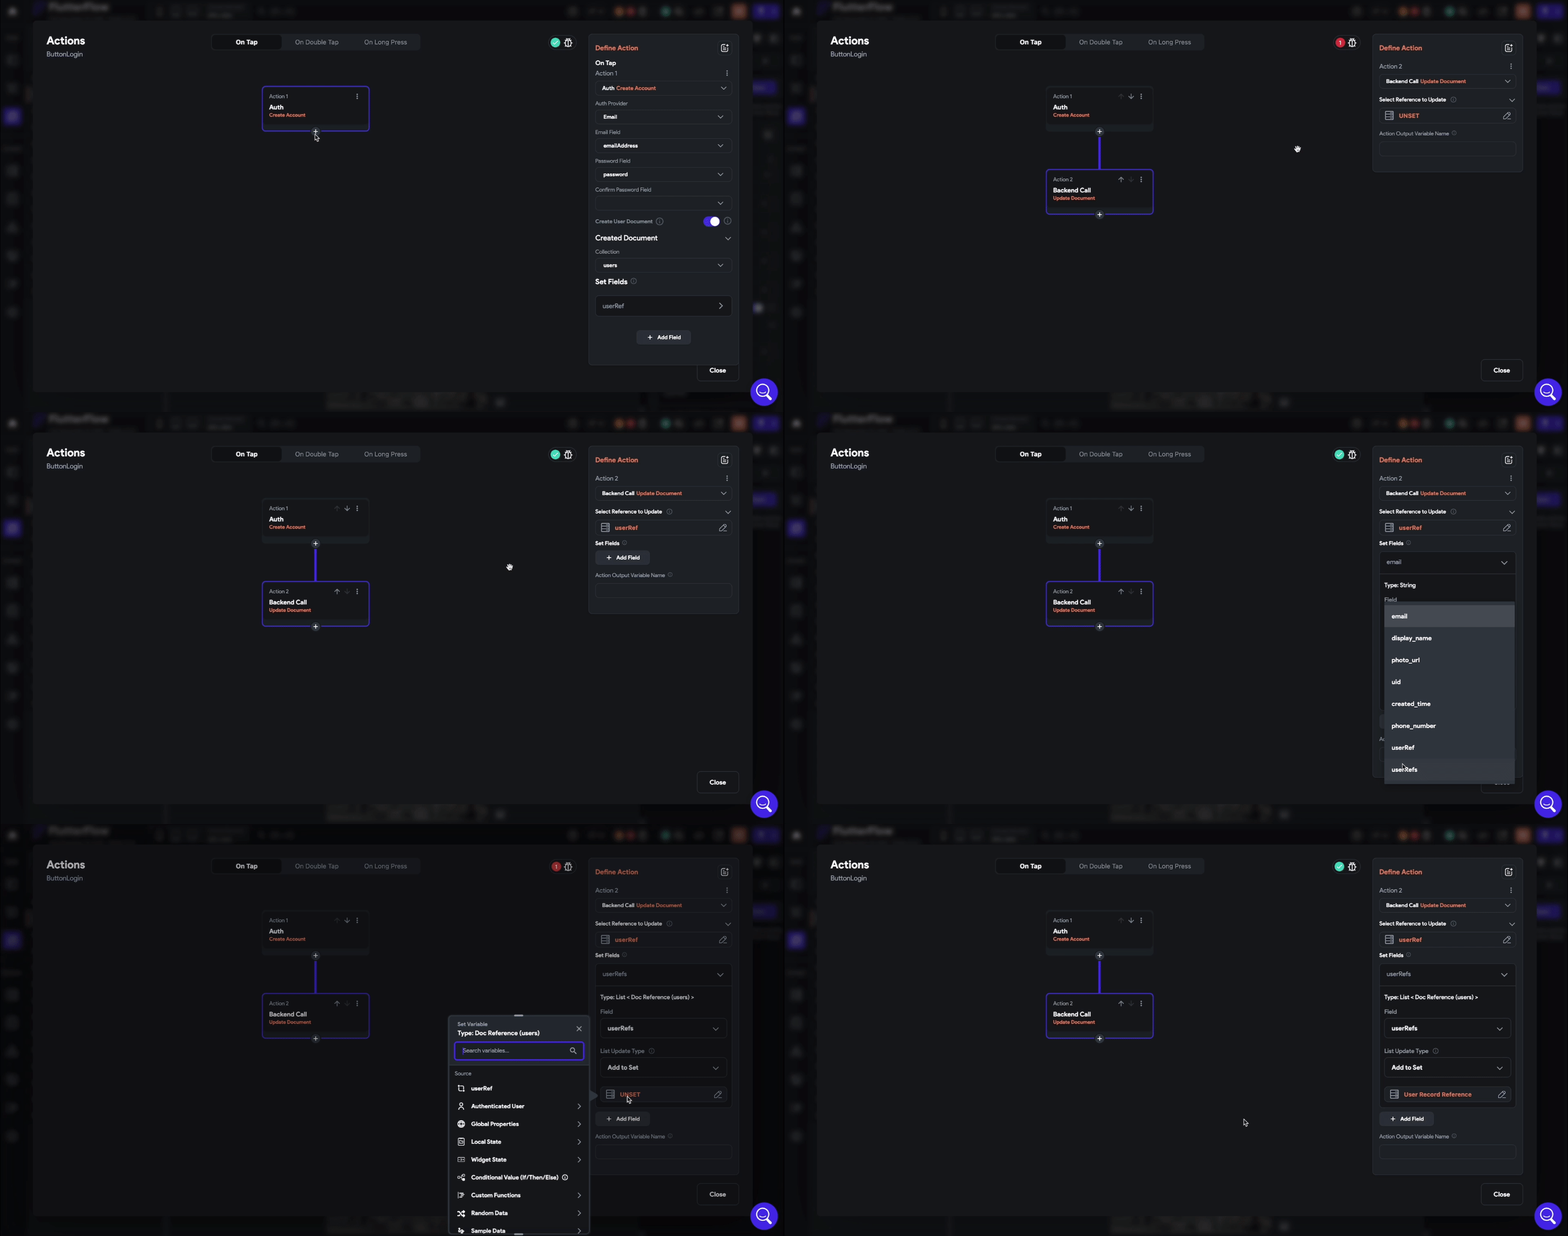
To also store the referral information for the person who sent the link, add another action to update a Update a Document in Firebase. Select the userRef page parameter created in Step 1, then select userRefs and select Add to Set. Then select the User Reference from the Authenticated User.
If you have issues following along, you can watch the GIF below or the YouTube video at the end of the tutorial.
Setting Up Shareable Referral Links
Now that we have set up the infrastructure to support the referral links, we will go over the steps to create a referral link and add it to your FlutterFlow app.
Step 1 - Creating a Button to Generate Link
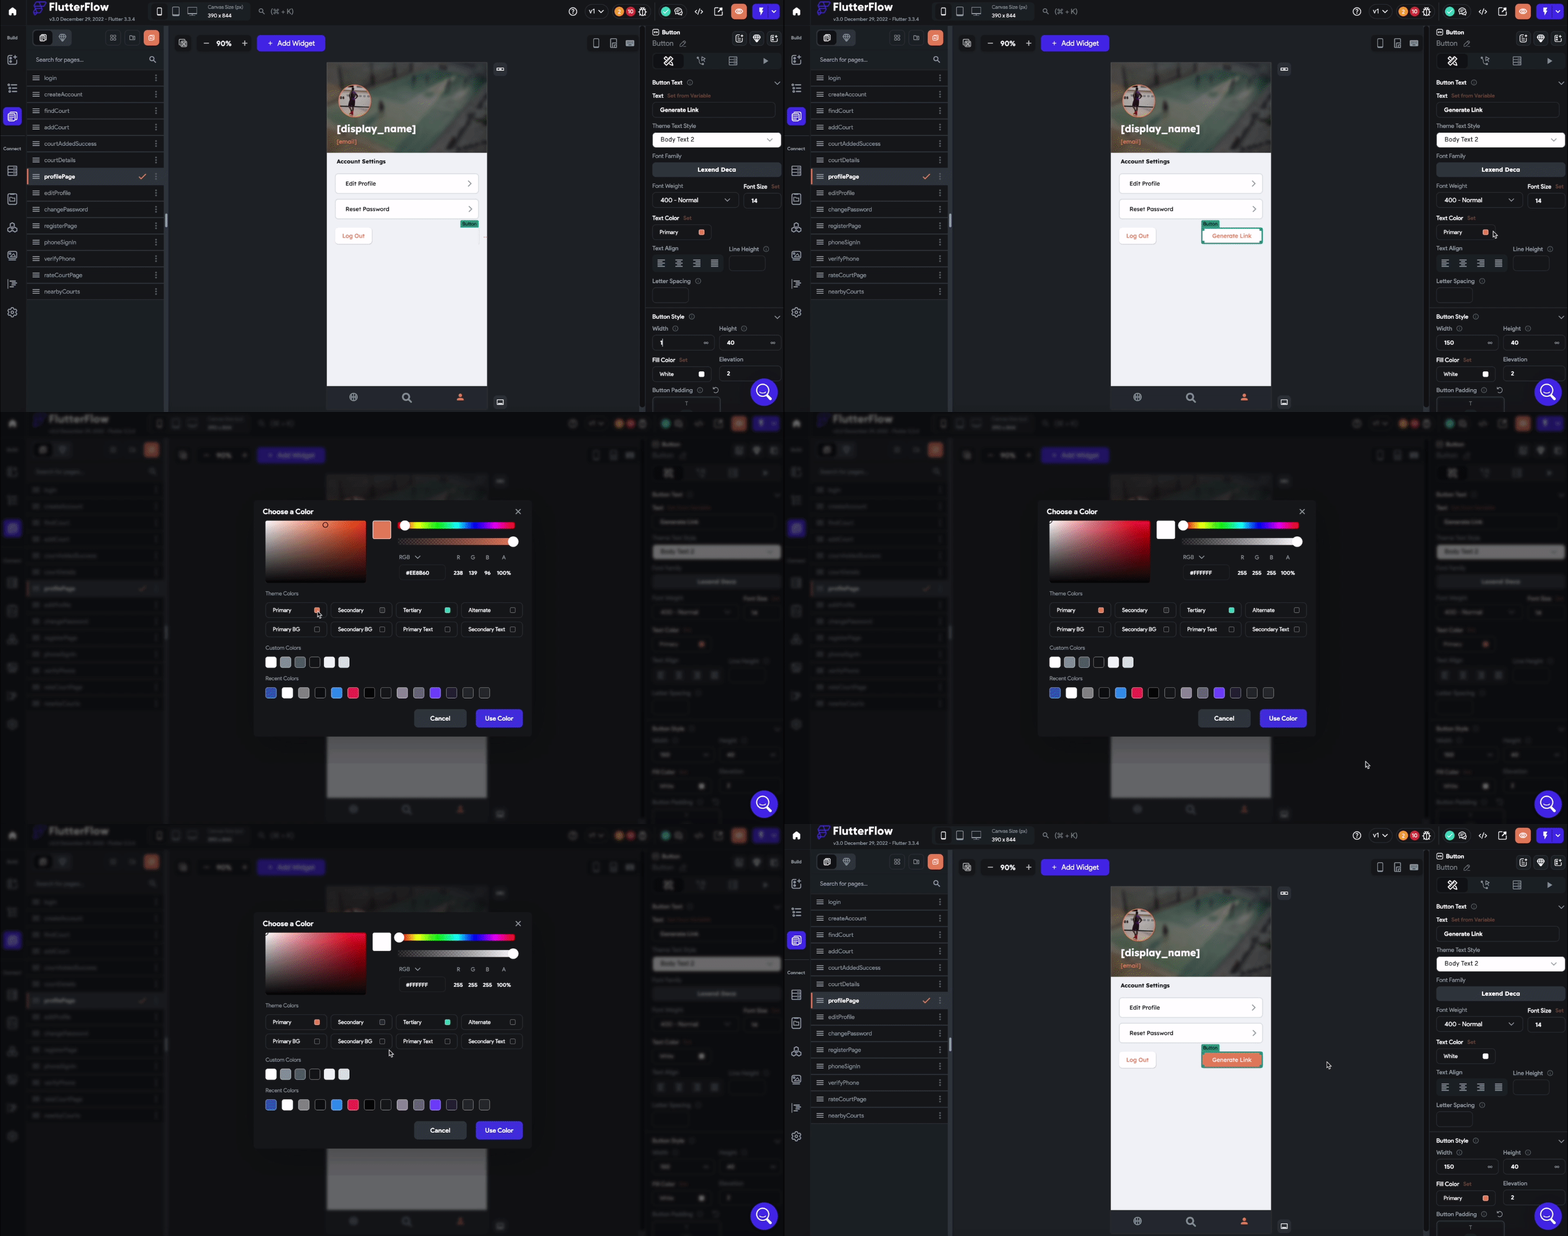
To start, navigate to an app page and add a button labeled something similar to "Generate Link." Be sure to make the text obvious to the user, so they know what occurs during a button press. Adjust the button's design to fit your preferences and remove any unnecessary actions.
Step 2 - Adding the Copy to Clipboard Action
Next, add a Copy to Clipboard action to the button. This will allow users to easily copy the referral link to their clipboard.
To create the referral link, we will use the Combine Text option. The first set of text should be the link to your application, whether it is hosted on the web or through deep linking. For example, if you were creating a referral link for the FlutterFlow website, you would use https://flutterflow.io.
After the link, add a question mark (?) and the name of the referral parameter you created on the account creation page in Step 1 of the "Building a Referral System in FlutterFlow" section. In this example, the parameter is named userRef.
Next, add "=" and the authenticated user's User ID to complete the referral link.
A completed referral link should look like the following:
[YOUR_LINK]?[PARAMETER]=[USER_ID]Or in this tutorial, it would look something like this:
https://flutterflow.io?userRef=[USER_ID]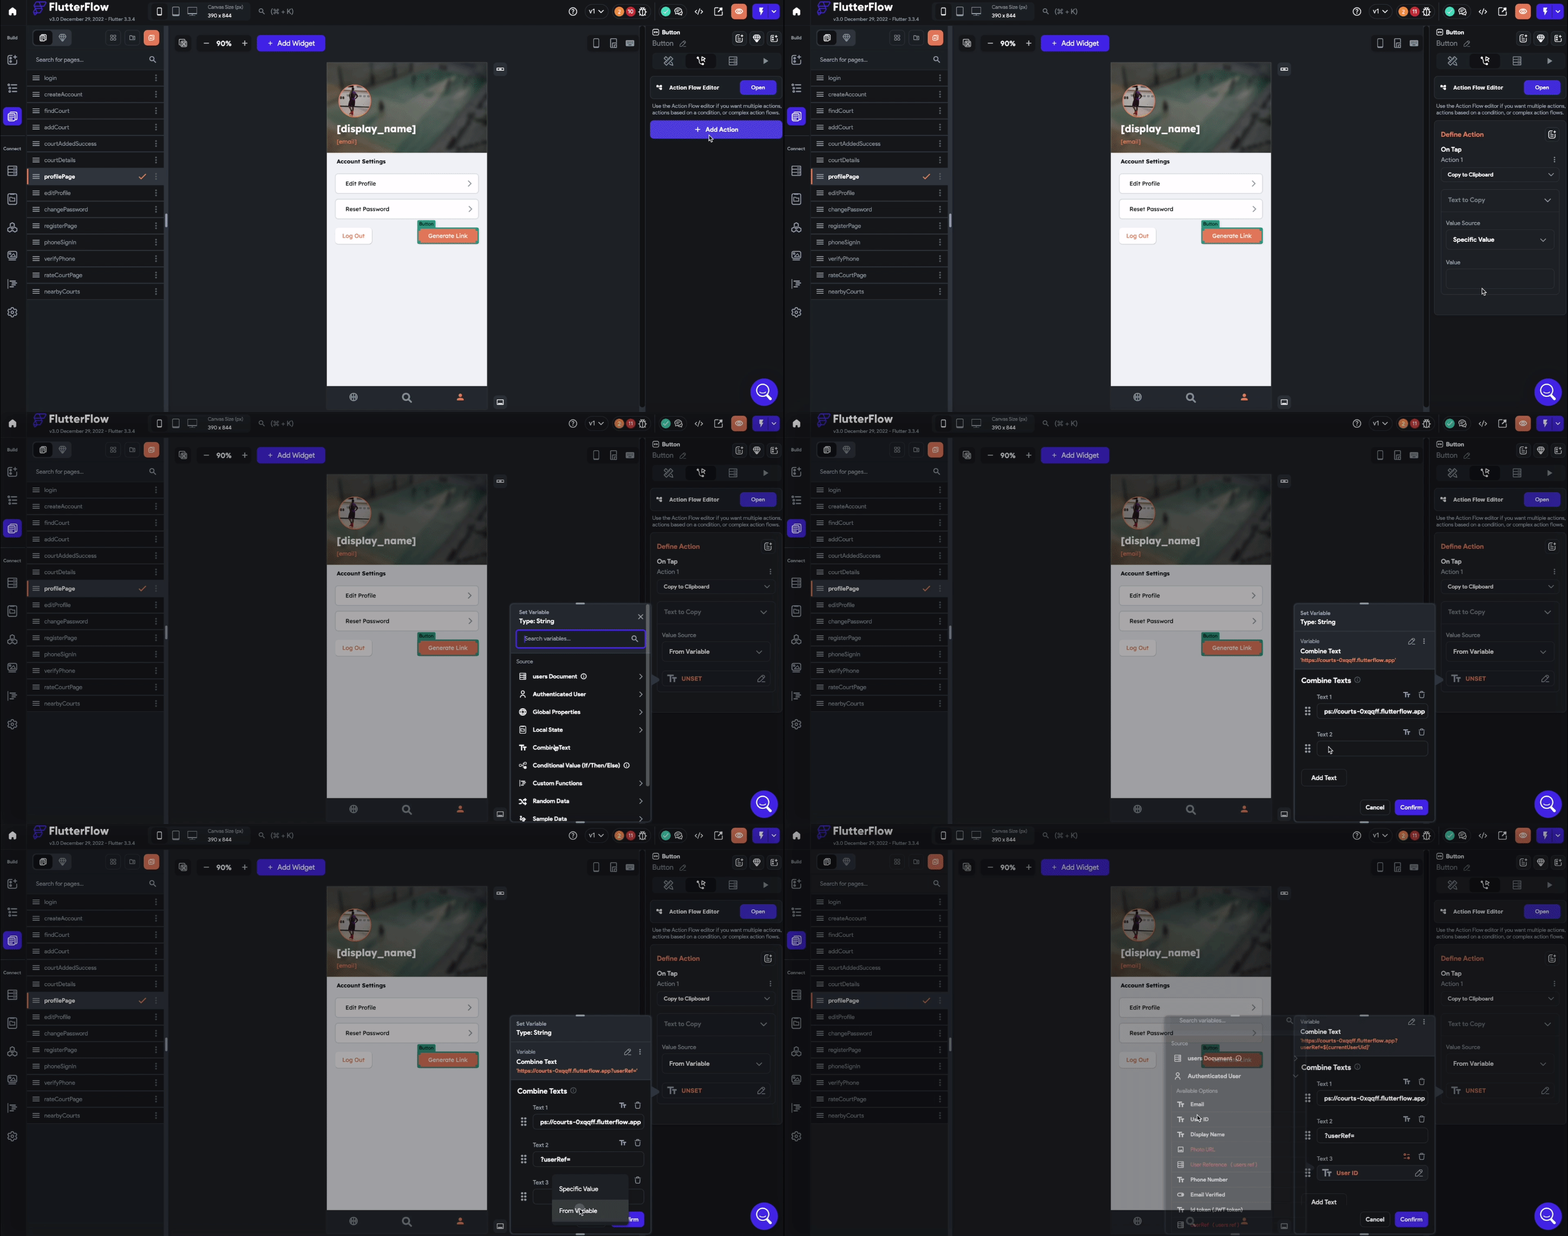
With these steps, you should now have a functioning referral link in your Flutter Flow app. Users can click the button to copy the referral link to their clipboard and invite their friends and colleagues to join your application!
YouTube Tutorial
Start Building a Referral System in FlutterFlow!
With these steps, you have now set up a referral system in your FlutterFlow app. You can track user signups and see who invited new users to join through their referral link. Give it a try and see how easy it is to add this feature to your app. Whether you're building a social network, a loyalty program, or any other type of application, the referral system is a powerful tool for growth and engagement. With FlutterFlow, you can customize and expand your referral system to fit your needs and goals. So why wait? Start building and see the power of referrals in action.
