FlutterFlow can publish your project to the web in minutes, and it's a great way to share your app with the world fast. However, sometimes we need to take things a step further and host an app on our own backend. This unlocks a whole new level: being able to connect your app deployment to a custom CI/CD pipeline.
A continuous integration pipeline helps automate the repetitive work of building, testing, and releasing apps. This reduces developer time spent and helps them get back to the fun stuff - building apps! CI/CD pipelines also help to maintain a high-quality codebase with automated quality controls, code review processes, and staging environments.
Today, we're going to cover how to deploy a FlutterFlow web application with Firebase Hosting. Then, we'll take a step further and show you how to automate the entire process using GitHub Actions. Let's go!
Firebase Setup
You'll need a FlutterFlow project and a Firebase project to get started. You're ready to go if you've already set up Firebase as a storage or authentication backend for your FlutterFlow app. If you haven't, head to console.firebase.google.com and create a new project.
Using Firebase's command line interface (CLI) is the fastest way to get your code deployed to the cloud.
Install it by following the instructions at firebase.google.com/docs/cli.
Download FlutterFlow project source code
We'll need to download the full source code to deploy the app. This feature is available on the Standard, Team, and Pro plans for FlutterFlow.
There are two ways we can do this:
1. Export the code from the browser
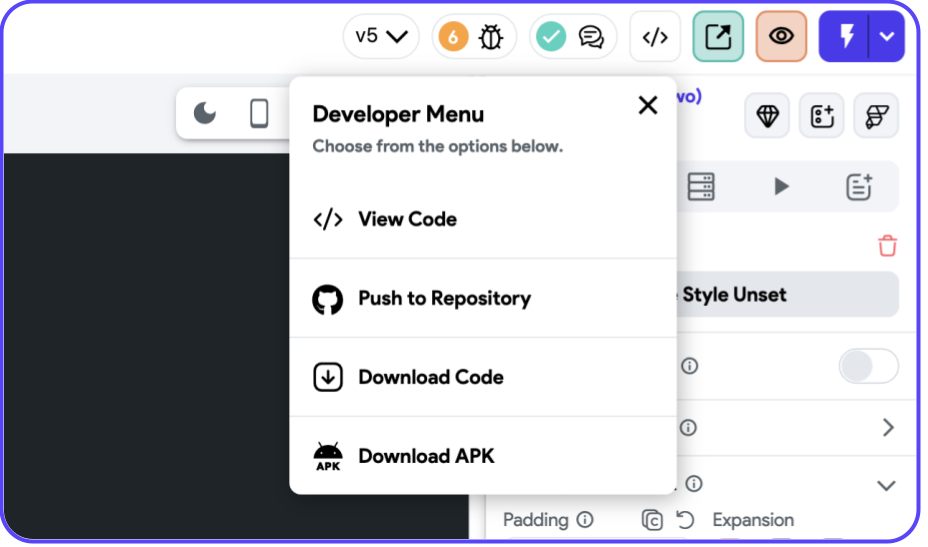
In your FlutterFlow project window, tap the </> Developer Menu icon in the top right, then select Download Code.
2. Use the FlutterFlow CLI
You can also use our CLI to download the code straight from a Terminal window.
First, open a new Terminal window and install the CLI:
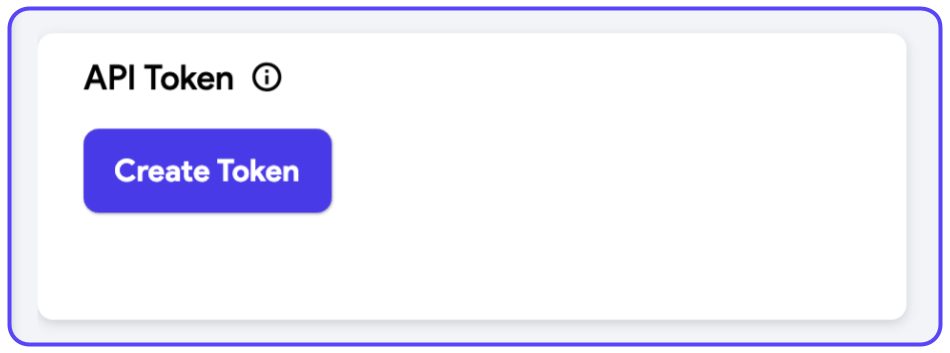
dart pub global activate flutterflow_cliNext, head to your FlutterFlow account page (app.flutterflow.io/account) and in the API Token card, tap Create Token. Copy it, and make a note of it somewhere safe.
Then, retrieve your FlutterFlow project ID. That's the name of the project in the URL: app.flutterflow.io/project/myProjectID
Lastly, type this to fetch your project's source code:
flutterflow export-code --project <project-id> --token <API-token>You can also include a --dest flag if you'd like to specify a directory for the code.
FLUTTERFLOW_API_TOKEN in your PATH, so you don't have to write it in each export-code command.Configure Firebase
Great, now we have our source code - time to set up hosting. We can do this all from the command line!
First, open your terminal in your project directory and initialize Firebase:
firebase init
- Select
use an existing projectand select your Firebase project. If you don't have one yet, you can also selectcreate a new project. - Select
Hosting: Configure files for Firebase Hosting and (optionally) set up GitHub Action deploys. - For
What do you want to use as your public directory?typebuild/weband hit enter. - For
Configure as a single-page app (rewrite all urls to /index.html)?, entery(yes). - For
Set up automatic builds and deploys with GitHub?, entern(but we'll come back to this later! - For
File build/web/index.html already exists. Overwrite?entery.
Set up is now complete – let's give it a try!
Preview & Deploy your web app
We need to build the web application, which will populate our build/web directory with the assets needed for hosting. Then, we can preview the URL:
flutter build web

firebase hosting:channel:deploy myFirstPreview
Replace myFirstPreview with whatever you'd like to call your temporary deployment.
This will give you a URL you can use to preview your web application:
✔  hosting:channel: Channel URL (myFirebaseProject):
https://myfirebaseproject--myfirstpreview-26ie0a1g.web.app
[expires 2023-08-06 18:00:14]
Open that URL, and check out your work! If it looks as expected, you can proceed to a full live deployment:
firebase deployWrap Up
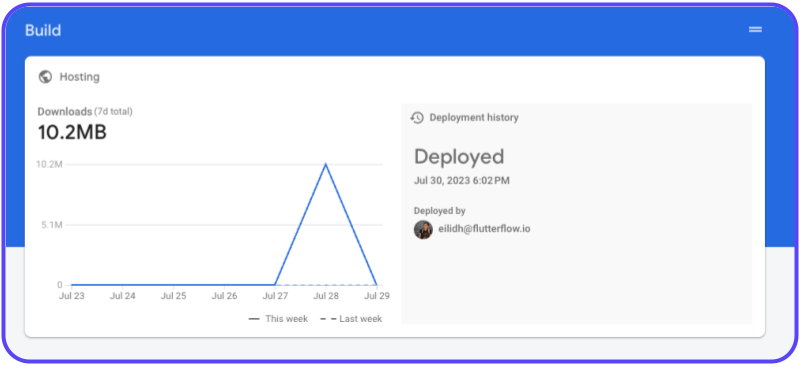
That's it - you've deployed your web application! From here, you can go to your Firebase project console and see all the useful statistics on deployment history, app size, and more. You can also add a custom domain if you'd like to change it to one of your own.
What next? Our process is still quite manual - we have to download the code, build it, and then deploy it... so let's automate that!
Part 2: Automating your deployment with GitHub Actions
Now we're going to build on our knowledge from the previous section and automate the deployment process. Your very own CI/CD pipeline!
To do this, we're going to connect our FlutterFlow project to a GitHub repository. Then, we'll connect a GitHub Action (a series of instructions that will run every time we push to the repository). These instructions will do all the steps we did in part 1 (build the web application, then deploy to Firebase).
Set up
We'll need a couple of things to get started:
- A FlutterFlow project
- A Firebase project
- A GitHub account and a new repository
GitHub set up
Create a new repository in GitHub: github.com/new.
Open a new Terminal window, and clone the repository:
git clone git@github.com:userName/yourProject.gitFollowing the export code steps above, download your latest FlutterFlow source code into the local repository.
Firebase set up
- Run
firebase initagain. This time, selectHosting: Set up GitHub Action deploys. - You'll be automatically prompted to log in to Firebase. Do this, and head back to the Terminal.
- Enter your repository in the format
user/repository. - At
Set up the workflow to run a build script before every deploy?, typen. - At
Set up automatic deployment to your site's live channel..., typen. - A new file has been created in your repository:
.github/workflows/firebase-hosting-pull-request.yml. Open it in your IDE of choice.
Modify Action File
This file contains the instructions that GitHub will run when a pull request is merged to the repository. We need a few extra steps: building the Flutter app, accessing the build/web directory, then deploying.
Replace the entire contents with the following file:
name: Flutter Firebase Deployment
on:
  push:
    branches:
      - main
  pull_request:
    branches:
      - main
jobs:
  build_web:
    name: Build Flutter (Web)
    runs-on: ubuntu-latest
    steps:
    - uses: actions/checkout@v1
    - uses: subosito/flutter-action@v1
      with:
        flutter-version: '3.10.4' # Replace with your project's version of Flutter.
        channel: 'stable'
    - run: flutter pub get
    - run: flutter config --enable-web
    - run: flutter build web
    - name: Archive Production Artifact
      uses: actions/upload-artifact@master
      with:
        name: web-build
        path: build/web
  deploy:
      needs: build_web
      runs-on: ubuntu-latest
      steps:
        - name: checkout
          uses: actions/checkout@v1
        - name: Download Artifact
          uses: actions/download-artifact@master
          with:
            name: web-build
            path: build/web
        - name: Deploy to Firebase
          uses: FirebaseExtended/action-hosting-deploy@v0
          with:
            repoToken: '${{ secrets.GITHUB_TOKEN }}'
            firebaseServiceAccount: '${{ secrets.FIREBASE_SERVICE_ACCOUNT_MYPROJECT }}'
            channelId: live
            projectId: projectName
You'll need to make modifications to the last couple of lines:
- Change
FIREBASE_SERVICE_ACCOUNT_MYPROJECT, replacingMYPROJECTwith your Firebase project name. - Change
projectNameto your Firebase project name.
main branch. You can modify this to another branch – for example, flutterflow is the branch name for code that is pushed directly from the GitHub integration in the FlutterFlow project, so you can use that if you plan to push to GitHub from the FlutterFlow project in the browser.Push Action File
Commit the file to your repository, and push all changes:
git add .

git commit -m "my new commit"

git push --set-upstream origin main
Head to your GitHub repository and tap on the Actions tab. Because we just pushed to the main branch, the Action will start automatically.
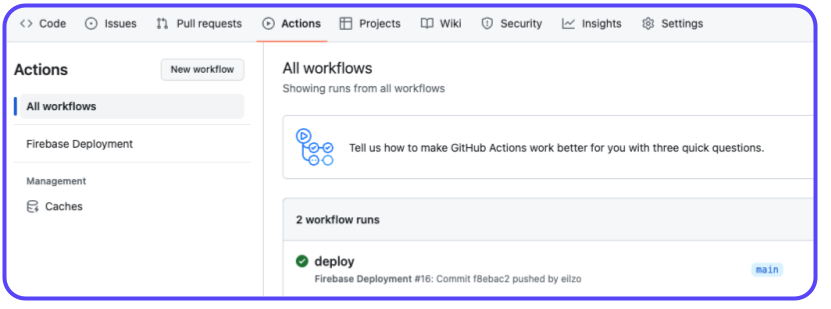
Here, you can see your Action in progress. Once it's successful, try opening your Firebase console again, where you'll see a new successful deployment!
Conclusion
We've covered how to deploy your FlutterFlow web application to Firebase hosting and how to automate the process using GitHub Actions.
There's so much more that can be done with Actions: adding test frameworks, security checks, and periodic actions, to name just a few. Explore the GitHub Actions documentation to find out more and continue your CI/CD journey!