
QR code makes it easier to share data with other users. The data embedded in the QR code can be retrieved easily by scanning it with an app like Google Lens (Android), Apple Camera (iOS), or using your own app created using FlutterFlow!
Today, you will learn to build a QR code generator widget using Flutter and add it as a Custom Widget to your FlutterFlow app.
If you don't have coding knowledge of using Flutter, fear not; you can directly use this pre-built custom widget for the QR code generator:
Package overview
Let's look at a Flutter package that can help you build a QR code generator widget.
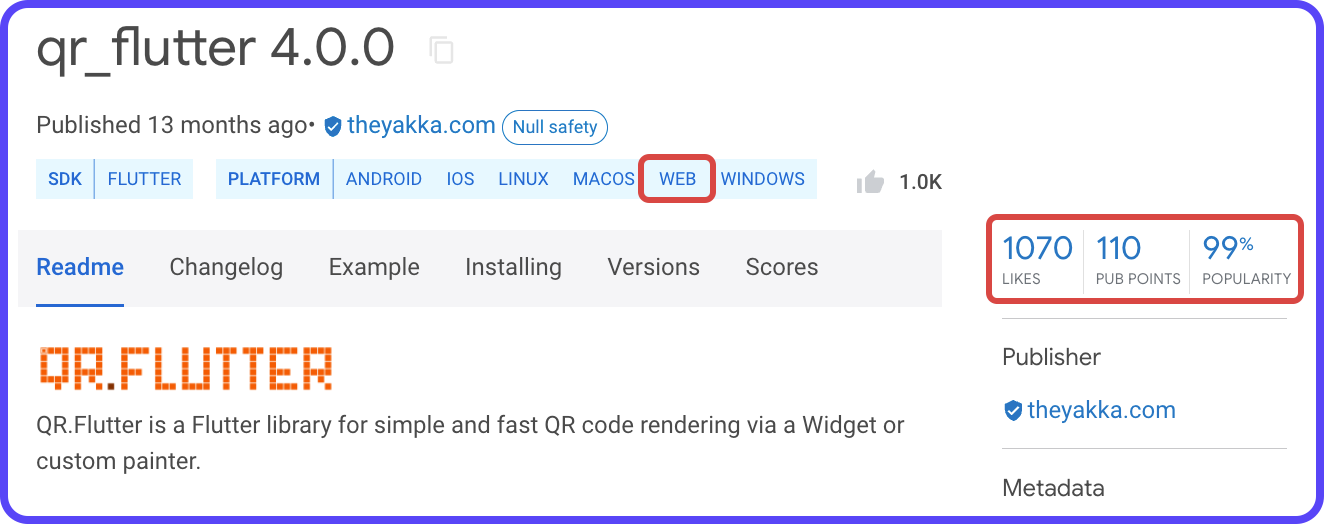
You can find the Flutter packages by visiting pub.dev, the official package repository of Dart and Flutter apps. A decent package would be qr_flutter which is quite popular and has a good amount of likes.
There could be several packages providing similar functionalities. While choosing, make sure the package:
- Has good scores: Likes, Pub Points (out of 130), and Popularity percentage (out of 100%). More information about package scores is here.
- Has Web support, this will allow you to test out the widget in the Run/Test mode of FlutterFlow.
Setup Flutter locally
While working with a custom widget, it's recommended to build and test it locally on your system. It also allows you to take advantage of Flutter's hot reload feature that helps to iterate over the widget quickly.
To use Flutter on your system, you must install the Flutter SDK. Go to this link and select your operating system to get the instructions for installing it.
Once you have the Flutter SDK installed, run the following command from the terminal:
flutter doctorThis command checks your environment and reports if there are any issues or any further steps required to complete the installation correctly.
Flutter being a cross-platform framework, can run on mobile, desktop, web, and various other platforms. But you should run the app on the platform which you have selected as the target platform (just to be sure that everything works properly on that particular platform).
If the package supports Web platform, then it's always faster to use web while testing, because it doesn't require any additional steps. You just need to have Chrome installed on your system.
You will also require an IDE for writing the Dart code for your Flutter app. The three most popular IDEs among Flutter developers are:
Setup any one of them using the respective link present above.
Create basic Flutter app structure
For testing the widget, let's create a basic Flutter project.
Run the following command from the terminal:
flutter create qr_code_generatorIt will generate the required files inside a folder called qr_code_generator. Open the folder using your preferred IDE.
Now, head over to your main.dart file present inside the lib folder.
Replace the entire code present inside main.dart with the following:
import 'package:flutter/material.dart';

void main() => runApp(const MyApp());

class MyApp extends StatelessWidget {
  const MyApp({Key? key}) : super(key: key);

  @override
  Widget build(BuildContext context) {
    return MaterialApp(
      title: 'Widget Preview',
      debugShowCheckedModeBanner: false,
      theme: ThemeData(
        primarySwatch: Colors.blue,
      ),
      home: const PreviewPage(),
    );
  }
}

class PreviewPage extends StatelessWidget {
  const PreviewPage({Key? key}) : super(key: key);

  @override
  Widget build(BuildContext context) {
    return Scaffold(
      appBar: AppBar(
        title: const Text('Widget Preview'),
      ),
      body: Center(
        // TODO: Replace Container with the widget
        // that you would be building
        child: Container(),
      ),
    );
  }
}
The above code will help you preview the QR code widget once we add it. PreviewPage is just a page with an AppBar and an empty Container widget. We would replace this Container with the QRCode widget once we complete building it in the step.
Testing QR Code widget locally
To install the qr_flutter package in your Flutter project, open the terminal, navigate to the project folder, and run the following command:
cd project/folder/path
flutter pub add qr_flutter
This command would install the package inside your project and add it to the pubspec.yaml file under the dependencies section:
dependencies:
  qr_flutter: ^4.0.0
Now, create a new file inside the lib folder, called qr_code.dart. Add these two import statements to the file:
// Required for getting access to basic Flutter widgets
import 'package:flutter/material.dart';
// QR Flutter package
import 'package:qr_flutter/qr_flutter.dart';Add the structure of the QRCode widget to the file after the import statements:
class QRCode extends StatelessWidget {
  const QRCode({
    Key? key,
    this.width,
    this.height,
  }) : super(key: key);

  final double? width;
  final double? height;

  @override
  Widget build(BuildContext context) {
    // TODO: Replace with the QrImage widget
    // of the package
    return Container();
  }
}
This structure is similar to the boilerplate code generated by the Custom Widget page of FlutterFlow.
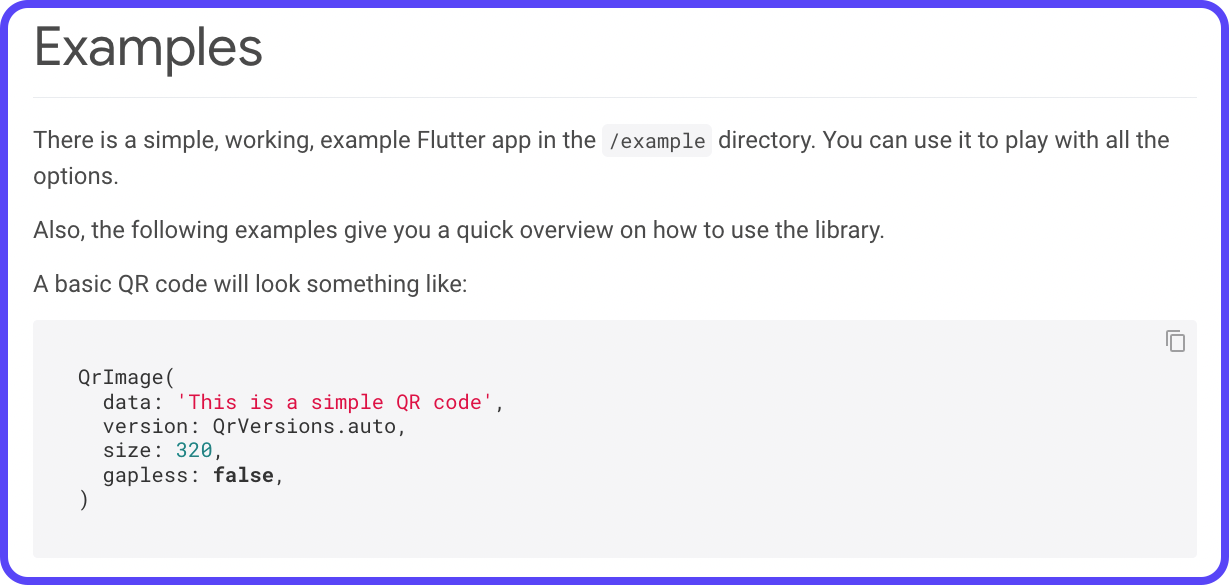
Usually, most popular packages have a basic example code for using their package. If you go to the qr_flutter page and scroll down, you will find an Examples section. A basic QR code generation widget example is given there; you can use this code to get started.
To get more customizability, you can take some of the data used inside the widget as parameters. Here's a sample version of the widget with all available parameters, this will help you to set these parameters directly from FlutterFlow once the widget is added to the project:
class QRCode extends StatelessWidget {
  const QRCode({
    Key? key,
    this.width,
    this.height,
    this.qrSize,
    required this.qrData,
    this.gapLess,
    this.qrVersion,
    this.qrPadding,
    this.qrBorderRadius,
    this.semanticsLabel,
    this.qrBackgroundColor,
    this.qrForegroundColor,
  }) : super(key: key);

  // Required by FF (NOT USED IN WIDGET)
  final double? width;
  final double? height;
  // The (square) size of the image
  final double? qrSize;
  // Text data to the encoded
  final String qrData;
  // Adds an extra pixel in size to prevent gaps (default is true).
  final bool? gapLess;
  // `QrVersions.auto` or a value between 1 and 40.
  // See http://www.qrcode.com/en/about/version.html for limitations and details.
  final int? qrVersion;
  // Padding on all sides
  final double? qrPadding;
  // Circular border radius beside the QR code
  final double? qrBorderRadius;
  // Will be used by screen readers to describe the content of the QR code.
  final String? semanticsLabel;
  // 	The background color (default is transparent).
  final Color? qrBackgroundColor;
  //	The foreground color (default is black).
  final Color? qrForegroundColor;

  @override
  Widget build(BuildContext context) {
    return ClipRRect(
      borderRadius: BorderRadius.circular(qrBorderRadius ?? 0),
      child: QrImage(
        size: qrSize,
        data: qrData,
        gapless: gapLess ?? true,
        version: qrVersion ?? QrVersions.auto,
        padding: EdgeInsets.all(qrPadding ?? 10),
        semanticsLabel: semanticsLabel ?? '',
        backgroundColor: qrBackgroundColor ?? Colors.transparent,
        foregroundColor: qrForegroundColor ?? Colors.black,
      ),
    );
  }
}
If you notice carefully, the QrImage widget is wrapped inside a ClipRRect widget. It's added to create a rounded border if the user wants it. By default, it is set to "0", which means the borders would have sharp pointed corners.
In the above code, ?? signifies if the user does not provide the parameter value (on its left), the right one will be used as the default value.
For example, qrBackgroundColor ?? Colors.transparent signifies that if the value of qrBackgroundColor is null or empty, then Colors.transparent will be used as the default background color.
Now, go to the main.dart file and import the qr_code.dart file by adding the following:
import 'qr_code.dart';Finally, replace the Container widget with the QRCode widget inside the PreviewPage:
class PreviewPage extends StatelessWidget {
  const PreviewPage({Key? key}) : super(key: key);

  @override
  Widget build(BuildContext context) {
    return Scaffold(
      appBar: AppBar(
        title: const Text('Widget Preview'),
      ),
      body: const Center(
        // Add this QRCode widget in place of the Container
        child: QRCode(
          qrSize: 320,
          qrData: 'https://flutterflow.io',
        ),
      ),
    );
  }
}
We have passed just two parameter values:
qrSize: determines the size of the QR imageqrData: encoded text data in the QR code
To run the app on any device, first, check what are the devices that are currently available for running the app using the command:
flutter devices
I have an iPhone 13 Pro (Simulator) and a Chrome web browser on which I can run the app.
To start the app on any device, use the following command:
flutter run -d "<device_name>"For example, to run the app on iOS Simulator, use:
flutter run -d "iPhone 13 Pro"Once you run this command, it will take some time to build the app and run it on the selected device:
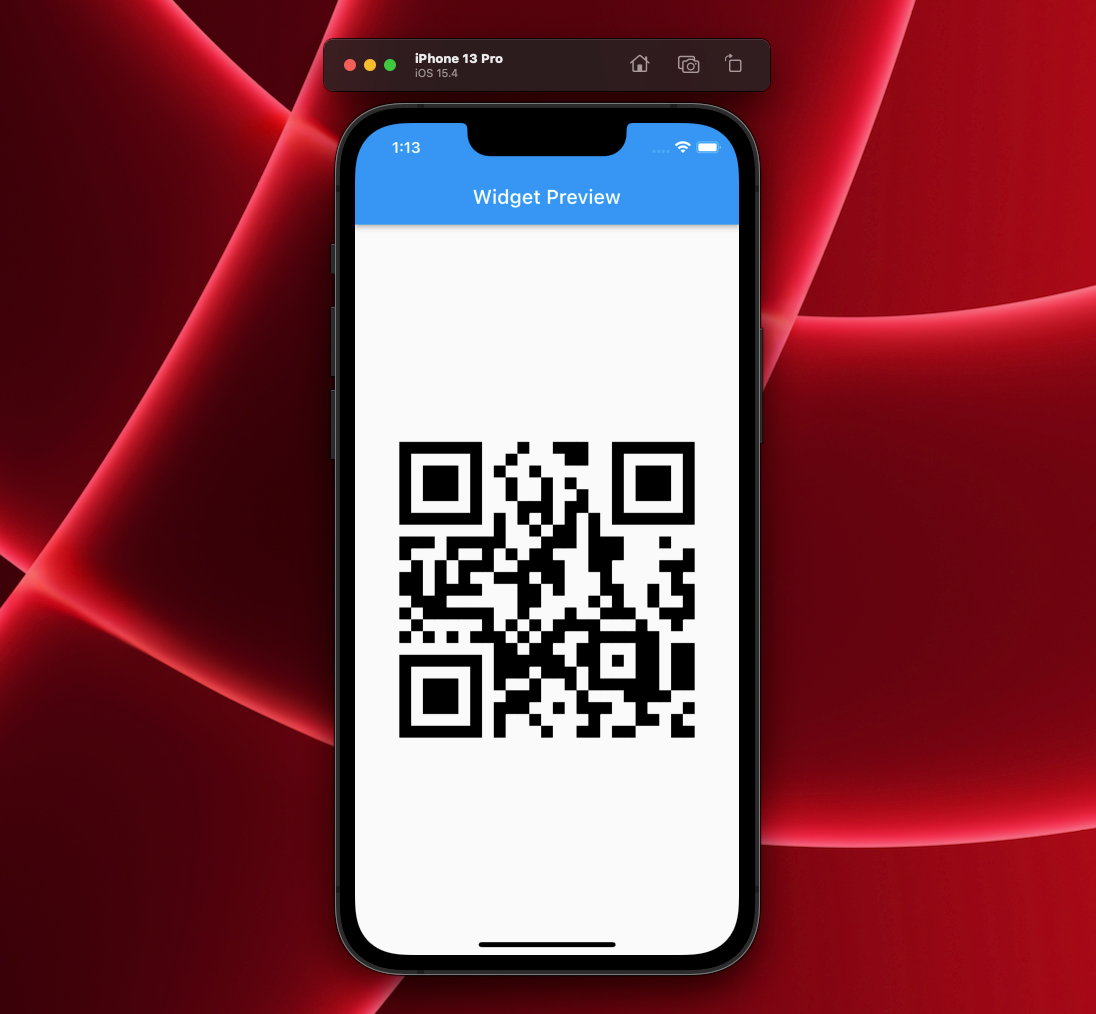
This is how the simplest version of the QRCode widget looks while using the default parameters.
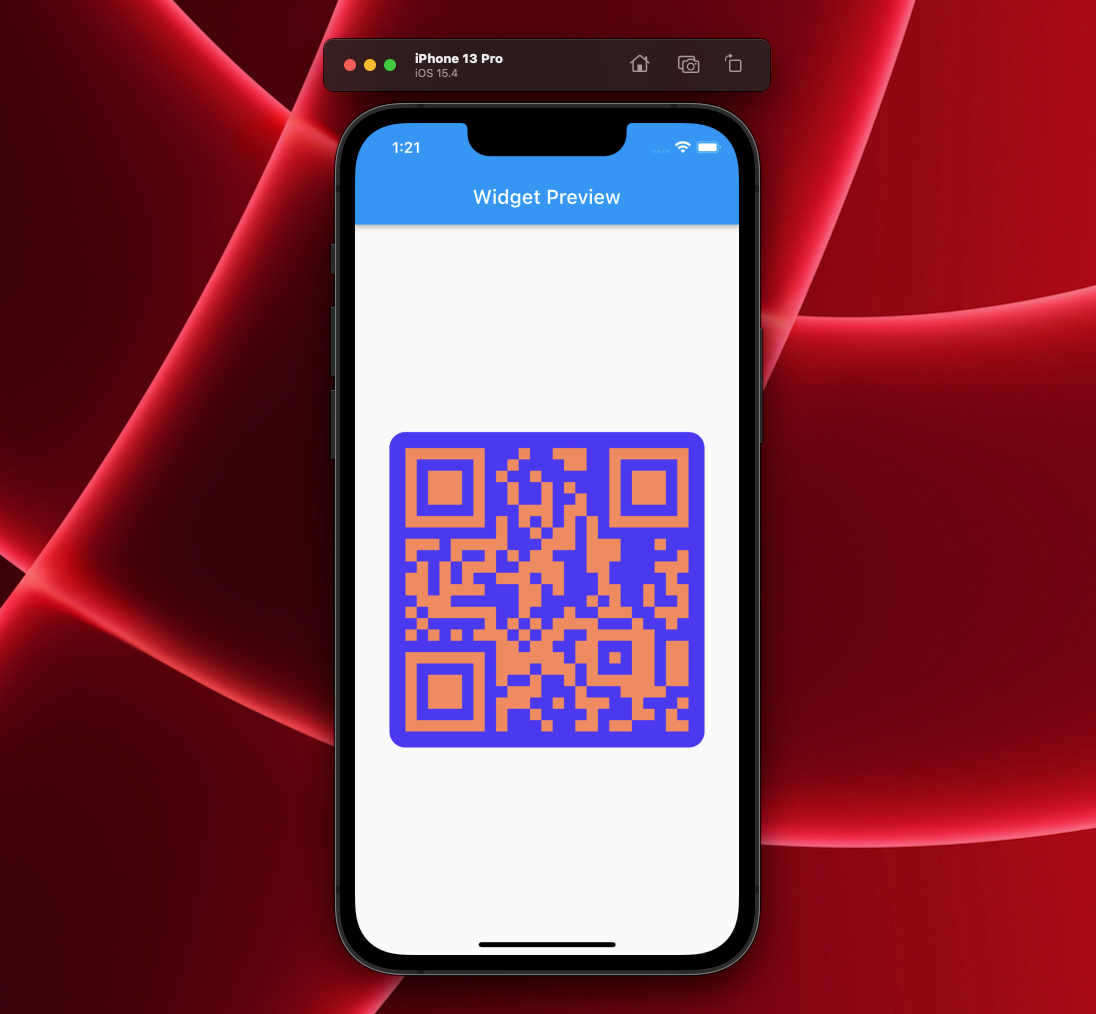
Let's customize the look by providing some other parameter values:
QRCode(
  qrSize: 320,
  qrPadding: 16,
  qrBorderRadius: 16,
  qrData: 'https://flutterflow.io',
  qrBackgroundColor: Color(0xFF4B39EF),
  qrForegroundColor: Color(0xFFEE8B60),
)
Here, the background and foreground color of the QR code is defined along with some padding and rounded border radius values. The widget will look like this:
So, we have tested the widget locally and it works as expected. It's time to add this QRCode as a Custom Widget to FlutterFlow.
Adding Custom Widget
Open your FlutterFlow project in which you want to add the QR code widget, and follow the steps below:
- From the Navigation Menu (present on the left), select Custom Functions.
- Go to the Custom Widgets tab and click + Create.
- Enter the widget name as QRCode.
- Click on the Upload Code button and select the
qr_code.dartfile from your system. - If your file contains the
material.dartimport statement, remove it. This line is not required because FlutterFlow automatically imports this package. - Click on + Add Dependency. Copy the qr_flutter package name along with its version by clicking on the copy button and paste it inside the dependency field of the Custom Widget dialog.
- Add the parameters you have used in the code by clicking on the + Add Parameter button. Enter the Parameter Name (exactly as written in the code) and choose its Data Type. Repeat this step for adding the other parameters as well.
- Click on Compile & Preview. This would take around 2 minutes to build the widget and preview it.
- Once the compilation is complete, enter the required properties to the widget and you will be able to see its preview.
- Click Save.

Using QR Code Widget
You can drag and drop the custom widget you created to generate a QR code to any page of the app.
To use the QR Code widget, follow the steps below:
- Go to the UI Builder tab from the Navigation Menu (left).
- Select the Components tab. You will find the QRCode widget here.
- Drag and drop the widget onto the canvas.
- Set the proper custom widget properties from the Properties Panel (right).
- Center the QRCode widget in the screen by setting the Column Main Axis Alignment to Center. Wrap the QRCode widget with a Row and set its Main Axis Alignment to Center as well.
Taking input from TextField
Let's go one step further and take the QR code data as a user input using a TextField widget.
But first, you have to define a local state variable to store the data. Follow the steps below:
- Go to Local State page from the Navigation Menu (left).
- Click on + Add State Variable.
- Enter the field name as
qrTextand set its Data Type to String. Click Create. - Set the Default Value of the field to "hello".

To add the TextField widget onto the canvas and store its value to the local state variable, follow these steps:
- Add a TextField widget inside the Column.
- Customize the widget using the Properties Panel (right), as per your requirement.
- With the TextField selected, go to the Actions tab. Click + Add Action. The TextField can only have an action of On Submit type, so the action will be triggered when the user submits the field.
- Define an Update Local State action, and set the field as qrText.
- Select the Update Type as Set Value.
- Under the value to set, select the Value Source as From Variable, Source as Widget State, and under Available Options choose QR Text.
Finally, update the QRCode widget property to take the input from the Local State Variable:
- Select the QRCode widget.
- From the Properties Panel (right), click Set from Variable beside qrData.
- Choose the Source as Widget State, under Available Options select QR Text, and set the Default Value to "hello".
- Click Save.
In Action
You can try out the app by running it either using the Run mode or by downloading the project and running it from your system.
You can try out this sample app with the QRCode widget here.
The following shows the QR code generator widget in action, running on an iOS Simulator:
Conclusion
This article covered the basics of building and using custom widgets inside FlutterFlow. Though every package would have a different code for using it as a widget, you can follow similar steps to set up and test the widget locally before adding it to FlutterFlow.
