
Overview
Whether you are a solo developer or a large business, email is one of the most reliable ways to connect with your users. Traditionally, it was required to maintain email servers for sending emails, but nowadays, you can easily access an email delivery service.
SendGrid is one of the most popular platforms that provide SMTP (Simple Mail Transfer Protocol) service through a hassle-less API.
This post will walk you through setting up the SendGrid Email API inside FlutterFlow and using it to send emails to your users!
Setup a SendGrid account
To access the SendGrid Email API service, you need an API key.
Follow the steps below to generate a SendGrid API key:
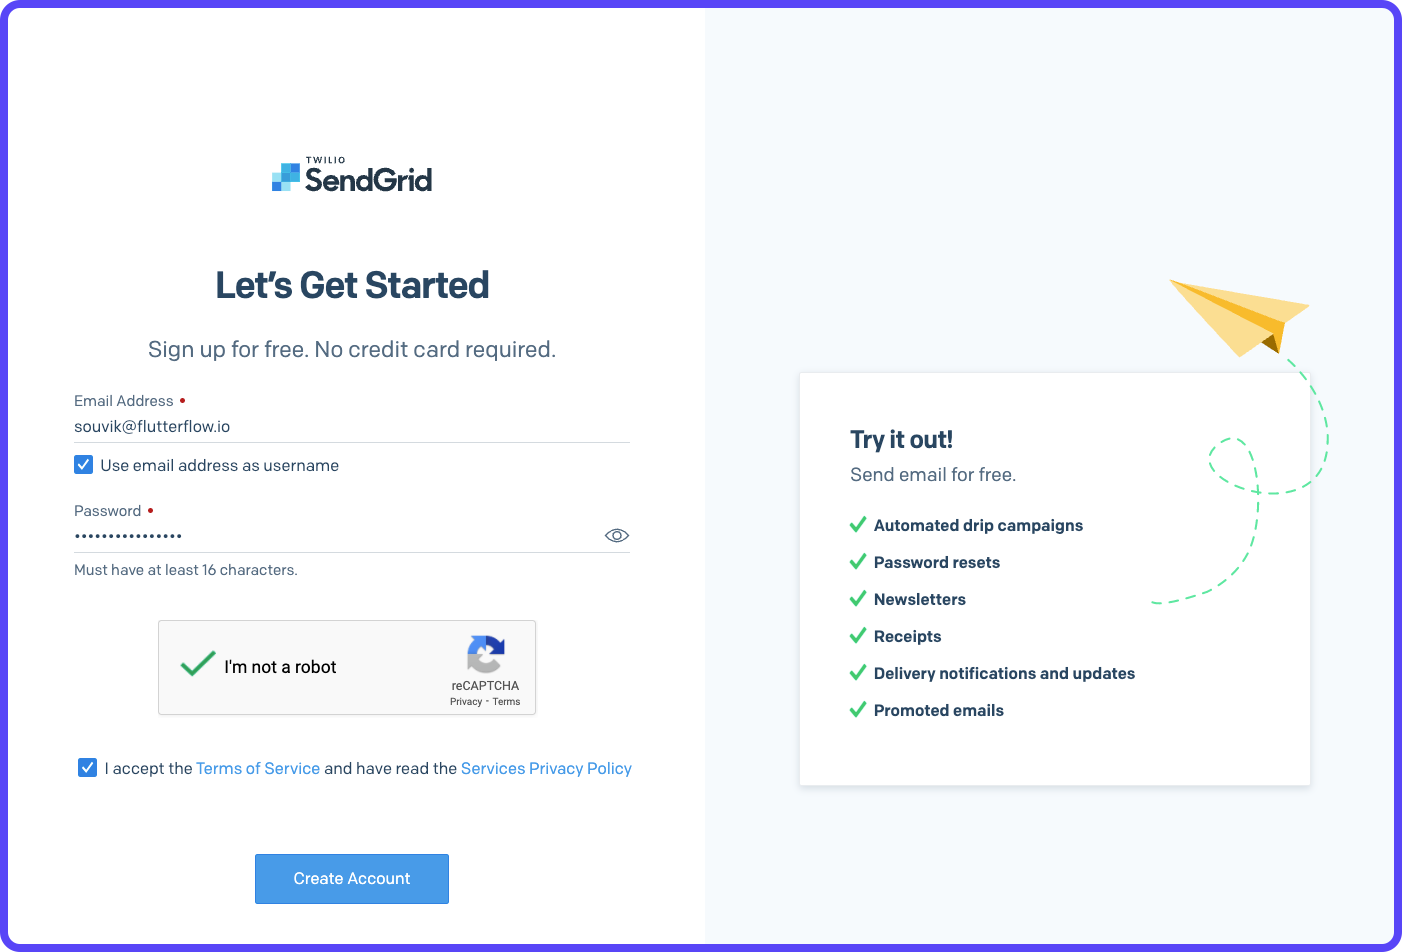
1. Create a SendGrid account by going to this page. Fill up any necessary information required for getting access to your account.
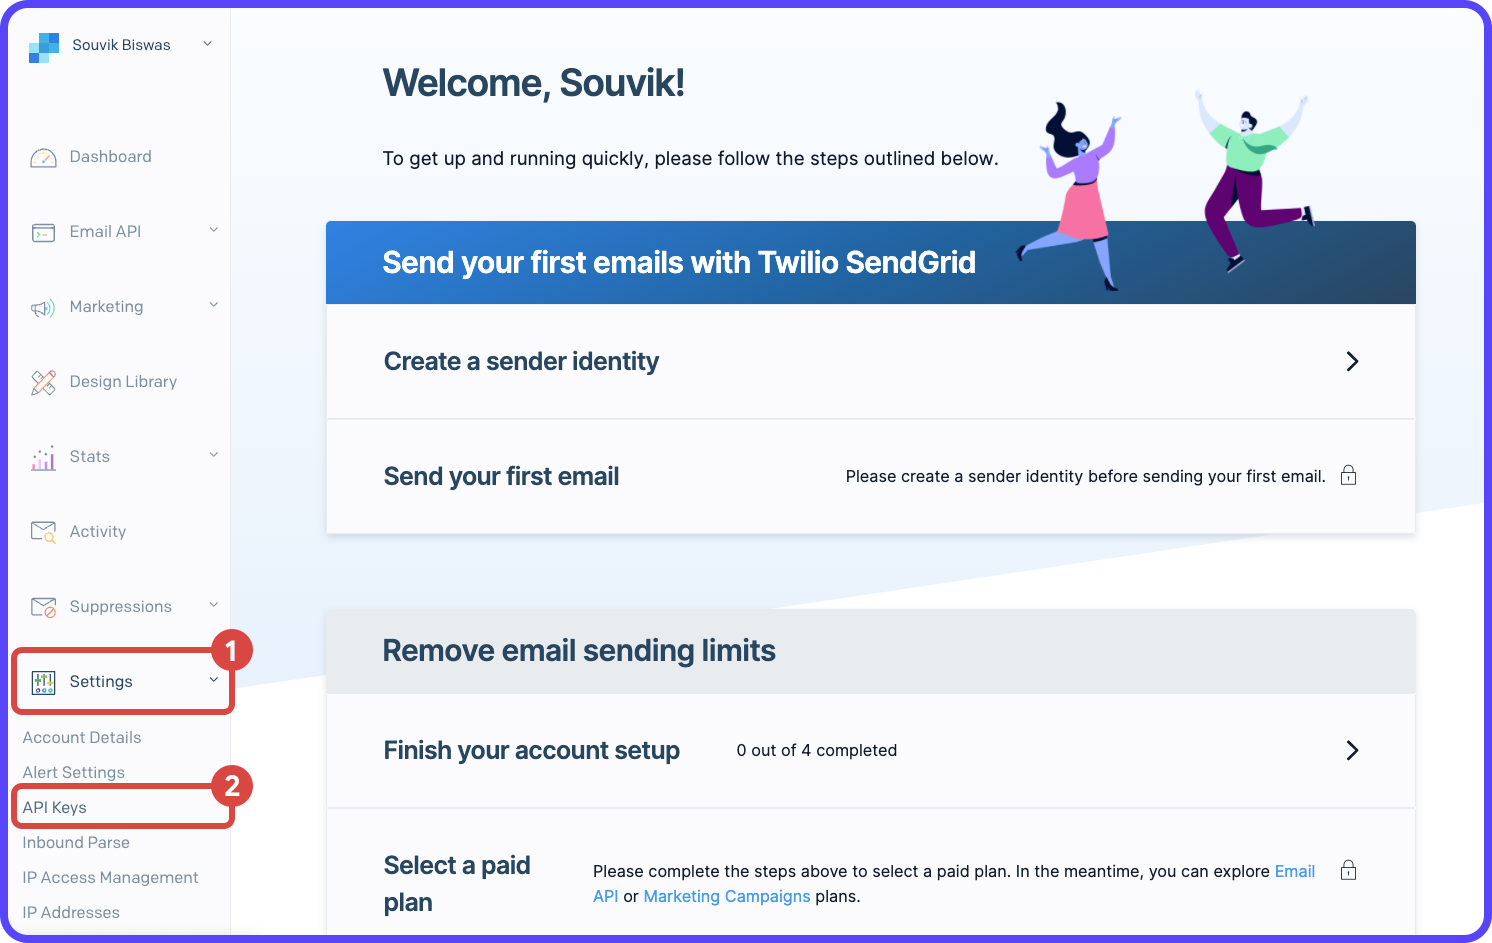
2. Once your account creation is complete, you will be navigated to the dashboard page.
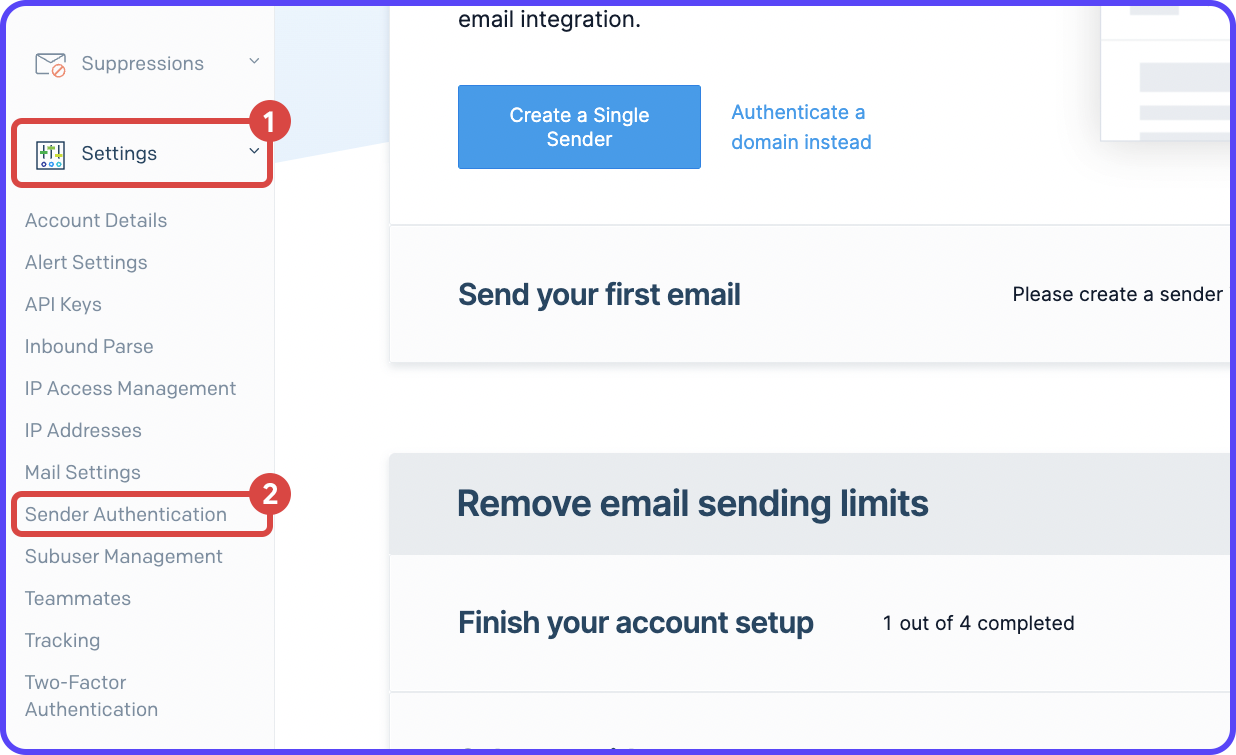
3. From the left menu, expand Settings and select API Keys.
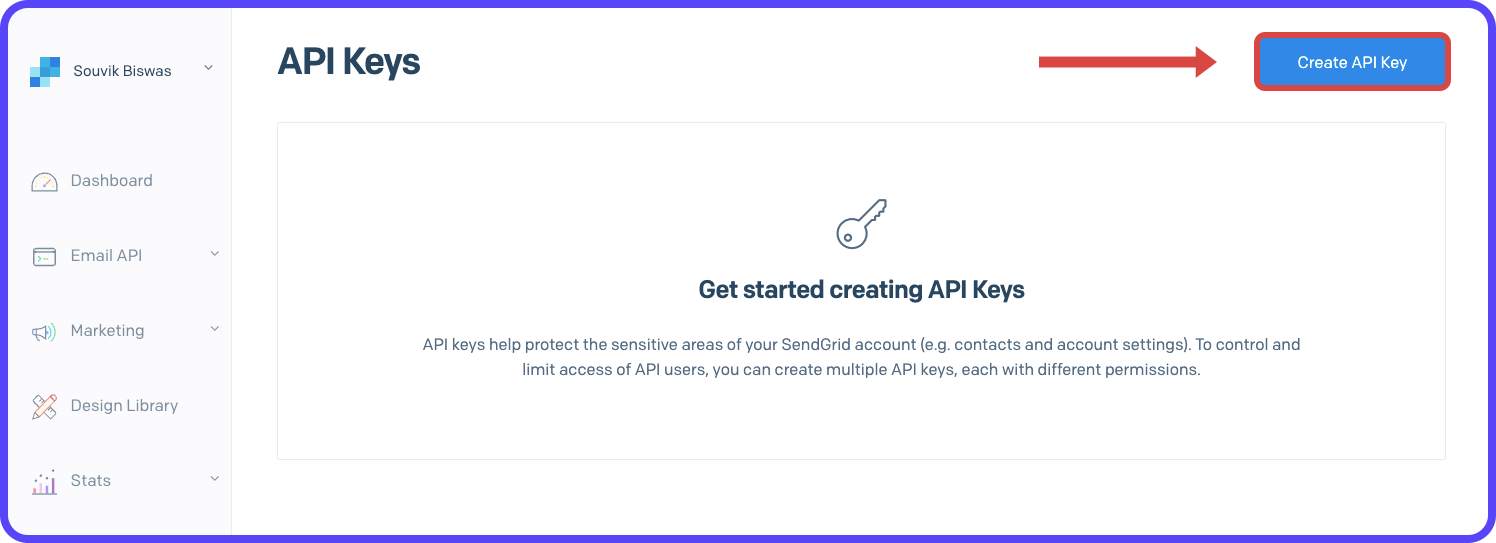
4. On the API Keys page, click Create API Key.
5. Enter an API Key Name, and select the API Key Permission as Restricted Access. Under Access Details, expand Mail Send and give Full Access to Mail Send. Click Create & View.
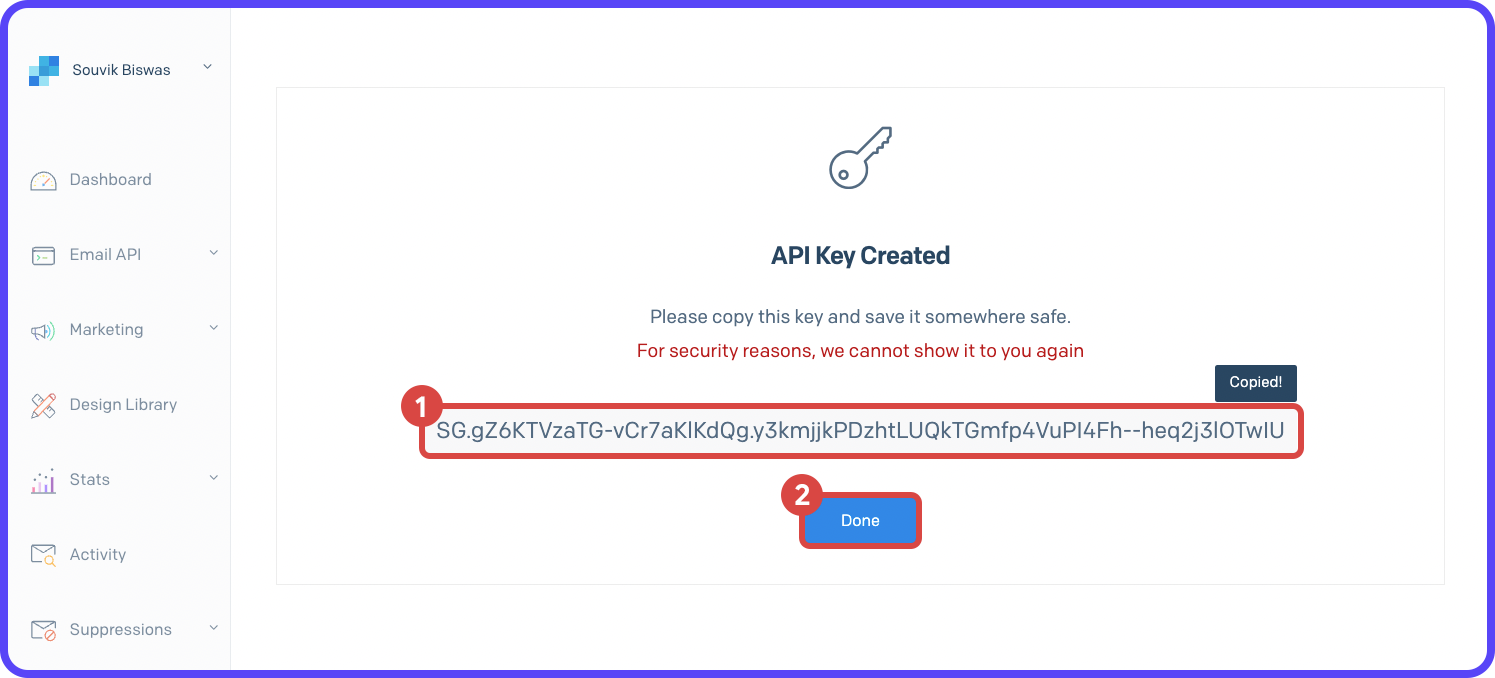
6. Click on the generated API Key to copy it and store it in a secure place. Click Done.
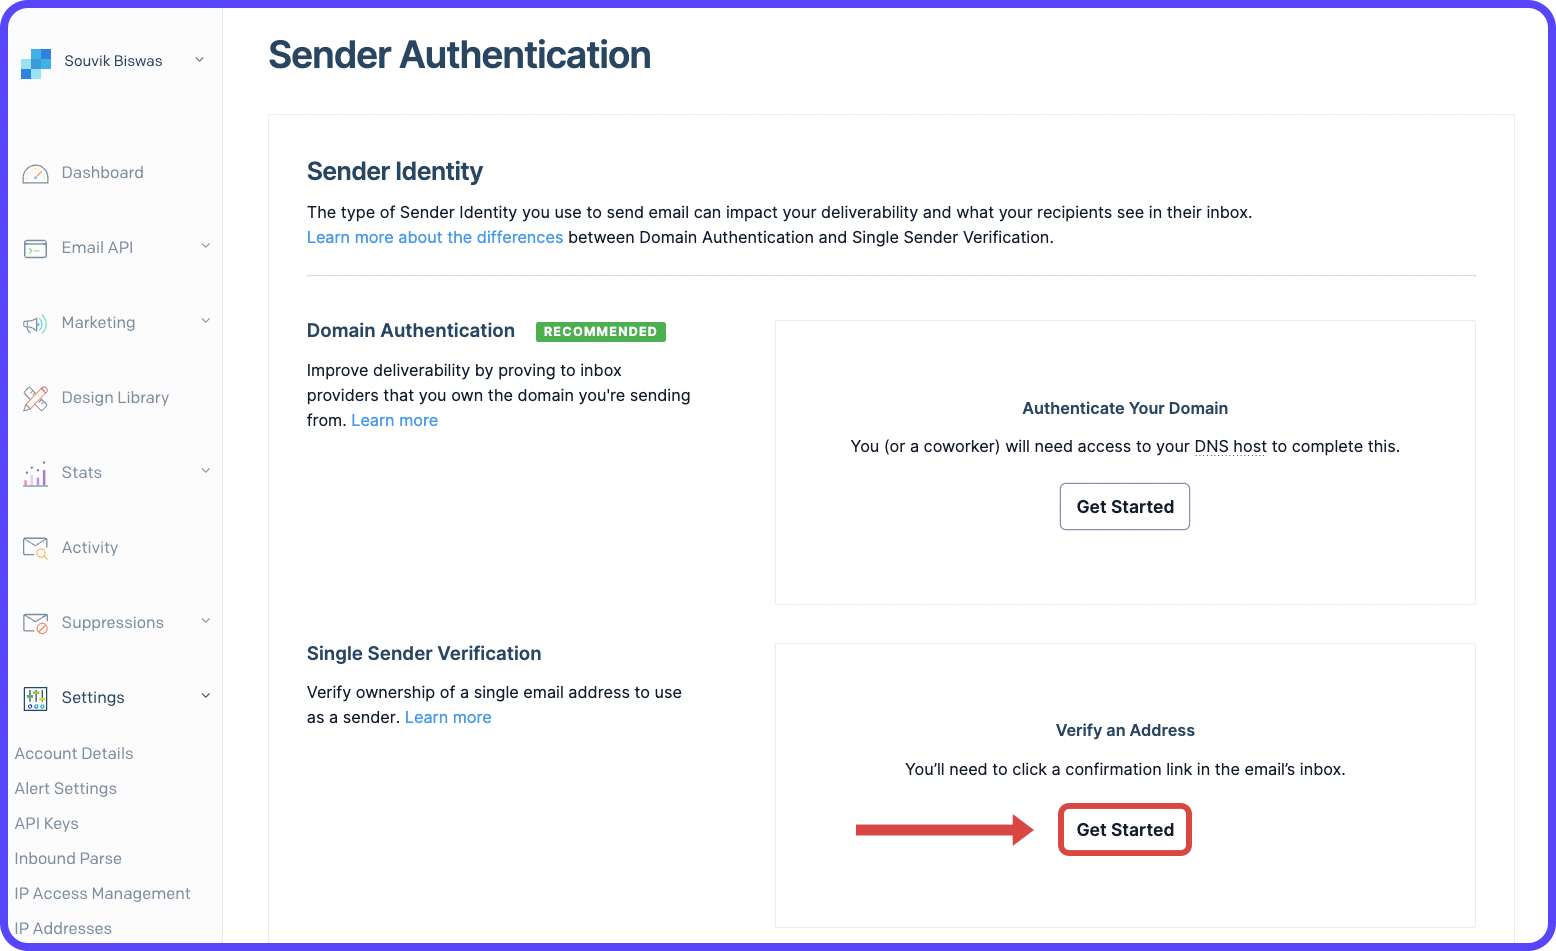
There's one more thing that you need to configure, Sender Authentication. It is required before you can start sending any emails.
There are two methods; you can choose either one of them:
- Domain Authentication (Recommended)
- Single Sender Verification
Both have their advantages. Learn more by going to their respective links. For simplicity, we'll go with the Single Sender Verification method in this article (you can shift to the Domain Authentication method anytime).
1. Go to Settings > Sender Authentication.
2. On the Sender Authentication page, click Get Started beside Single Sender Verification.
3. Fill in the required sender details. The email you enter in the From Email Address field will be used to send emails to your users. Click Create.
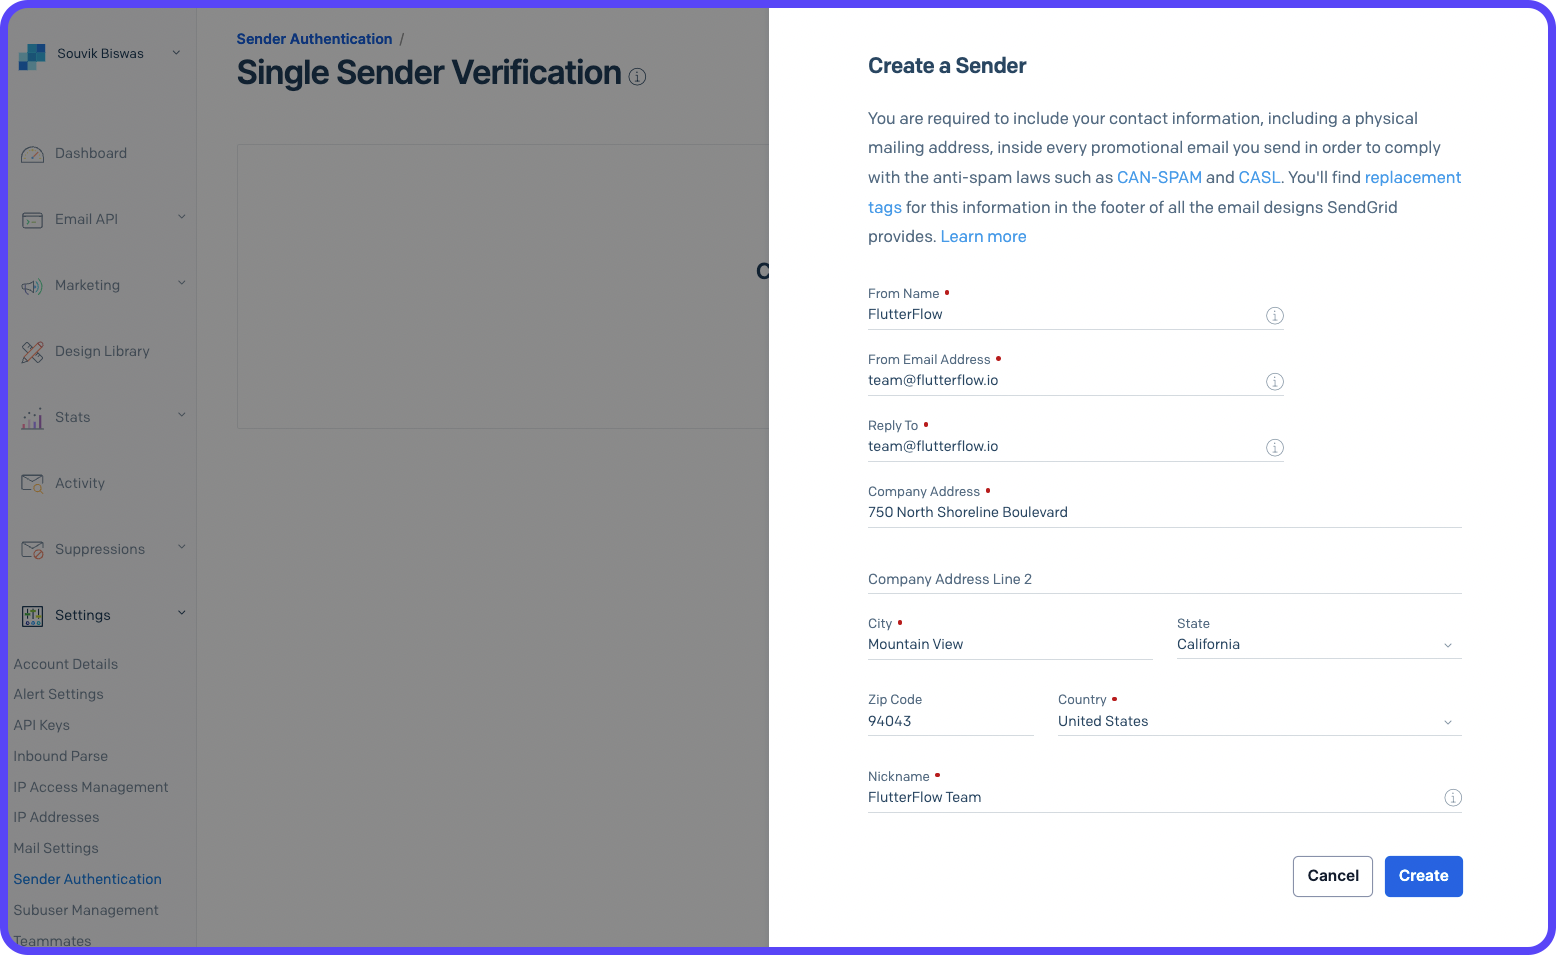
You will receive a verification email on the email address you used as the From Address. Once you verify that, you are ready to start sending emails.
Create email sending UI
Let's create a basic user interface inside FlutterFlow for sending an email. It will just consist of two screens:
- SendEmailPage: A form to accept the essential information to be used in the email and a button to trigger the sending process.
- EmailSentPage: Users will be navigated to this page once an email is sent successfully. It will just consist of a Text widget.
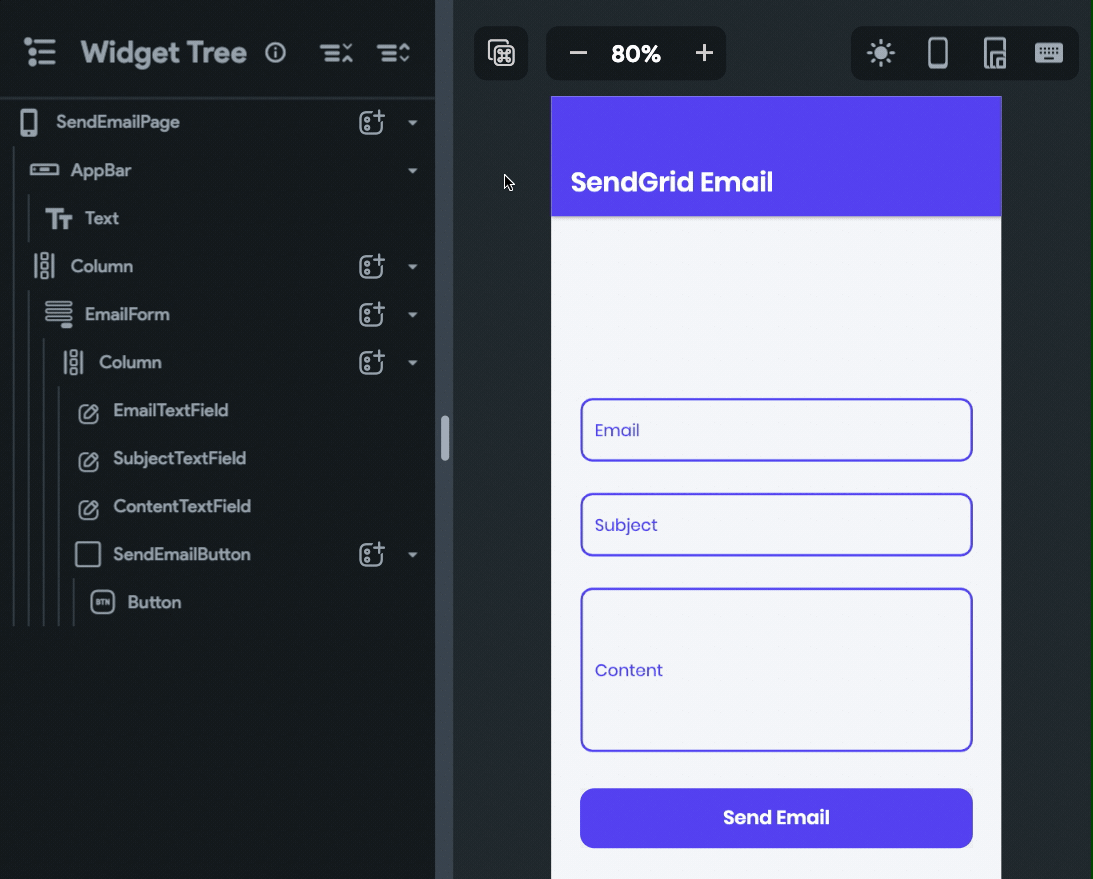
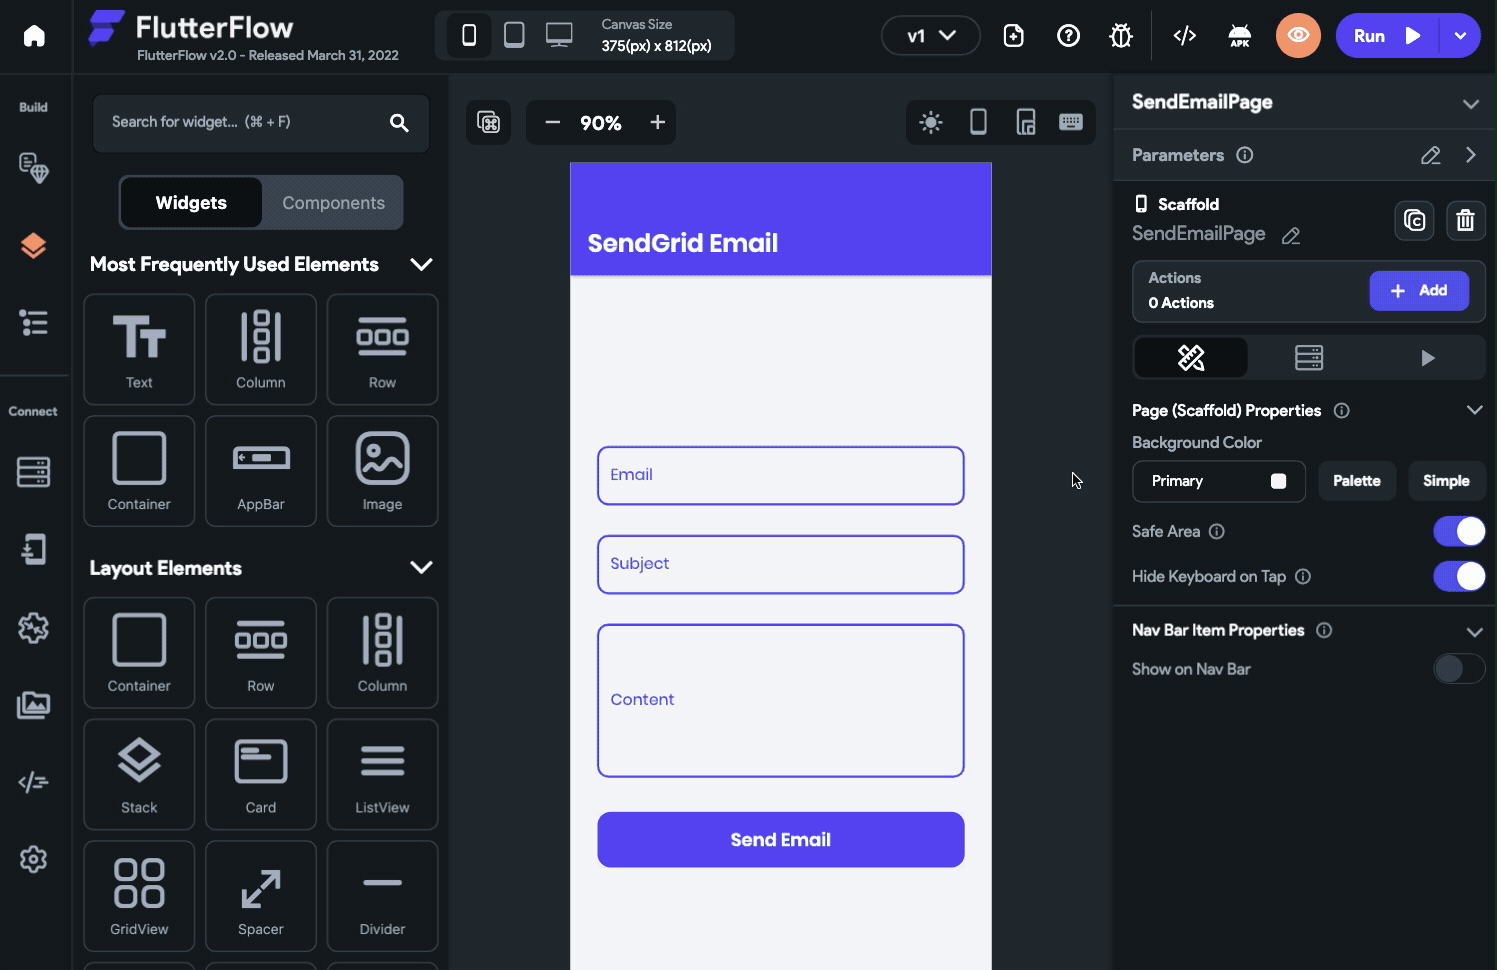
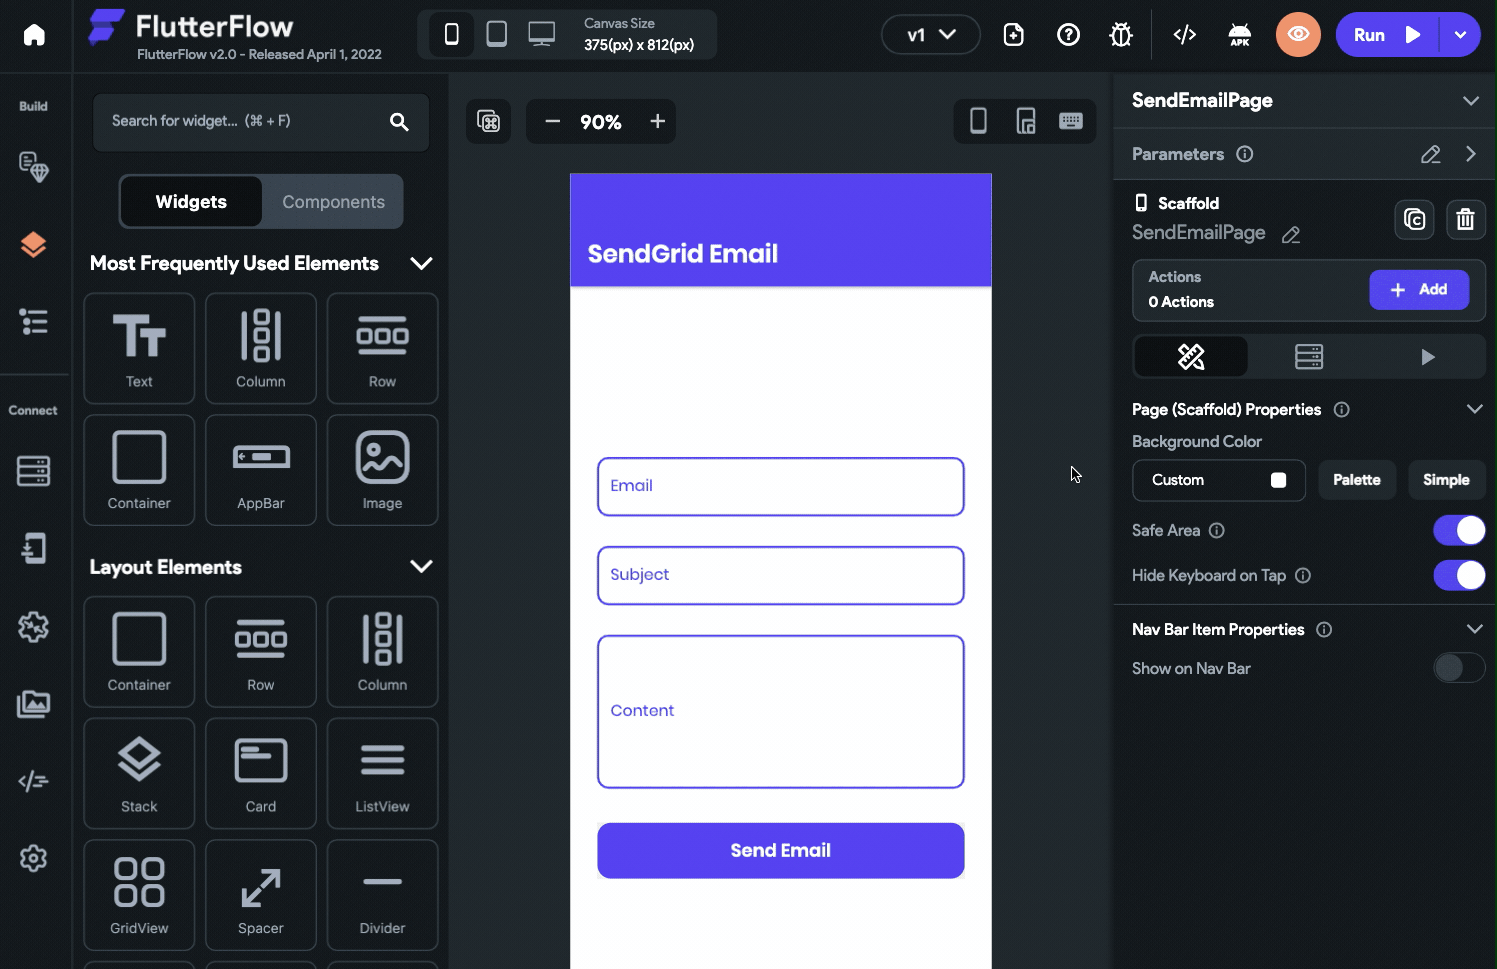
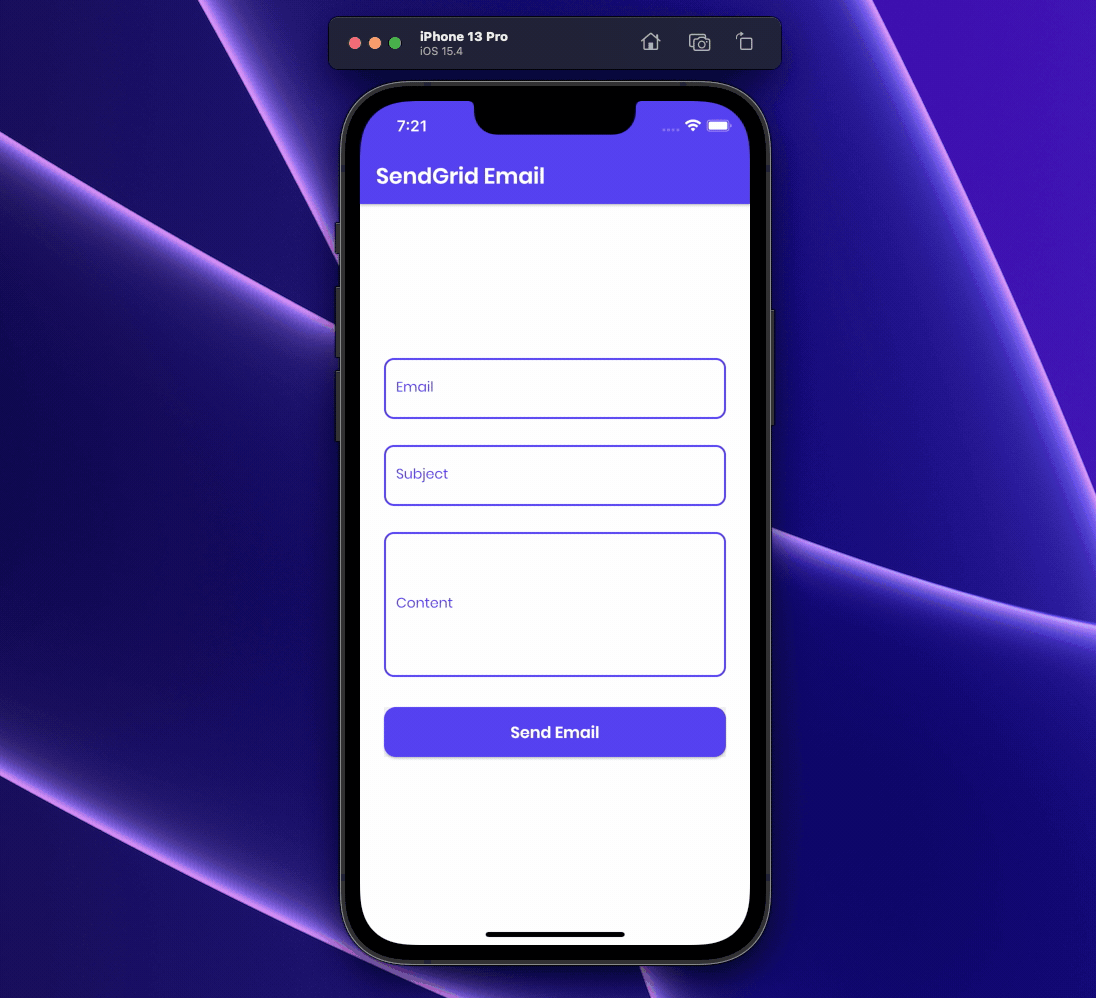
Send Email Page
This page consists of a From widget. Inside, there are three TextField widgets for accepting the user inputs for email address, subject, and content of the email, respectively. A Button widget is also present to trigger the API Call for sending an email that we'll be defining in the next section.
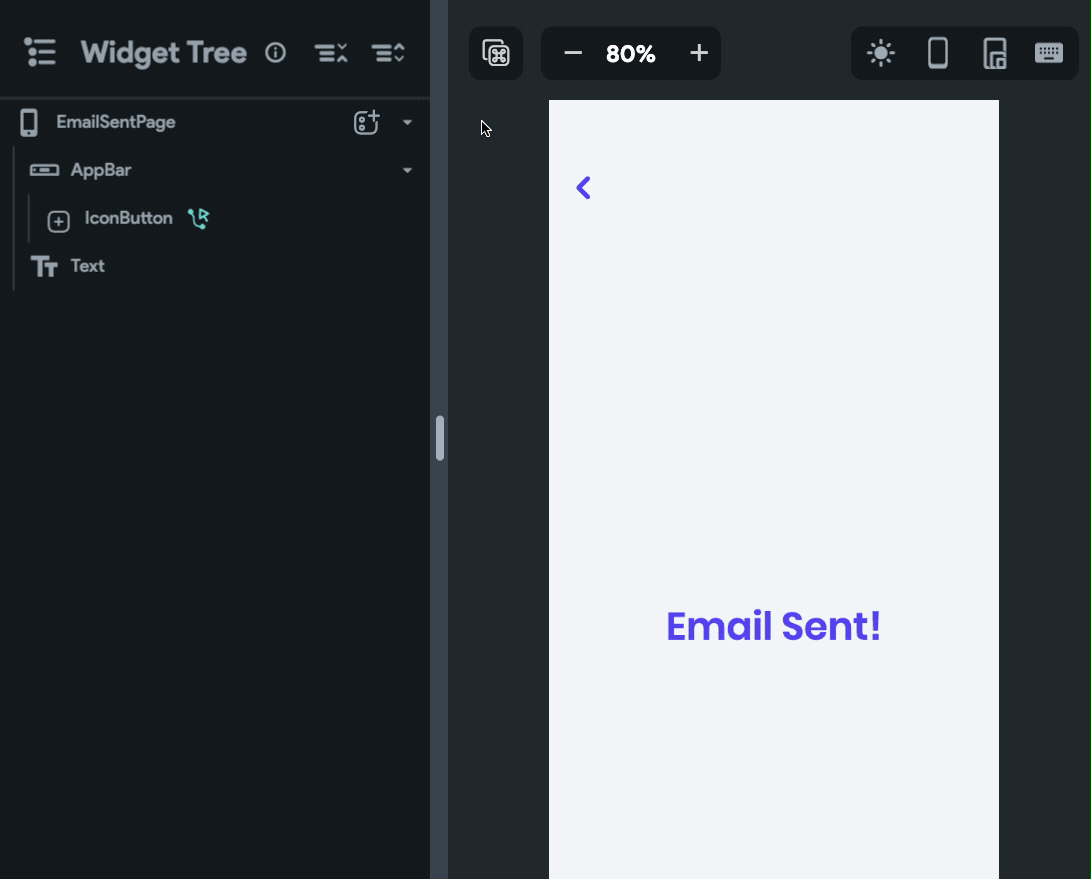
Email Sent Page
Once an email is successfully sent, we'll navigate the user to this page. It's a simple page containing just a centered Text widget and an IconButton in the app to navigate back to the previous page.
Define an API Call
Let's define the API call required for sending emails.
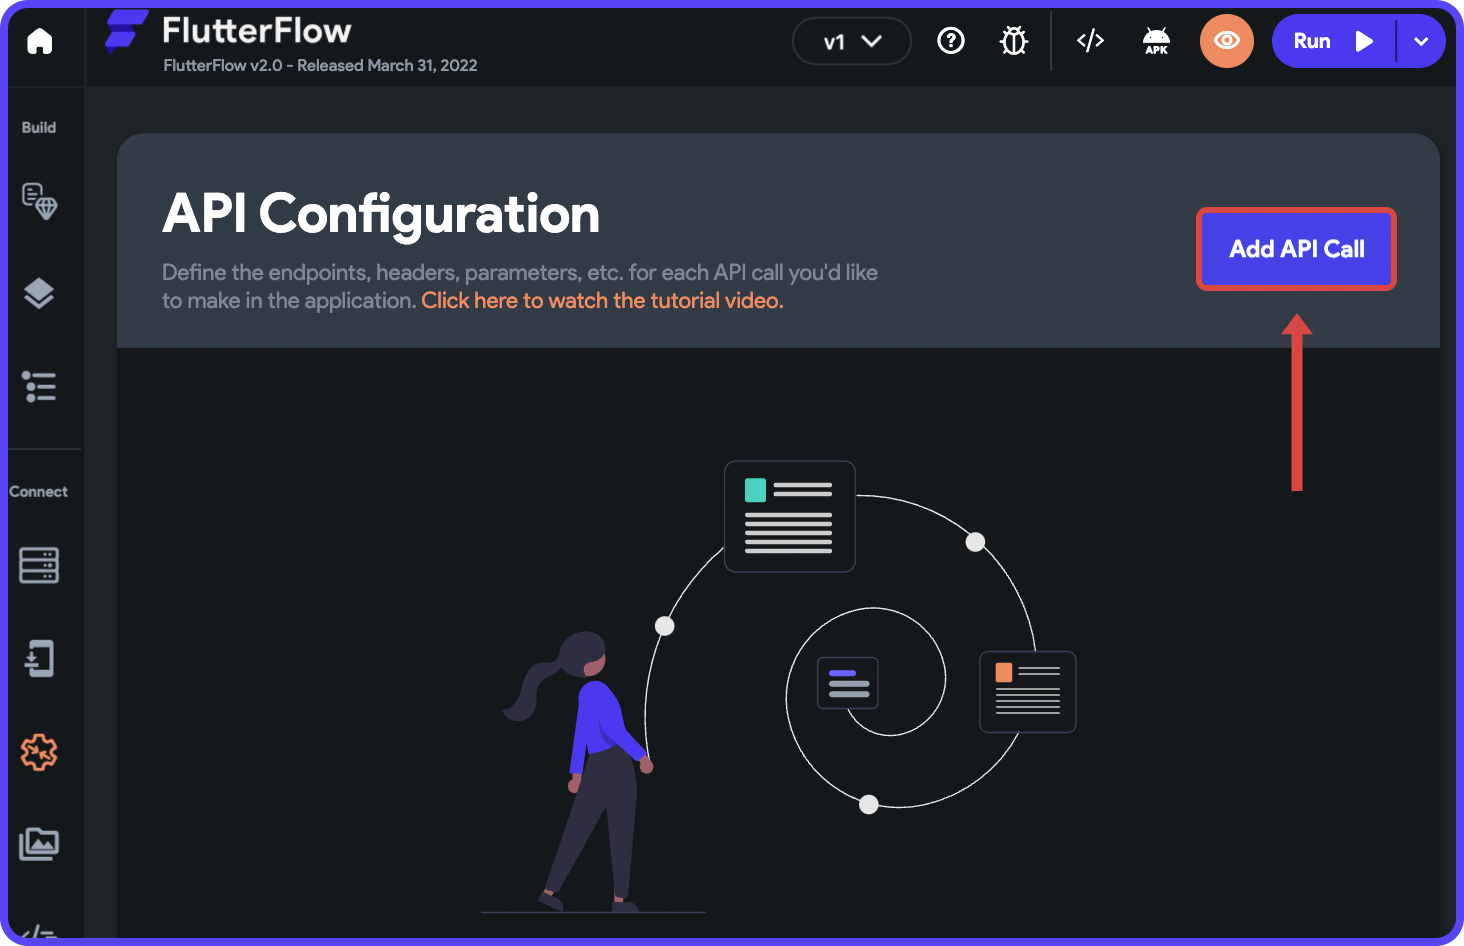
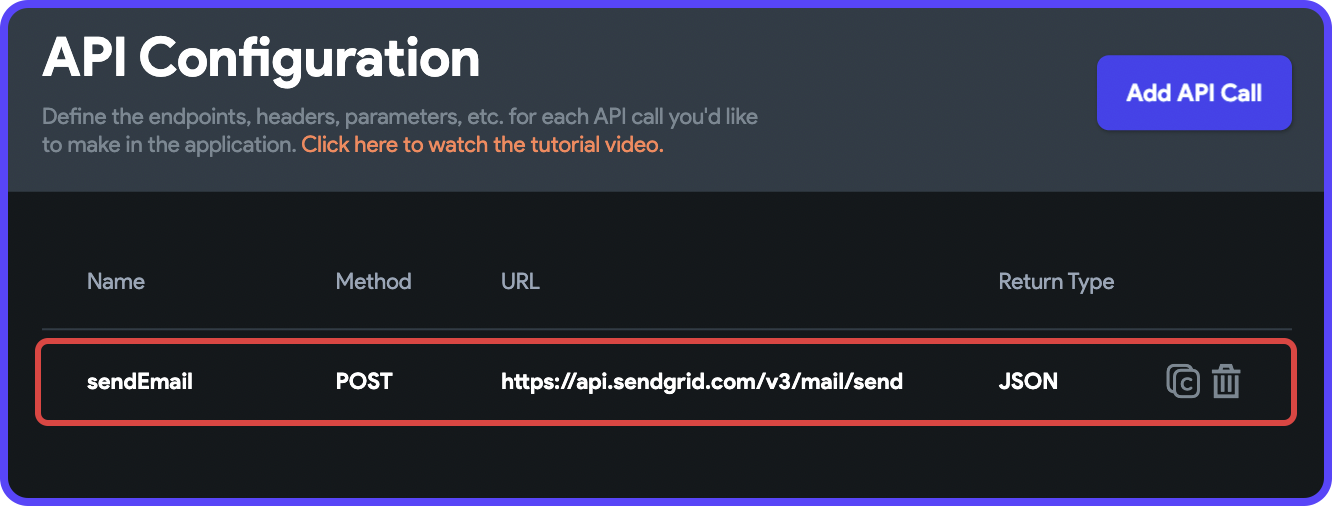
1. Go to API Calls from the left menu.

2. On the API Calls page, click Add API Call.
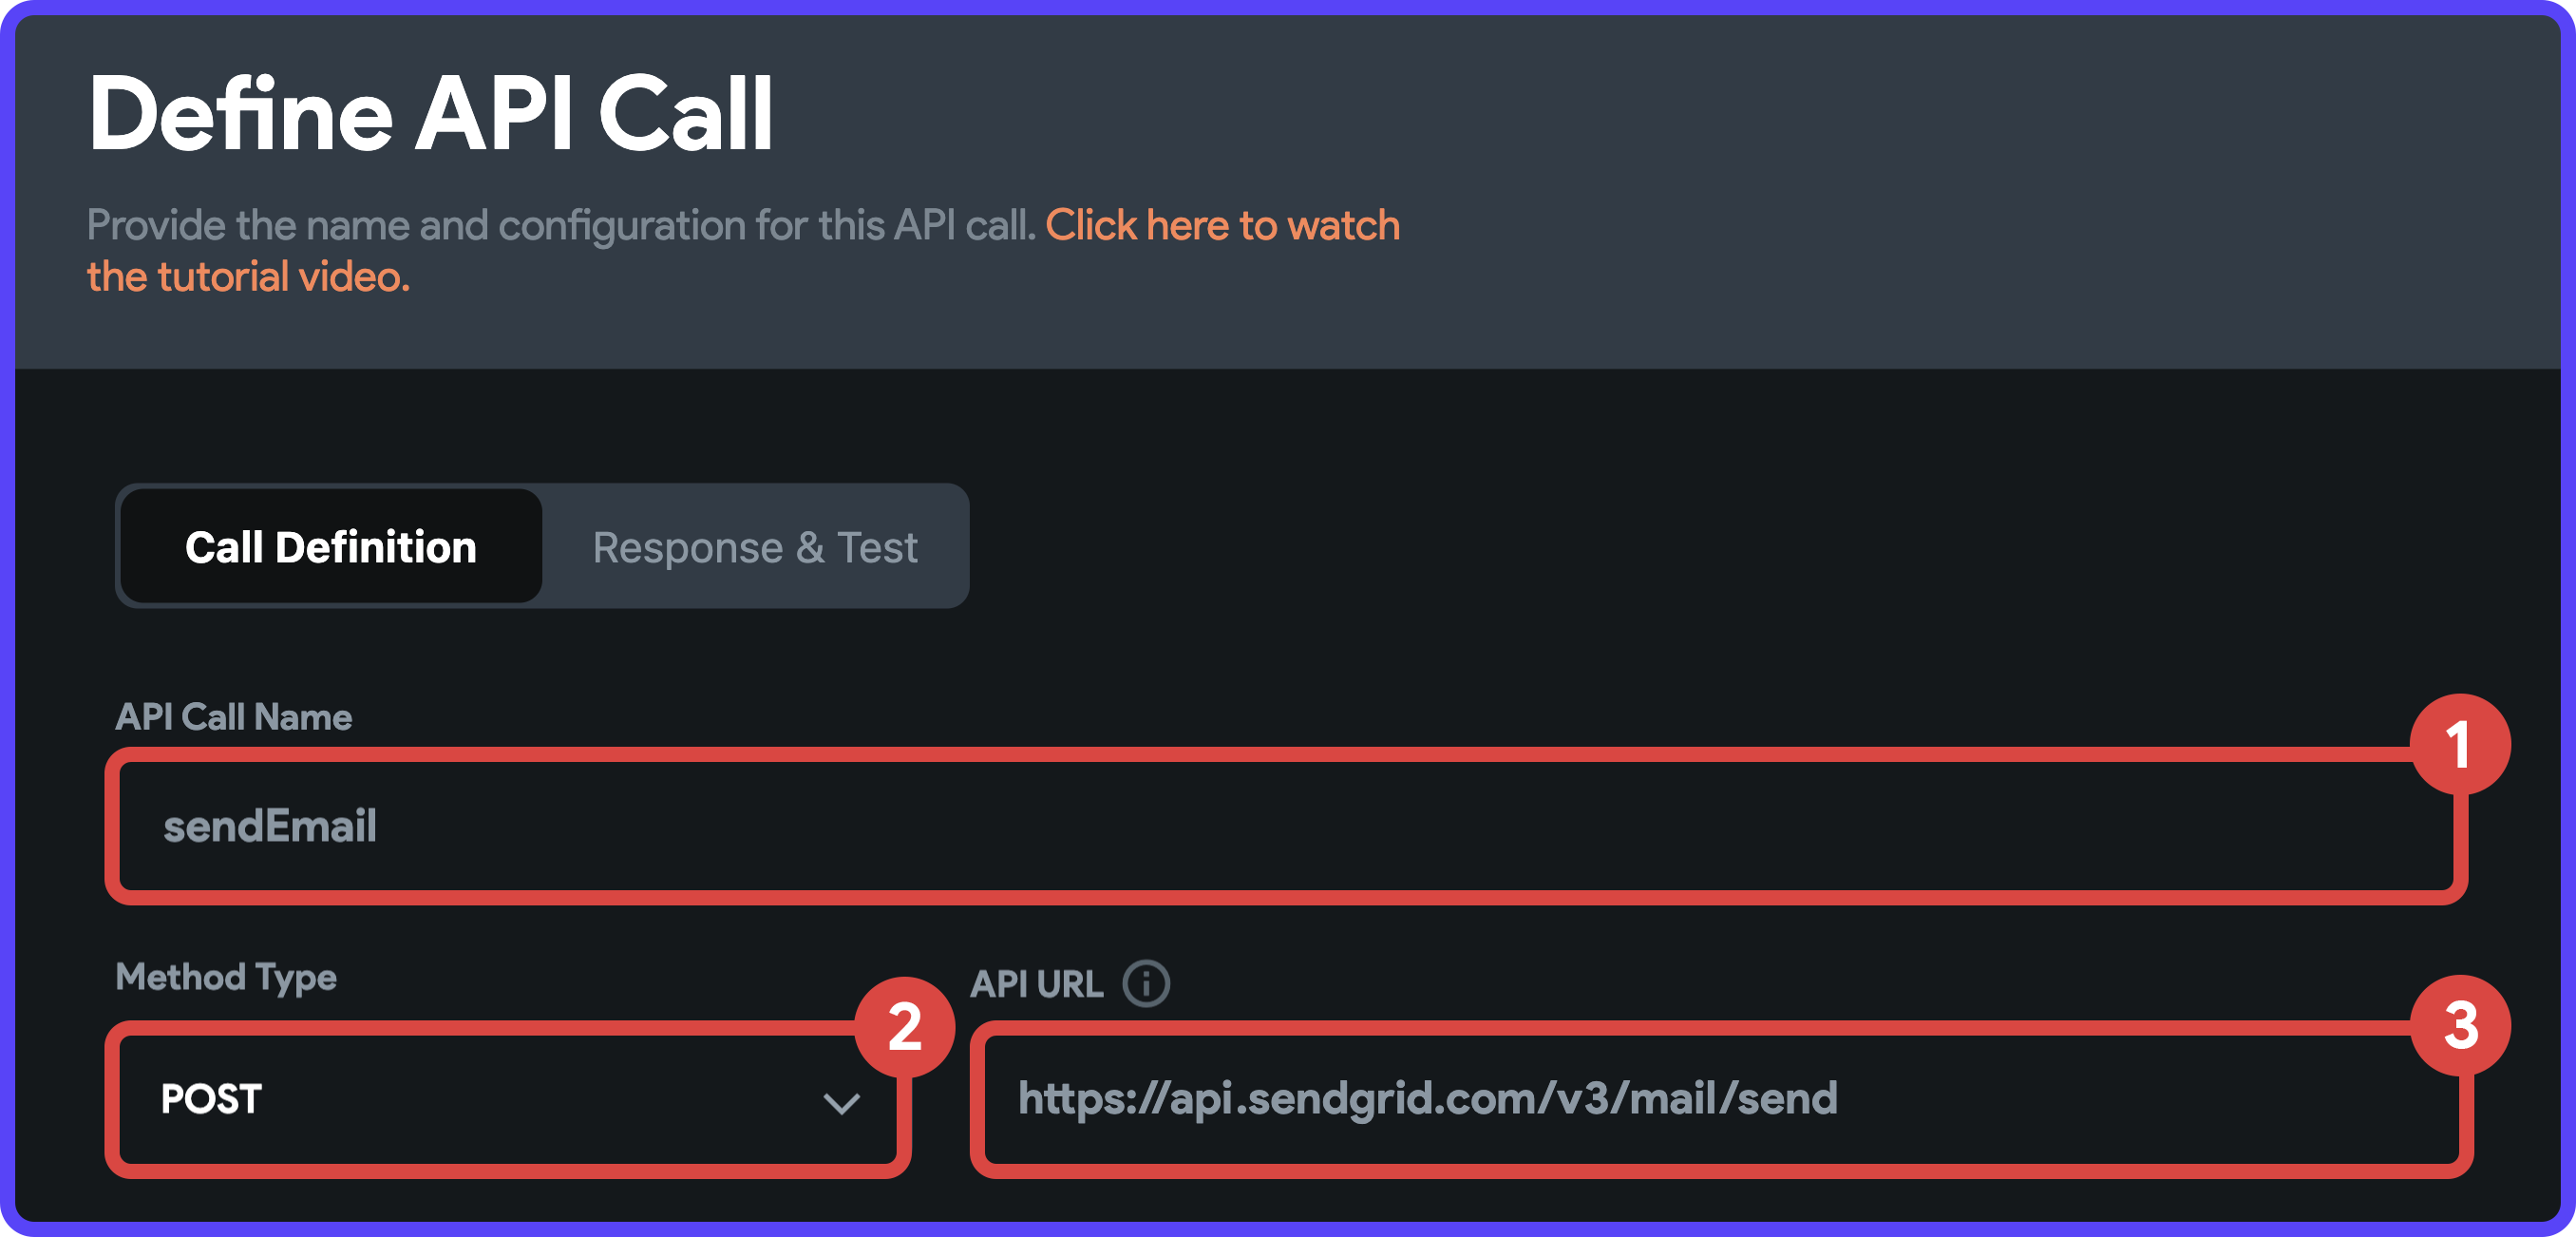
3. Enter an API Call Name (e.g. sendEmail), select the Method Type as POST, and enter the API URL as https://api.sendgrid.com/v3/mail/send.
4. Add a single Header by clicking on the Add Header button:
- Name: Authorization
- Value: Bearer <api_key>.
Use the SendGrid API Key that you generated earlier.
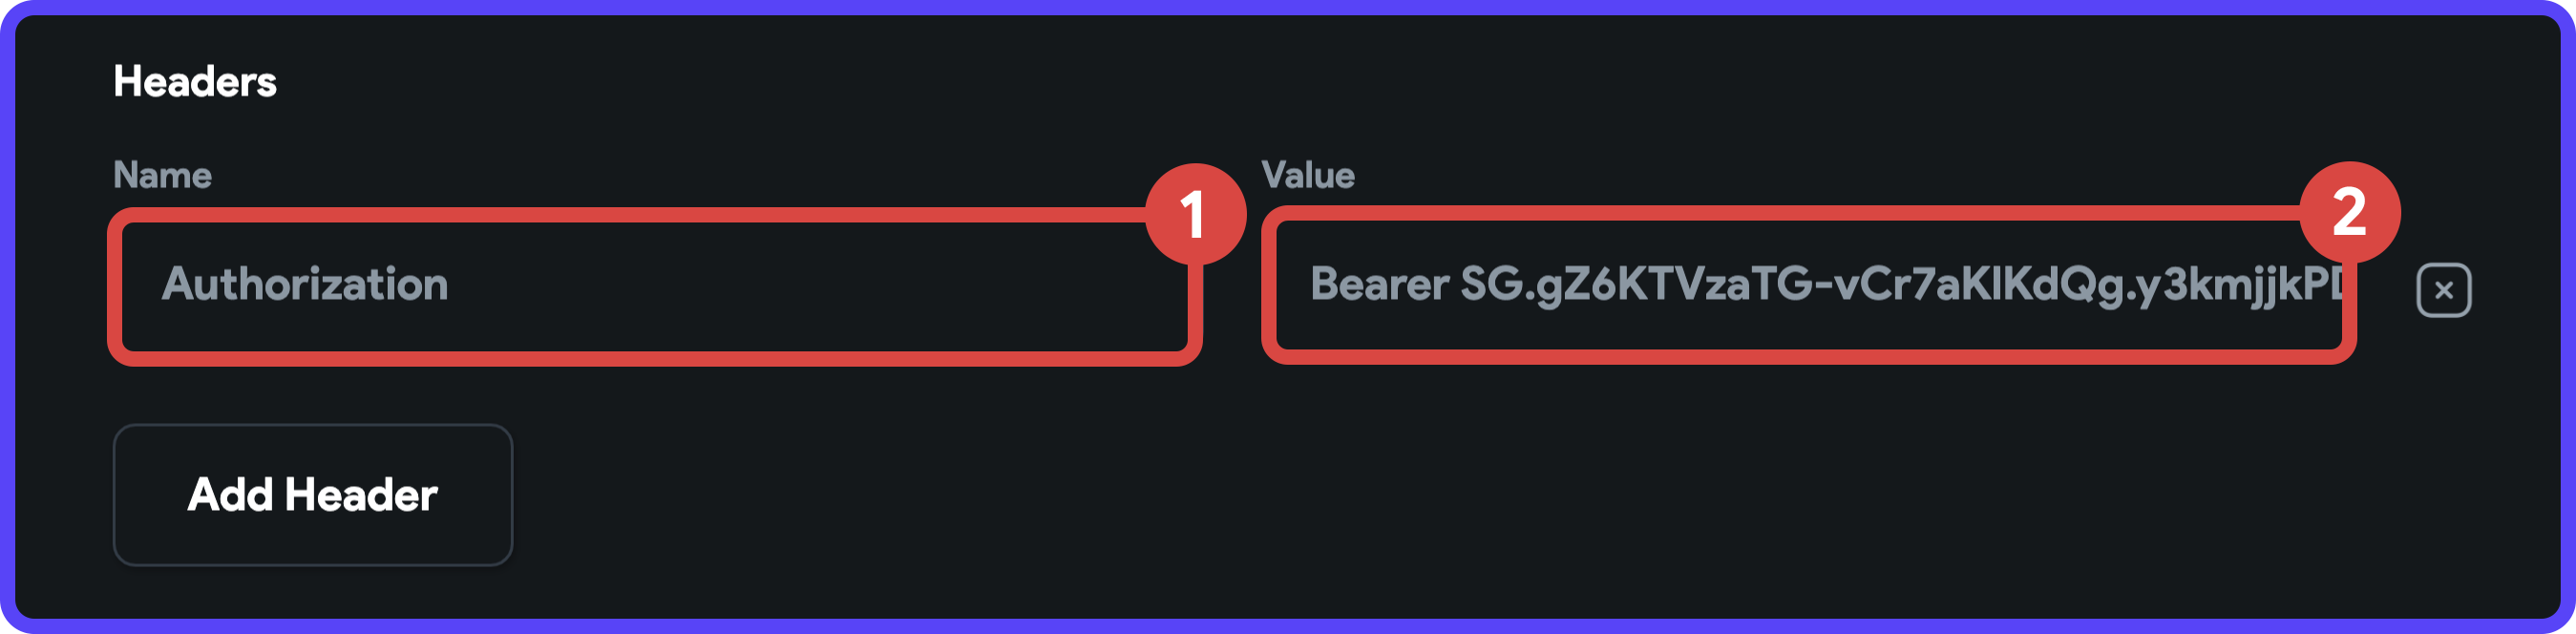
Bearer [sendGridApiKey]
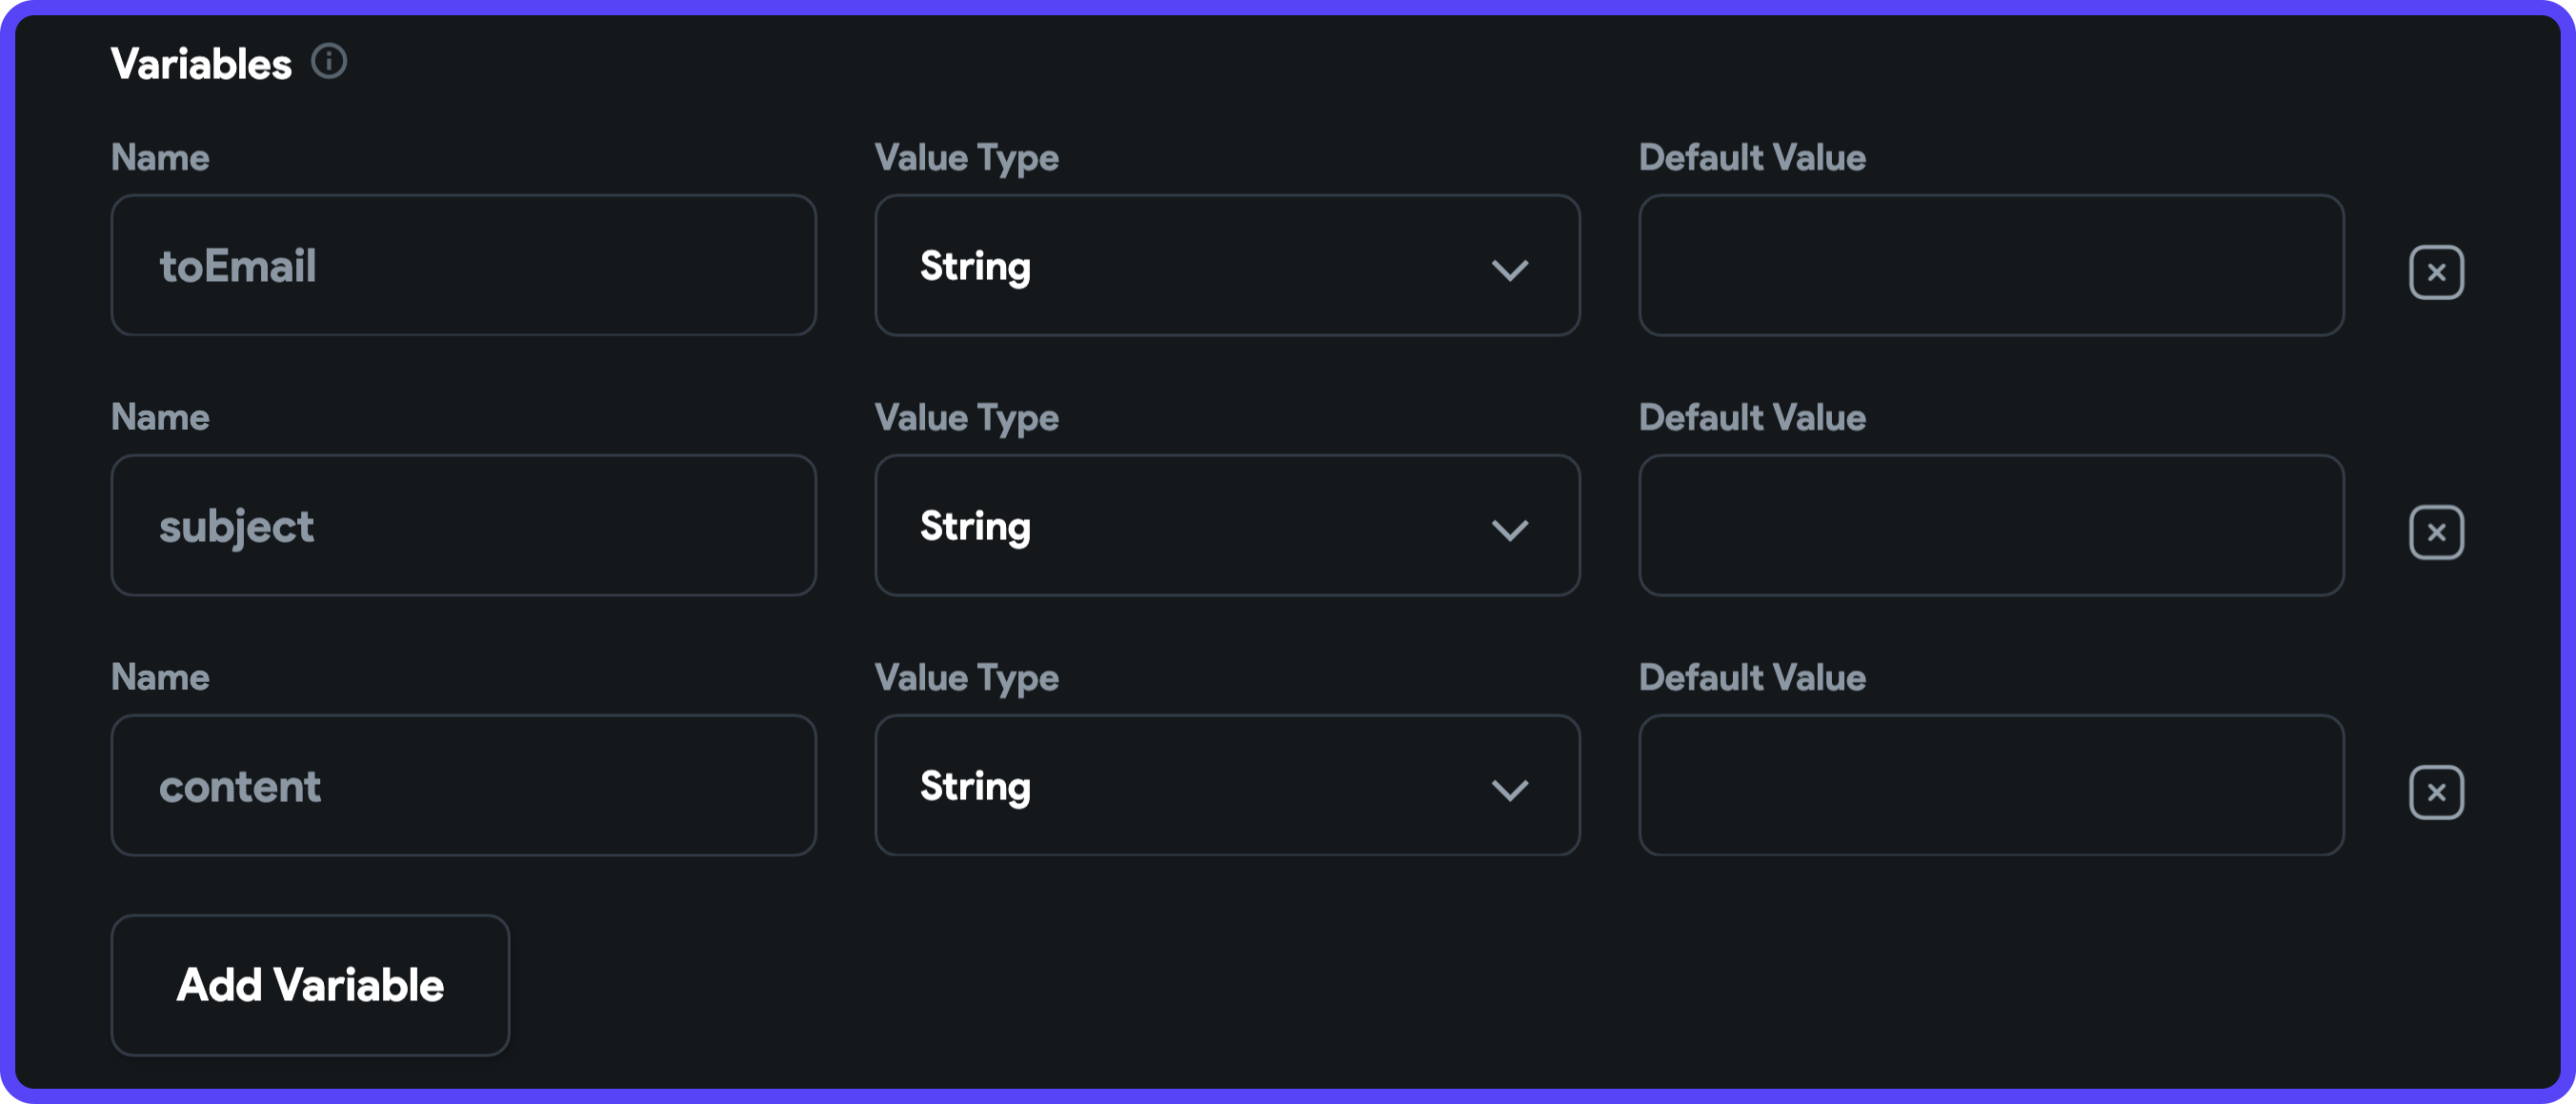
5. Add the following variables by clicking on the Add Variable button:
- Name: toEmail, Value Type: String
- Name: subject, Value Type: String
- Name: content, Value Type: String
You can add more variables if you require.
6. Choose the Body as JSON and add the following to the field:
{
  "personalizations": [
    {
      "to": [
        {
          "email": "<enter_to_email>"
        }
      ],
      "subject": "<enter_to_subject>"
    }
  ],
  "content": [
    {
      "type": "text/plain",
      "value": "<enter_content>"
    }
  ],
  "from": {
    "email": "<enter_from_email>",
    "name": "<enter_from_name>"
  },
  "reply_to": {
    "email": "<enter_reply_to_email>",
    "name": "<enter_reply_to_name>"
  }
}
7. To use the variables, you can just drag and drop them in their respective places.
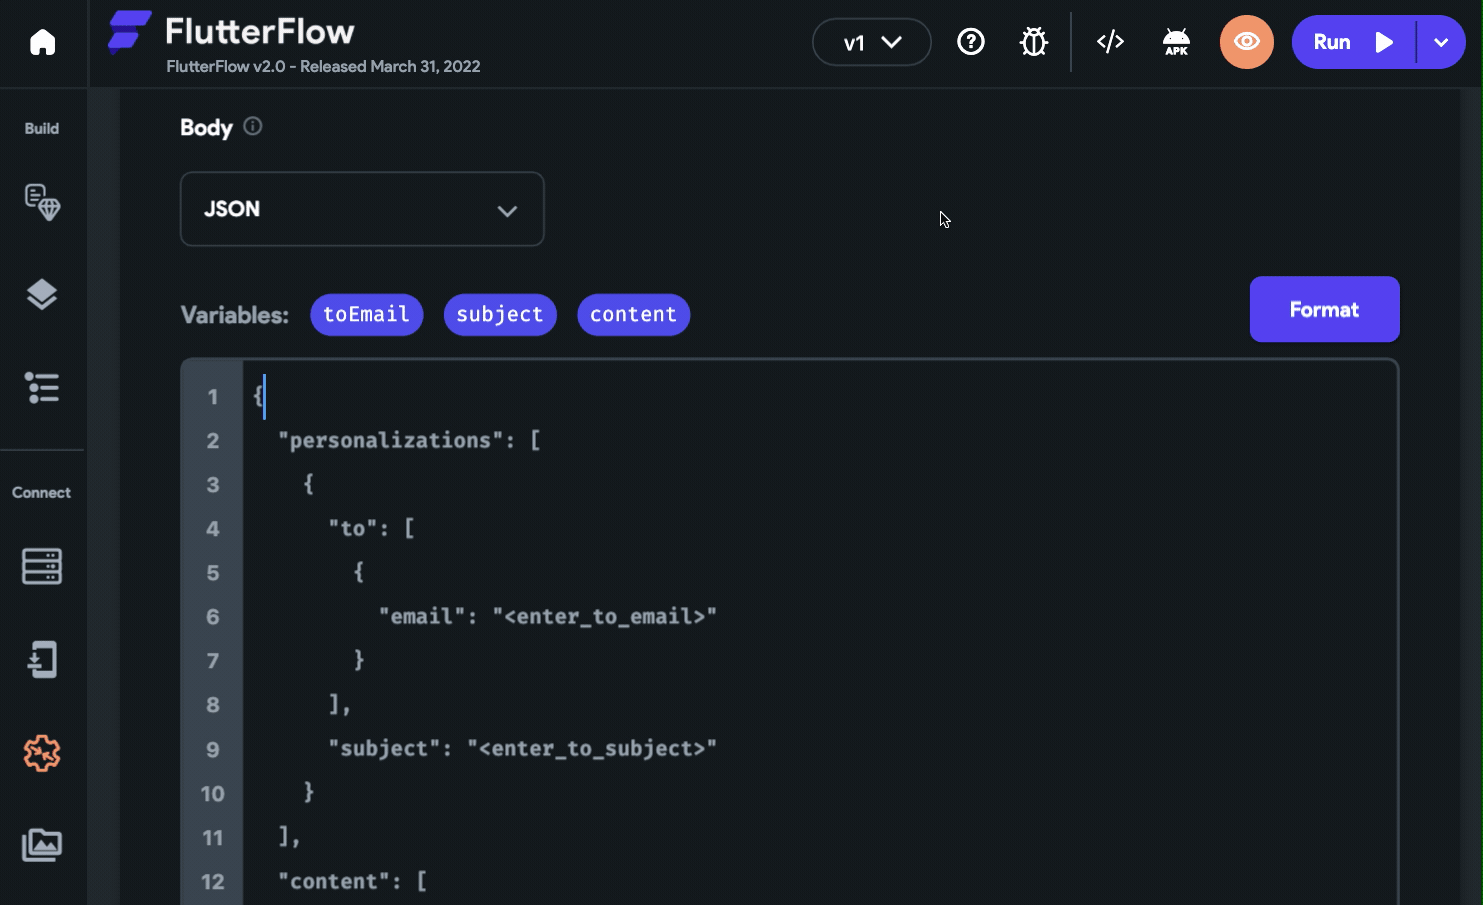
from and reply_to) with their respective values.8. Click Add Call.
Trigger the API Call
You are now ready to use the sendEmail API call. To trigger the API call, you need to define an Action.
TextField widgets. This will make it easier to identify the TextField(s) while passing them as parameters.Follow the steps below:
- Go to the SendEmailPage and select the Button widget.
- From the Properties panel (the right menu), click + Add under the Actions section.
- Choose On Tap as the gesture among the tabs present on the top.
- Click + Add Action.
- Select the action as API Call (present under Backend/Database).
- Choose the Call Name as sendEmail.
- Click + Parameter to define the values for the parameters that you had specified while adding the API call:
- Select a Parameter Name from the dropdown list.
- Choose the Value Source as From Variable.
- Select Source as the Widget State.
- Under Available Options, select the respective TextField name.
- Repeat steps 1 to 4 for defining the rest of the parameters.
- Once you have defined all the required parameters, click Close.
We want the user to be navigated to the EmailSentPage if the email is sent successfully. Otherwise, show a SnackBar with an error message.
You'll need to add a Condition after the API Call Action. Follow the steps below:
- Select the same Button widget.
- From the Properties panel, click Edit under the Actions section.
- Make sure the On Tap gesture is selected, select the API Call action, and add the Output Variable Name as
emailSentResponse. - Click on the "+" button below the API Call action tile, and select Add Conditional.
- Select the Source as Action Outputs, from Available Options select emailSentResponse, and under the Response Options choose Succeeded.
- Under TRUE condition, click "+" button, and select Add Action. Select the Action as Navigate To and choose the EmailSentPage from the dropdown menu.
- Under FALSE condition, click "+" button, and select Add Action. Select the Action as Show Snack Bar and enter the value as "Failed to send email".
- Click Close.
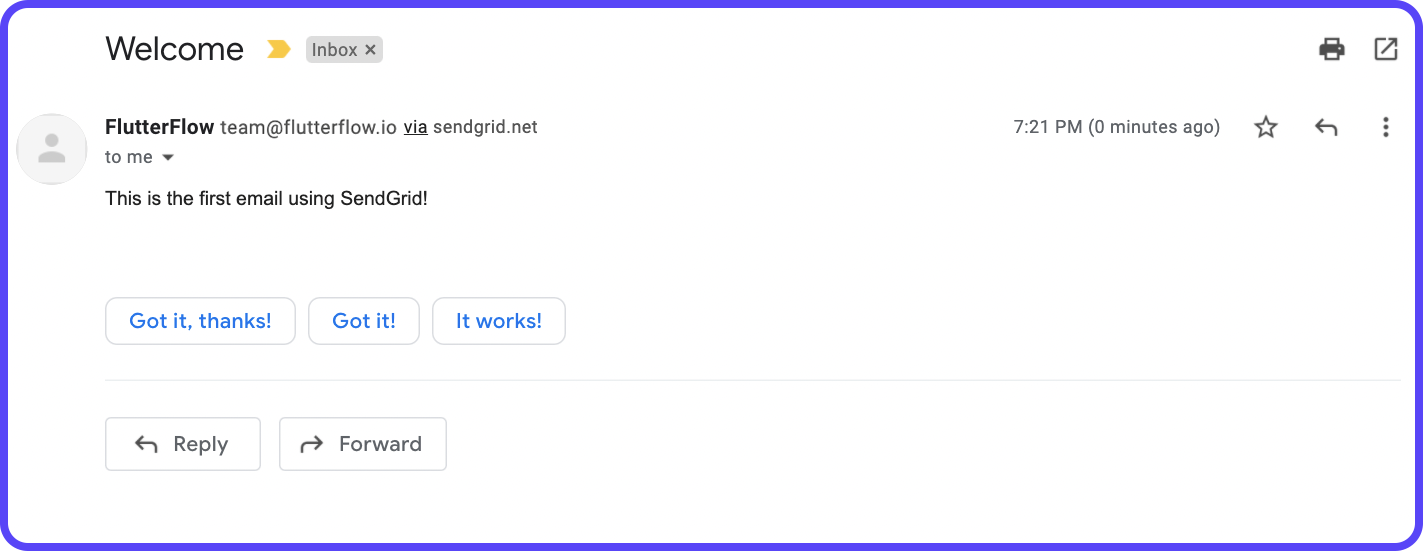
Email sending in action
You can try out whether the email sending is working correctly by running the app either using the Run mode (recommended) or by downloading the project and running it on your system.
If you check the email inbox, you should see the email sent using SendGrid:
References
Check out the following pages for more information regarding the concepts used in this blog post:
