
Recently the Flutter team at Google has announced a challenge called the Flutter Puzzle Hack for a chance to win one of over $50,000 worth of prizes. To be eligible for a prize, you have to either build a solvable slide puzzle from scratch or use their sample project as the starting point and use your creativity to design an innovative version of it.
You need coding skills to participate in this challenge, right? — Not really, and this is why you are here.
In this article, we’ll demonstrate how to build a working version of the Flutter Puzzle from scratch with very minimal coding using FlutterFlow. The only code that you need to write is for the logic of the puzzle (that code is included in this post 🙂).
The final puzzle, that you'll be building throughout this article, will look like this:
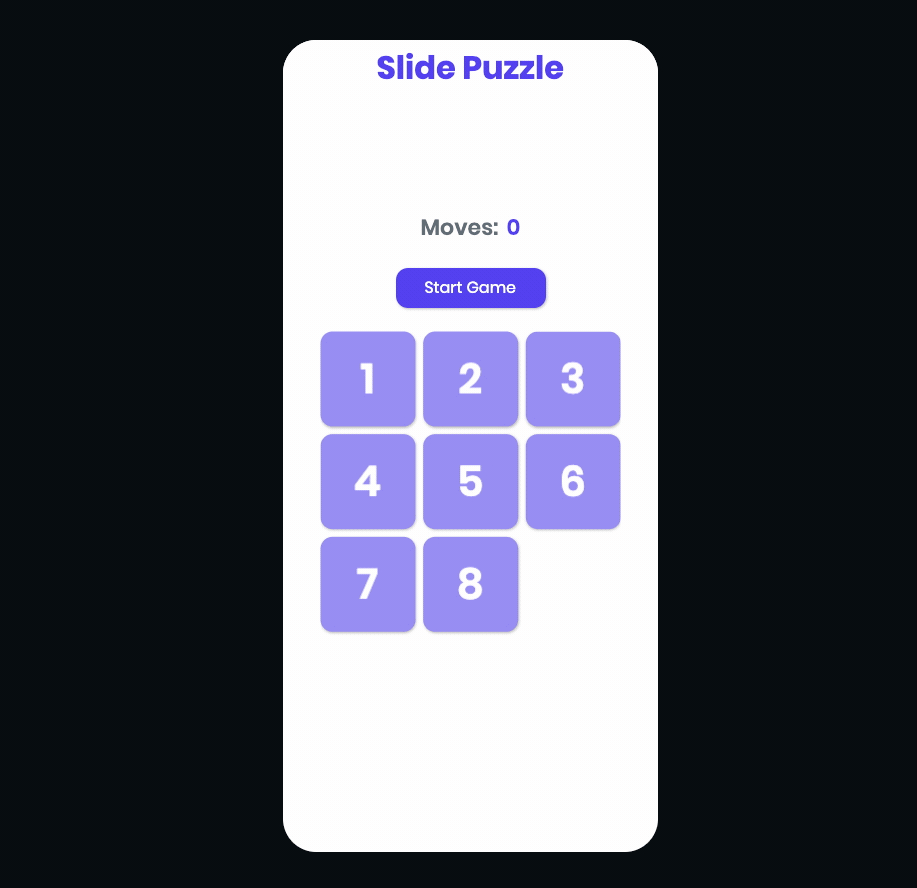
You can try out the puzzle by going to this link.
What’s FlutterFlow?

FlutterFlow is a low-code builder for native mobile applications (Android & iOS). You can the intuitive drag and drop visual builder to create your apps’ user interface but it offers a lot more:
- Easy integration with Firebase, Stripe, Algolia, GitHub, etc.
- Over 50 templates to start with
- Define Custom Functions, Custom Actions, and Custom Widgets
- AI generated code powered by OpenAI
- One click deployment using Codemagic
Behind the scenes, code is generated using the open source framework called Flutter powered by Google, so the app you build is totally eligible for the Flutter Puzzle Hack challenge.
Getting started
To start building the puzzle using FlutterFlow, you need to create a free account by going here. If you already have an account, just login.
Once you successfully login to your account, you will be navigated to the FlutterFlow Dashboard page.
Follow the steps below to create a new project:
- Click “+ Create New”.
- Enter a Project Name, for example — “SlidePuzzle”.
- Under Blank App, click “+ Create New”. You would also have an option to choose among the variety of templates offered by FlutterFlow, these cover most of the common use cases. But as this puzzle is a unique project you need to start from scratch.
- In Project Setup Step 1, you don't need to change anything just click Next Step.
- In Project Setup Step 2, set an Initial Page. Enter the page name, for example — “PuzzlePage”, and click “+ Create New” under Blank Page.
- Click Start Building.
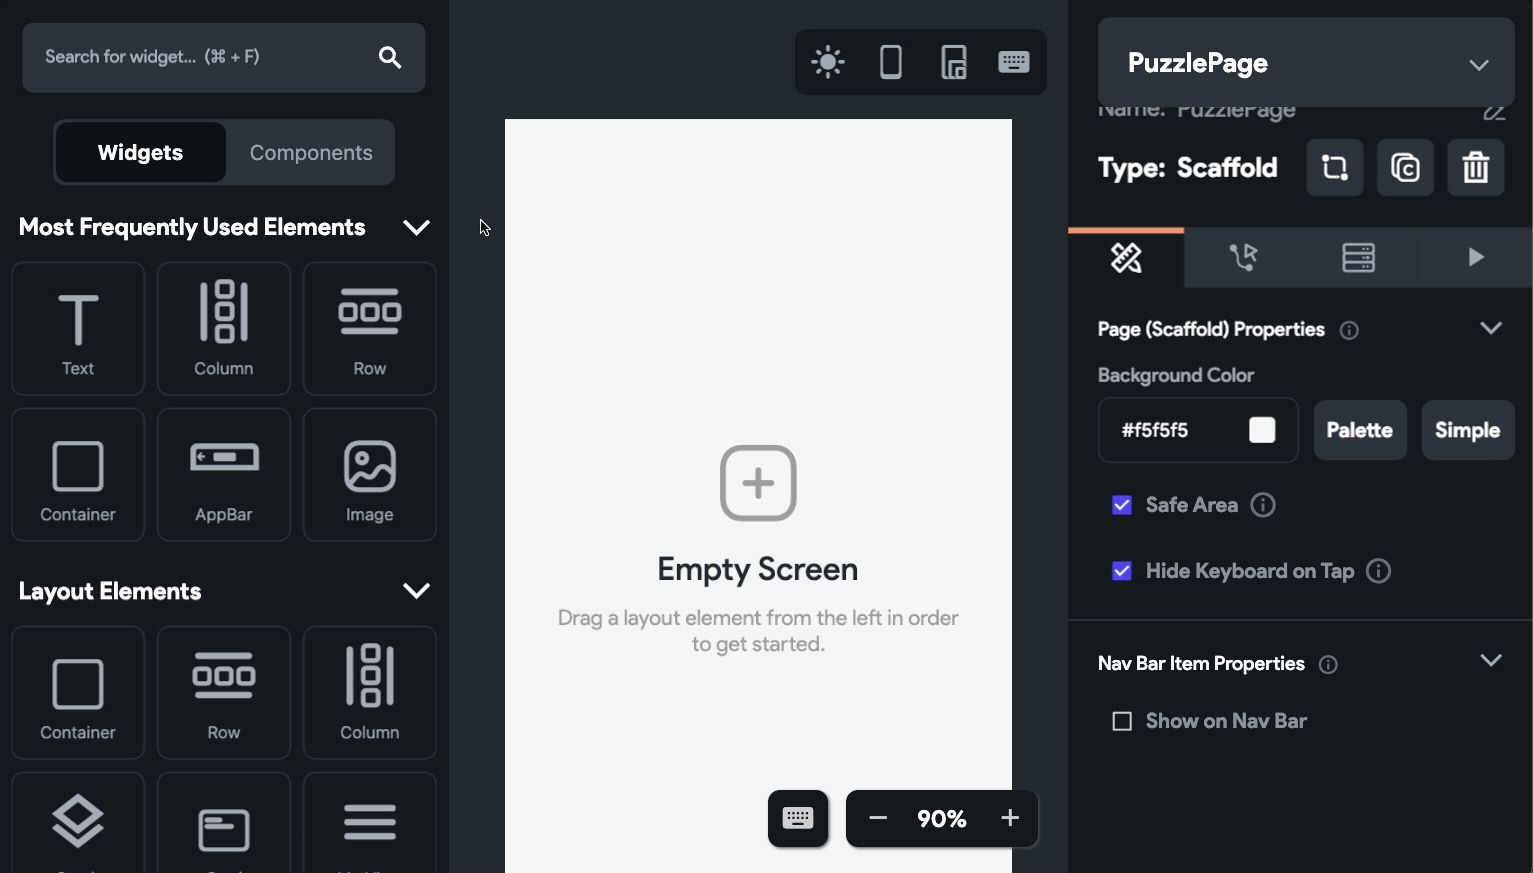
This will take you to the project editor (or, the UI Builder) where you can access the various widgets and customize your app by modifying their properties.
Building the puzzle UI
The UI Builder of FlutterFlow makes it really simple to create the user interface of any app by dragging and dropping widgets (UI elements) onto the canvas.
Canvas is the area where you would initially see “Empty Screen” written. The widgets can be found inside the Widget Panel section (present on the left) under the Widgets tab.

Let’s start by building a basic layout for an app.
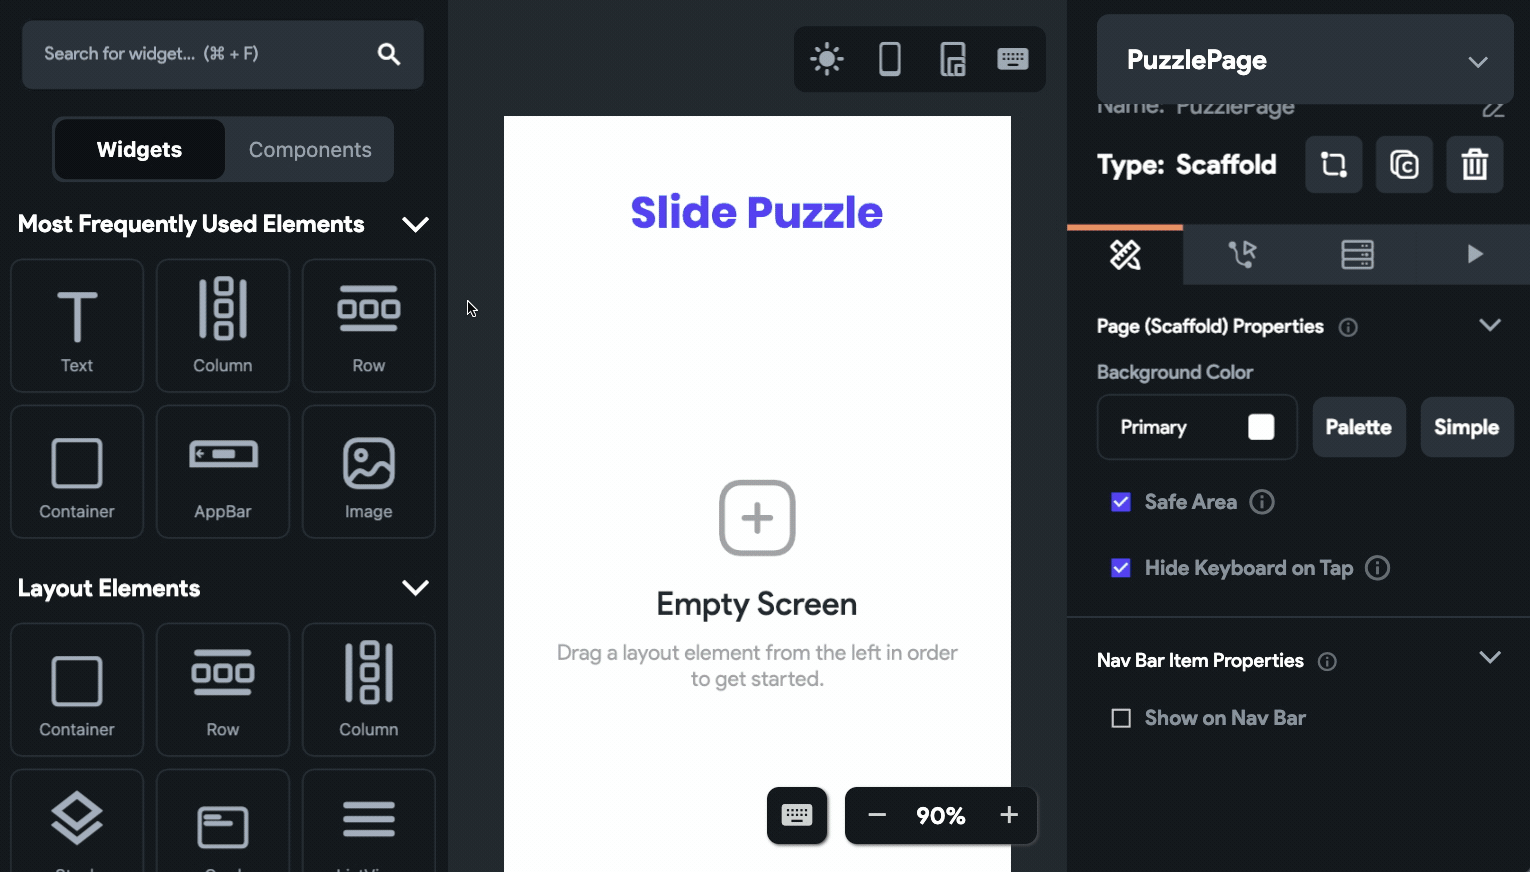
- Drag and drop an AppBar widget onto the canvas.
- Go to the Properties Panel (present on the right), customize the AppBar properties. For example, set the Background Color to PrimaryBG.
- Add a Text widget as the title inside the AppBar.
- Customize the text and properties to make it attractive. For example, change the text to “Slide Puzzle” and select Text Color as Primary.
- Set the Background Color of the page (Scaffold) to PrimaryBG as well.
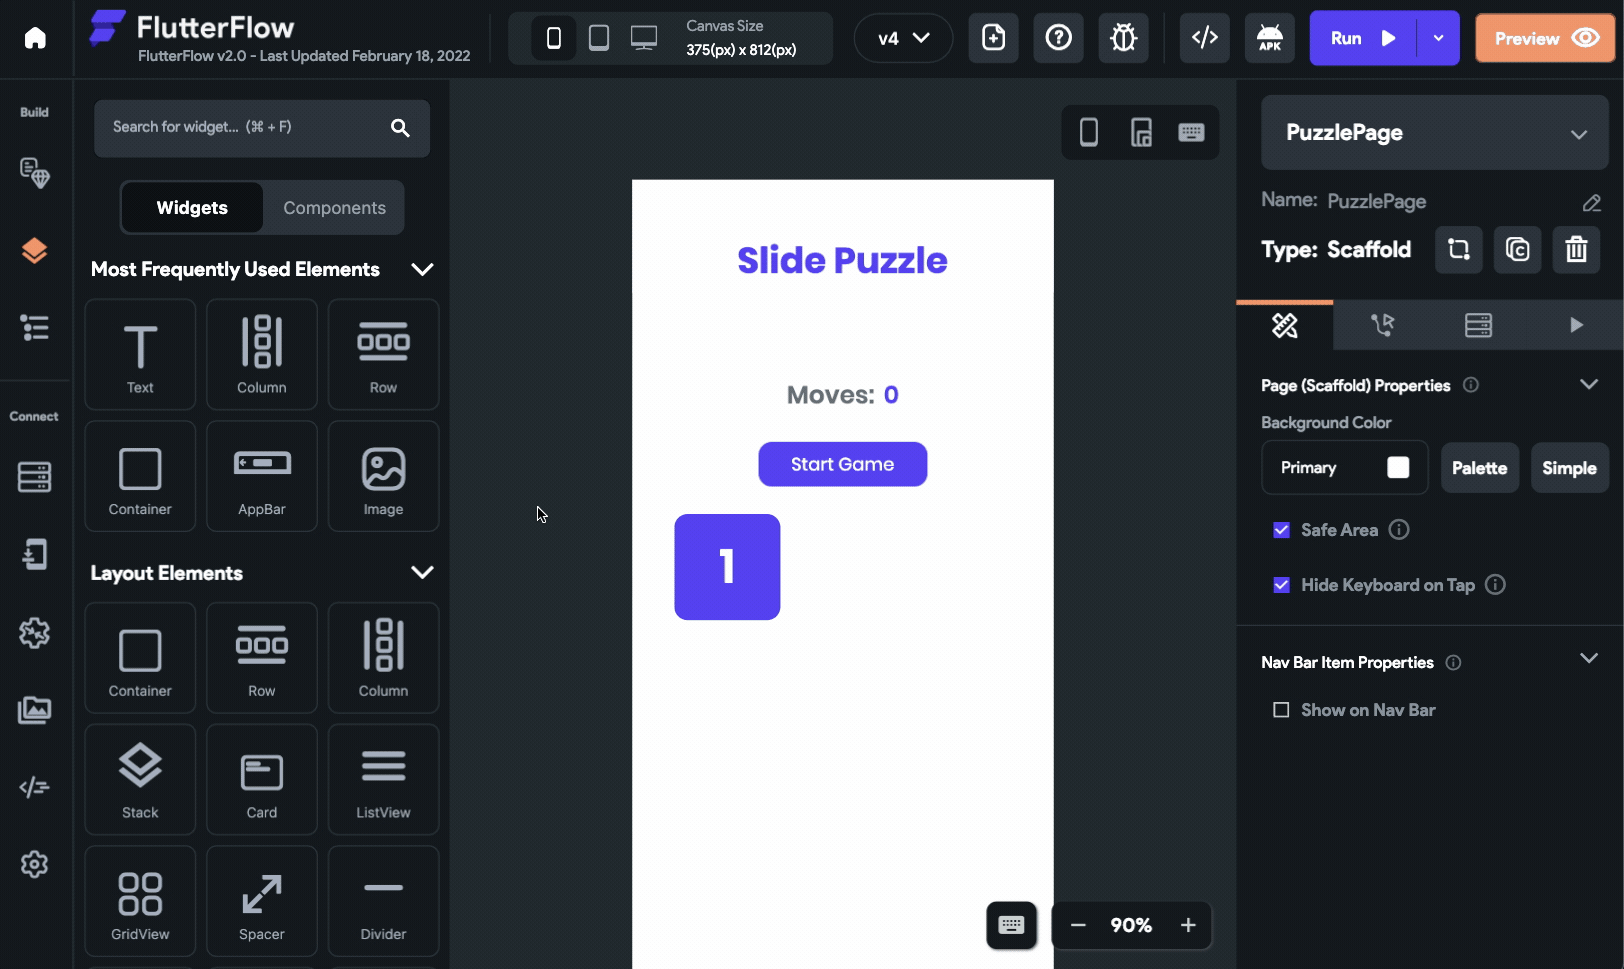
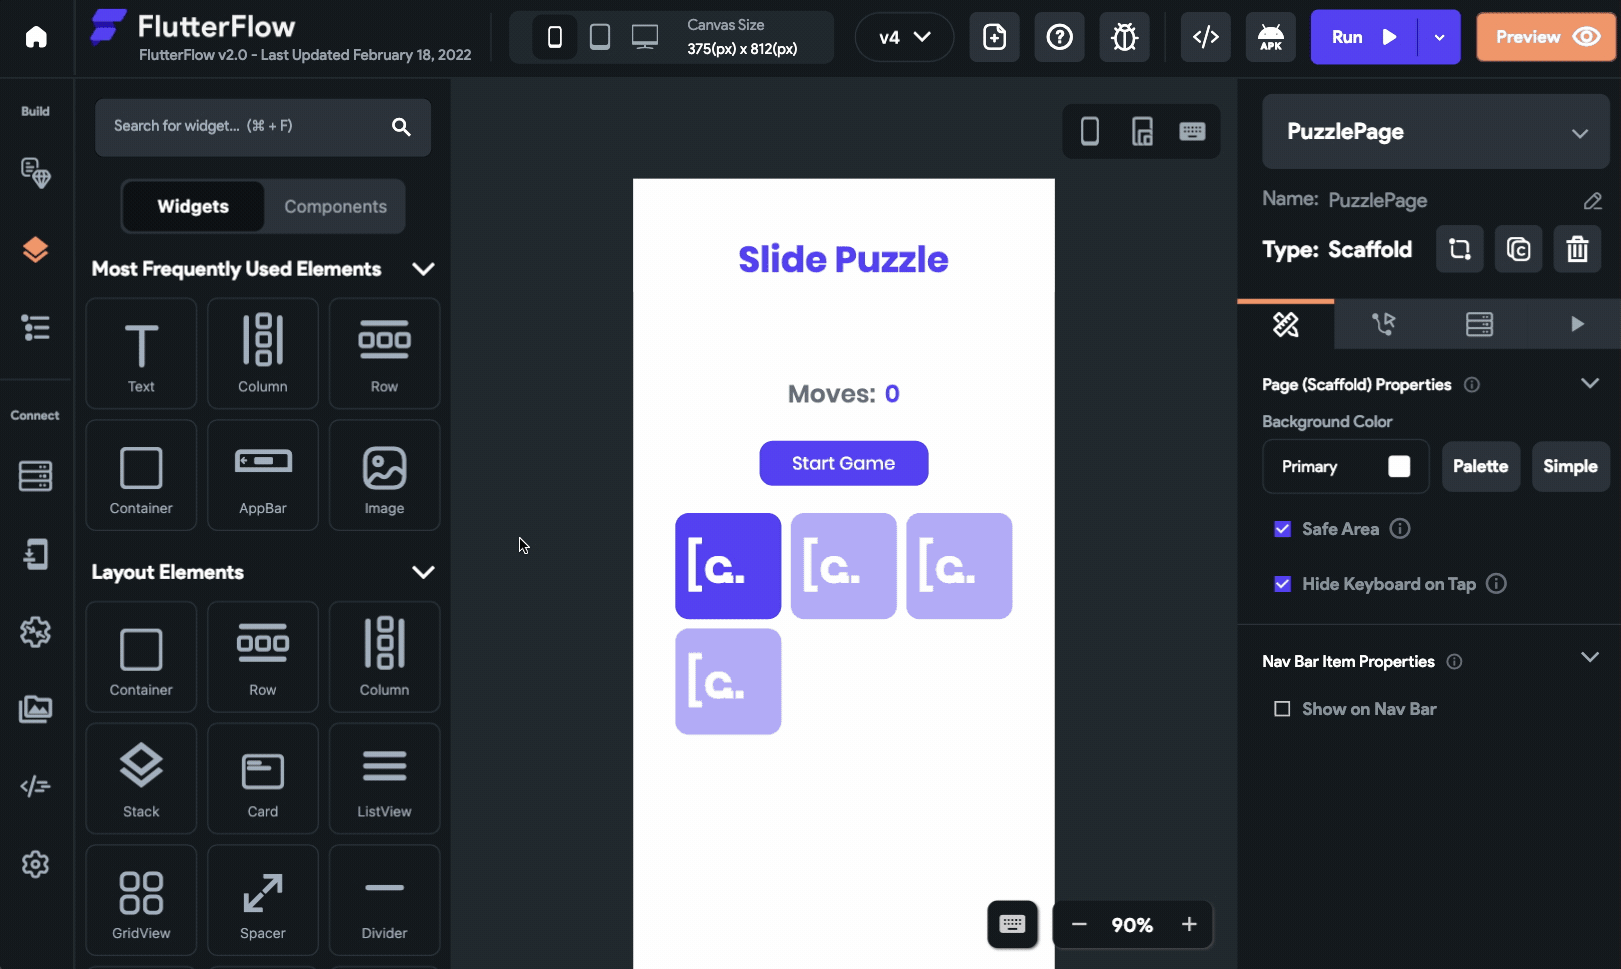
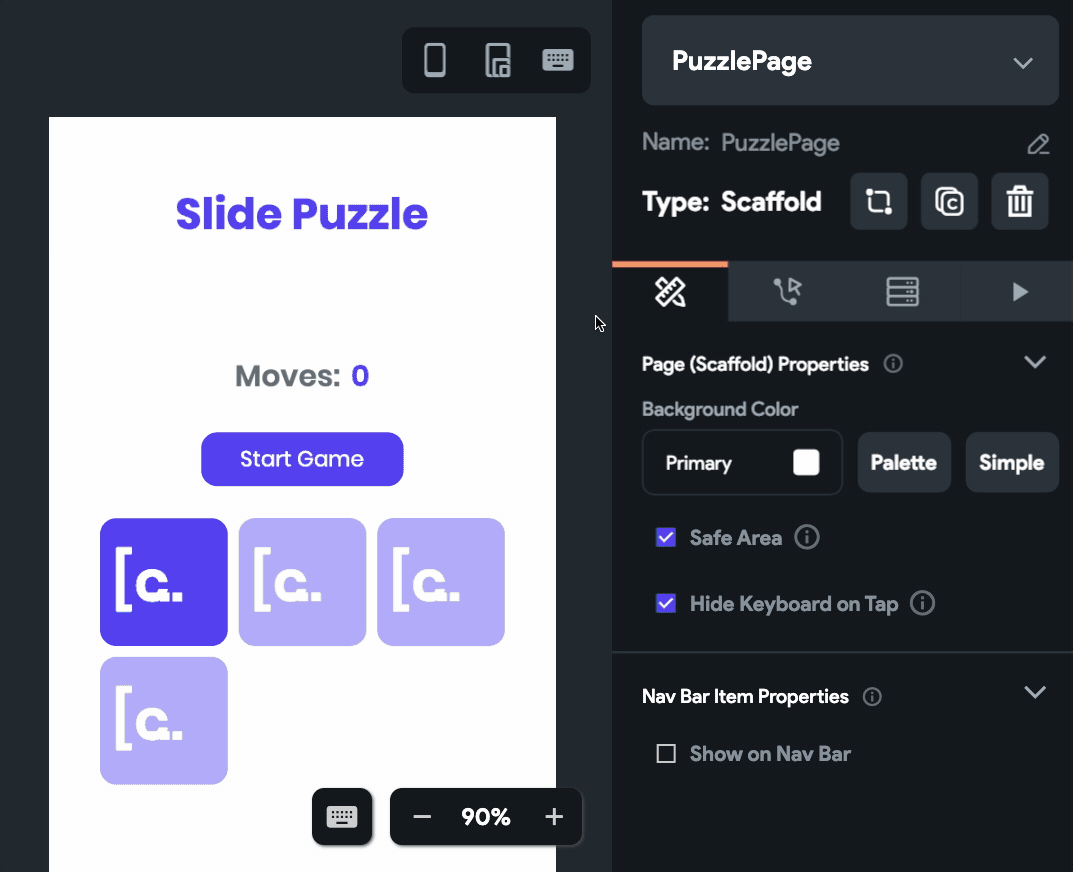
It’s time to build the main puzzle layout, follow the steps below:
- Start by placing a Column widget on the canvas.
- Add a Row widget inside the Column, place two Text widgets side-by-side. One them will display the text “Moves:” and the other will show the number of moves (it’s hardcoded here but later it will be set from a variable).
- Add a Container widget to the Column and place it below the Row. Set its width to
80%, height to50%, and background color as PrimaryBG. - Drag and drop a GridView widget inside the Container.
- Add a Button widget to the GridView.
The above steps are just to give you a basic idea about how to build the puzzle layout. Feel free to customize and modify the properties as per your requirement.
Initial puzzle layout is complete but does it look like a puzzle at all? — No, it’s because we haven’t generated the rest of the tiles yet. By tile here is referred to the Button widget that you just added.
FlutterFlow allows you to easily generate dynamic children of the GridView from a variable. Before that, you need to create a variable, and we’ll be defining it as a Local State variable because this will actually contain the list integers to be placed on the puzzle board.
Defining Local State variables
The Local State variables can be stored inside the app and are accessible from all the pages. Though in the case of the puzzle, you won’t need to access the variables from different pages as it contains just a single page but storing the variables like this helps in easily updating their states (or values).
Define the following Local State variables:
boardNumbers: to store the list of integers to be displayed inside the board tilesmoves: to track the number of tile moves inside the puzzleisStarted: to track whether the puzzle game has started
Follow the steps below to add the variables:
- Navigate to the Local State page from the Navigation Menu (left-most menu)
- Click + Add State Variable.
- In the Add Field dialog, enter the field name and the type of variable (example, Integer).
- If it’s of list type then enable List using the toggle.
- Click Create.
Keep the Persisted toggle disabled as you don’t need to persist the state of any of the variables between app restarts.
Create these variables with their respective data types and default values, following table has all the types listed:
| Field Name | Data Type | List | Persisted | Default Value |
|---|---|---|---|---|
| boardNumbers | Integer | true | false | - |
| moves | Integer | false | false | 0 |
| isStarted | Boolean | false | false | false |
Initializing the puzzle
The boardNumbers variable doesn’t have any default value, so it should be initialized with a list of integers before displaying them inside the GridView.
It’s time to do some coding (very minimal code), you need to define a Custom Action to shuffle and return a list of integers.
- Navigate to the Custom Code page from the Navigation Menu.
- Click + Create.
- Enter the Action Name as
shuffleBoard. - Enable the Return Value toggle, set the Data Type to Integer and Is List to True.
- Click View Boilerplate Code, then select Copy to Editor.
- Add the following code for shuffling the list of integers and returning them:
// Add this import statement import 'dart:math' as math; Future<List<int>> shuffleBoard() async { // Add the following code to the function List<int> numbersList = [0, 1, 2, 3, 4, 5, 6, 7, 8]; numbersList.shuffle(); return numbersList; } - Click on Check Errors, select Compile.
- Wait for the compiling to complete. If there are no errors, click Save.
Now, add a new Button widget to start the game by calling the shuffleBoard Action and setting the initial values to the local state variables inside the onTap gesture.
- Drag and drop a Button widget, change the text to “Start Game”.
- Select the Start Game button, go to the Actions tab from the Properties panel (the right menu).
- Click + Add Action button.
- Choose the gesture from the dropdown as On Tap.
- First action:
- Select the Action Type as Custom Action.
- Choose Custom Action Name as shuffleBoard.
- Enter the Output Variable Name as shuffledNumList.
- Second Action:
- Select the Action Type as Update Local State.
- Set Select field to update as boardNumbers.
- Select Update Type as Set Value.
- Select the Value Source as From Variable.
- Choose Source as Action Outputs.
- Select shuffledNumList under Available Options.
- Third Action:
- Select the Action Type as Update Local State.
- Set Select field to update as isStarted.
- Select Update Type as Set Value.
- Select the Value Source as Specific Value.
- Choose Value as True.

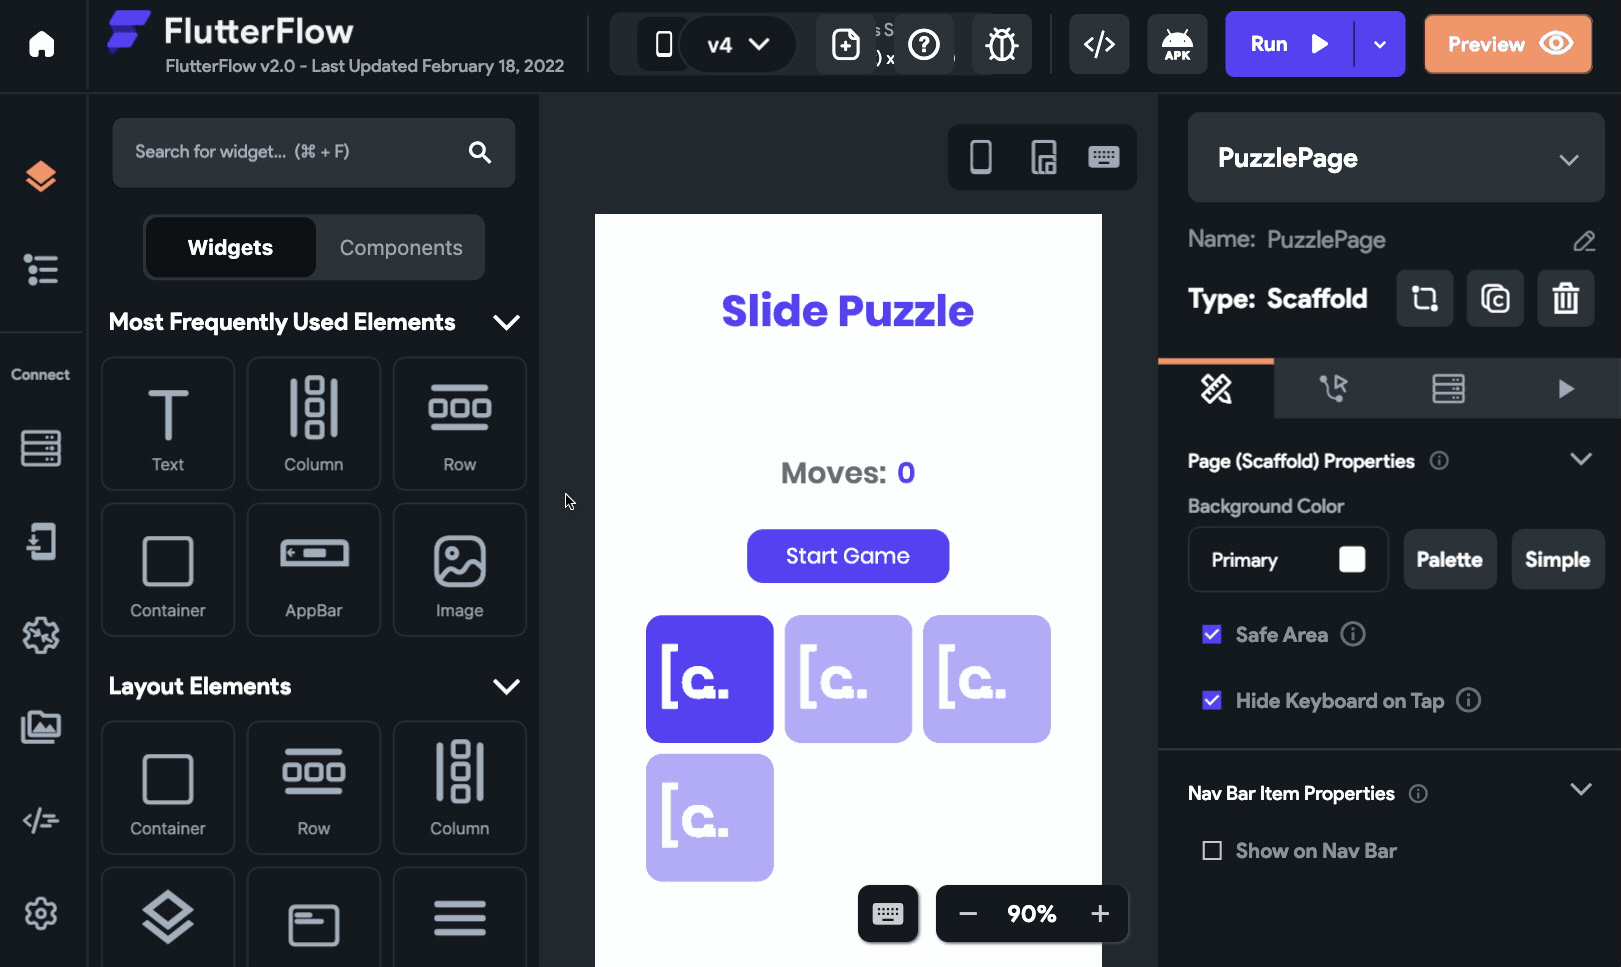
Generating tiles
The tiles (Buttons with numbers) can be generated dynamically inside the GridView by using the boardNumbers local state variable.
- Select the GridView widget.
- Go to Generate Dynamic Children tab present inside the Properties panel.
- Enter the Variable Name as currNumList.
- Select the Source as Local State.
- Under Available Options, choose boardNumbers.
- Click Save, then click Ok inside the dialog.
To display the numbers in the tiles from the list variable:
- Select the Button widget.
- Under Button Text, click Set from Variable.
- Select the Source as currNumList item (Integer).
- Keep the Number Format Options as No Formatting.
- Click Save.

Currently the boardNumbers variable contains "0" as well but it shouldn't be visible on the board, you need to hide the 0th title so that it looks like an empty area there.
There's a simple trick to hide the tile containing "0":
- Select the Button (tile).
- In the Properties Menu, expand the Visibility section.
- Set the source as Condition.
- Select the First Value Source as currNumList item.
- Change the condition type to Not Equals To.
- Set the Second Value Source as Specific Value.
- Enter the Value as "0".
- Click Save.
Adding empty list widget
The boardNumbers variable would be empty initially, it would only the initialized when the Start Game button is tapped. So, initially the GridView would have nothing to display. You can add a Component to be displayed while the GridView has an empty list.
Let's add a component that would look similar to the puzzle but with tiles in the correct order (solved state) and when the Start Game button is clicked the tiles would be shuffled.
To get the list of integers in the solved state you need to define a simple Custom Function.
- Go to the Custom Code page from the Navigation Menu.
- Select the Custom Functions tab.
- Click + Create.
- Enter the function name as initBoard.
- Set the return Data Type as Integer and set Is List to True.
- Go to the Code tab, add the following inside the function:
List<int> numbersList = [1, 2, 3, 4, 5, 6, 7, 8]; return numbersList; - Click Check Errors. If there are no errors, then click Save.
Create a Component by following the steps below:
- Go to Select Page or Component from the Navigation Menu.
- Select the Components tab.
- Click + Create New.
- Enter the name of the component as InitialGridView and click + Create New under Blank Component.
- Add a Container widget with width and height set to
100%. - Drag and drop a GridView widget and add a Button inside it.
- Select the GridView and go to the Generate Dynamic Children tab present inside the Properties panel.
- Enter the Variable Name as initNumList.
- Select Source as Custom Function.
- Under Function Name, select initBoard.
- Click Save, then click Ok inside the dialog.
- Select a Button, click Set From Variable under Button Text.
- Select the Source as initNumList item, click Save.
Set the component inside the GridView of PuzzlePage when the list is empty:
- Select the GridView widget, expand the Empty List Widget (inside Properties panel).
- Check the Show Empty List Widget checkbox.
- Select the Widget Type as Component.
- Choose InitialGridView as the Component Name.
Puzzle logic
This is the most important piece of code that you'll be adding to the puzzle, it estimates whether a tile can move and to which position it can move by finding out the empty area.
We won't go into the details of how this logic works, you can simply define the following as a Custom Action and proceed to the next step. This action would require three parameters to be passed and its return type would be JSON.
Follow the steps below:
- Navigate to the Custom Code page.
- Go to Custom Actions tab.
- Click + Create.
- Enter the action name as onClick.
- Enable the Return Value toggle, set the Data Type as JSON.
- Define the following Arguments, by clicking on + Add Parameter:
- Argument 1: list, Data Type: Integer, Is List: True.
- Argument 2: index, Data Type: Integer, Is List: False.
- Argument 3: moves, Data Type: Integer, Is List: False.
- Click View Boilerplate Code, select Copy to Editor.
- Download the following code and copy-paste it inside the function:
- Click Check Errors, then select Compile inside the dialog.
- If no errors are found, click Save.

In the above code, the updated list of numbers and the moves are returned in JSON format.
To make this logic work, you'll need to pass the index of the tapped tile. But from the grid tiles, only the number can be retrieved not its index inside the list. To get the index you need to add one more simple Custom Function:
- Function Name: getIndex
- Return Type: Integer (Is List: False)
- Function Arguments:
- board --> Data Type: Integer, Is List: True
- value --> Data Type: Integer, Is List: False
- Code:
import 'dart:math' as math;

int getIndex(
  List<int> board,
  int value,
) {
  return board.indexOf(value);
}
Trigger action on tile tap
Once you have the onClick action defined, you are ready to set them as onTap action of the Button widget inside the GridView. The following actions should be defined on the Button in order:
- Call the onClick Custom Action by providing the required variables which will return the updated list and the moves in a JSON format.
- Use the Update Local State action to update the list of board numbers from the JSON.
- Use the Update Local State action to update the number of moves from the JSON.
Follow the steps below to define these actions:
- Select the Button (tile) inside GridVew.
- Go to the Actions tab from the Properties panel (the right menu).
- Click + Add Action button.
- Choose the gesture from the dropdown as On Tap.
- First action:
- Select the Action Type as Custom Action.
- Choose Custom Action Name as onClick.
- Pass the list argument from: From Variable > Local State > boardNumbers.
- Pass the index argument from: From Variable > Custom Function > getIndex.
- Set the index function argument board from From Variable > Local State > boardNumbers, and value from From Variable > currNumList item.
- Pass the moves argument from: From Variable > Local State > moves.
- Enter the Output Variable Name as listMovesMap.
- Second Action:
- Select the Action Type as Update Local State.
- Set Select field to update as boardNumbers.
- Select Update Type as Set Value.
- Select the Value Source as From Variable.
- Choose Source as Action Outputs.
- Select listMovesMap under Available Options.
- Select JSON Path and define the path as
$.list.
- Third Action:
- Select the Action Type as Update Local State.
- Set Select field to update as moves.
- Select Update Type as Set Value.
- Select the Value Source as From Variable.
- Choose Source as Action Outputs.
- Select listMovesMap under Available Options.
- Select JSON Path and define the path as
$.moves.
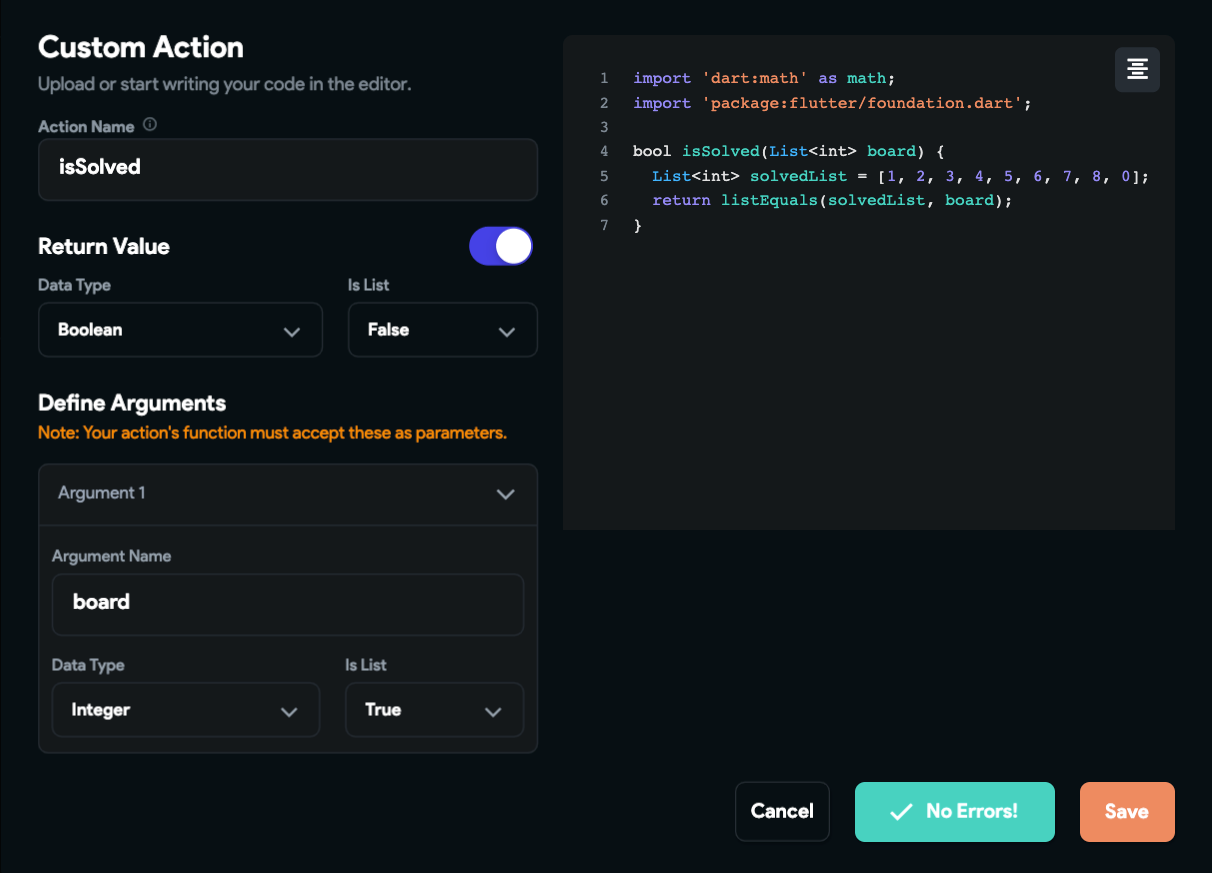
Show solved dialog
Once a user completes solving the puzzle, you should show something on the UI to indicate that.
Add a new Custom Action called isSolved with the following code:
import 'dart:math' as math;
import 'package:flutter/foundation.dart';

bool isSolved(List<int> board) {
  List<int> solvedList = [1, 2, 3, 4, 5, 6, 7, 8, 0];
  return listEquals(solvedList, board);
}
Then, you need to add a few more actions to the Button (or tile), follow the steps below:
- Select the Button (tile) inside GridVew.
- Go to the Actions tab from the Properties panel (the right menu).
- Click + Add Action button.
- Choose the Type of Action as On Tap.
- First action (call the custom action):
- Select action as Custom Action.
- Choose Custom Action Name as isSolved.
- Pass the board argument from: From Variable > Local State > boardNumbers.
- Enter the Output Variable Name as isSolved.
- Second Action (stop the timer):
- Select action as Update Local State.
- Set Select field to update as isStarted.
- Select Update Type as Set Value.
- Select the Value Source as Specific Value.
- Select Value as False.
- Enable the Set Conditional Execution toggle.
- Select the Source as Action Outputs.
- Under Available Options, choose isSolved.
- Third Action (show dialog box):
- Select the action as Alert Dialog.
- Select Alert Dialog Type as Informational Dialog.
- Enter Title as "Solved".
- Enter Message as "You have successfully solved the puzzle!".
- Enter Dismiss Text as "OK".
- Enable the Set Conditional Execution toggle.
- Select the Source as Action Outputs.
- Under Available Options, choose isSolved.
The second and third actions will only be triggered if the isSolved custom action output is True.
As the puzzle is solved, the dialog will be displayed like this:
Once you have added this final set of actions, your puzzle is ready!
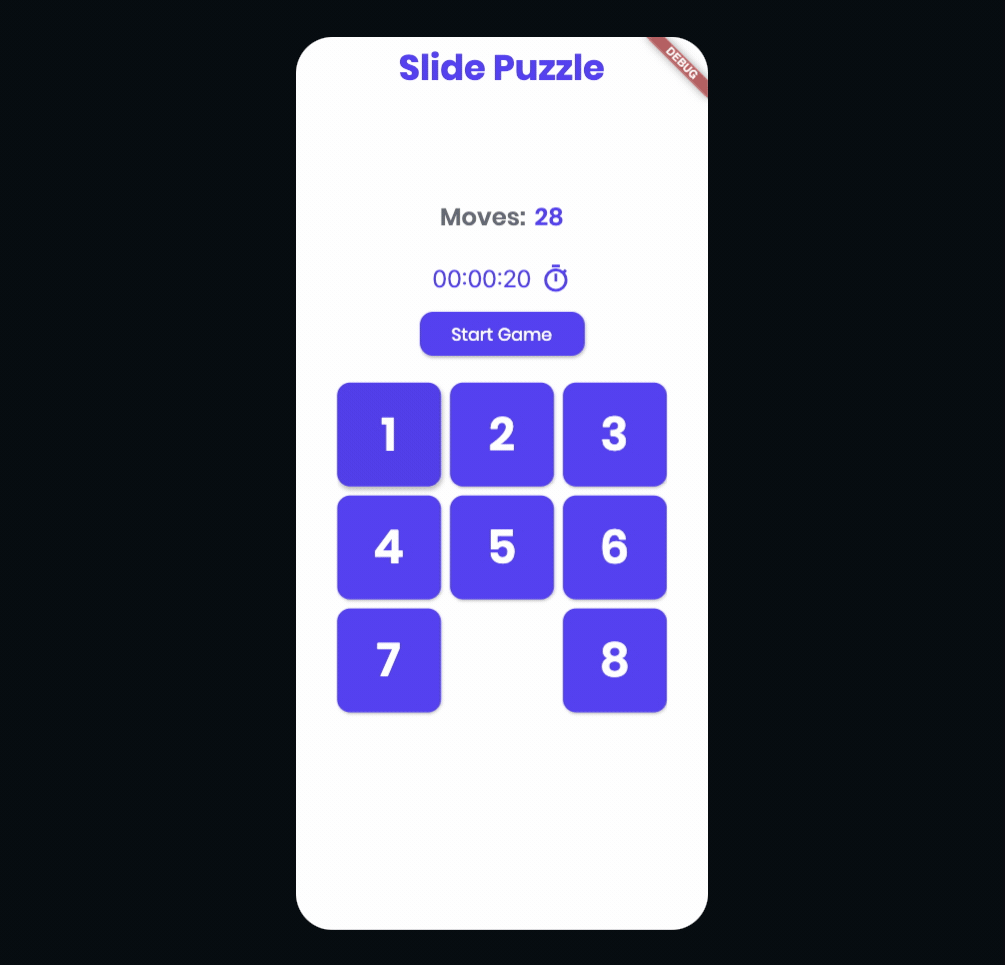
Trying out the app
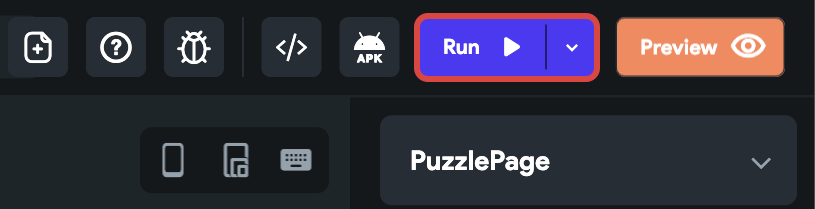
You can use the Run button present on the Tool Bar (present on the top) of FlutterFlow to test out the puzzle on your web browser.
The Flutter Slide Puzzle app in action:

Try out this version of the Slide Puzzle by going to this link.
Tips and ideas for your project
Some ideas that you can incorporate inside your puzzle on top of the sample that we created in this article are as follows:
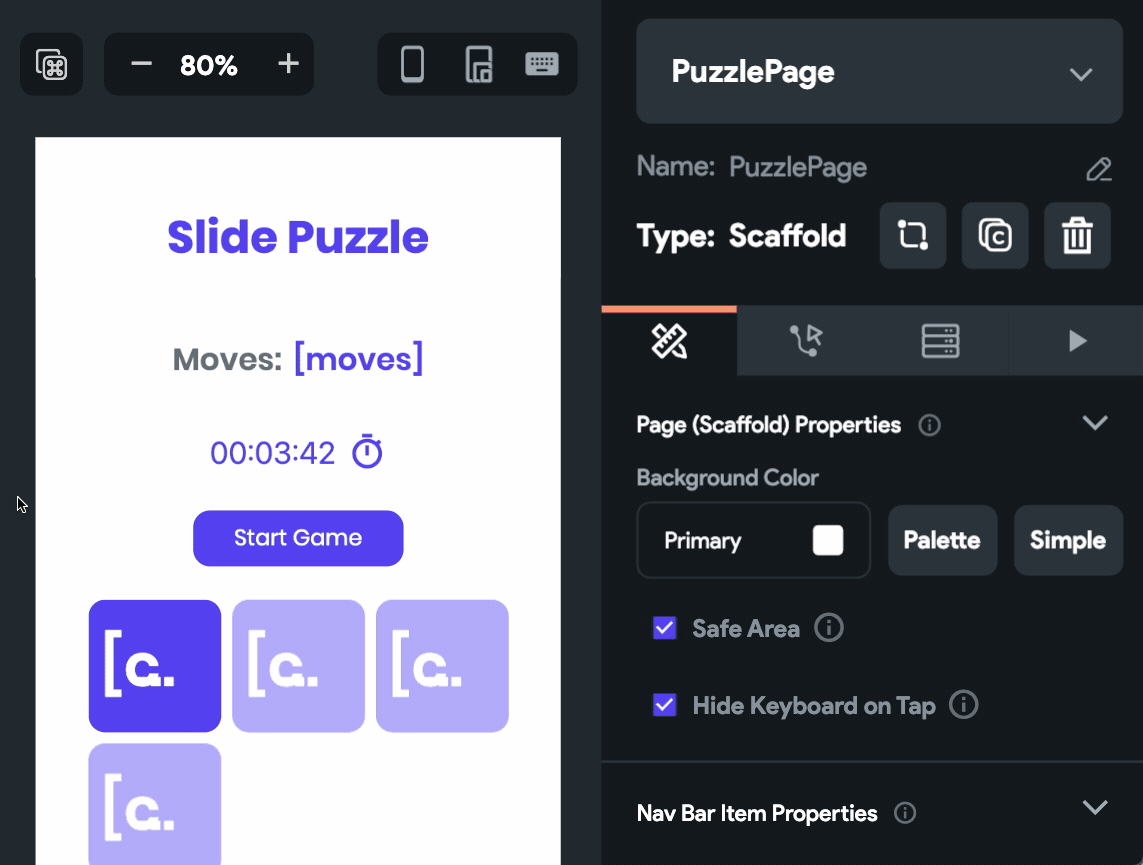
Stopwatch
Notice in the above demo, a stopwatch starts as soon as the Start Game button is tapped. This is one of the basic features that you can incorporate inside your puzzle. Though FlutterFlow doesn't provide a Timer widget, it won't stop you from adding a Custom Widget 😉.
Create a Custom Widget by going to the Custom Code page. Enter the widget name as TimerWidget and define the following parameters:
- fontSize: Double (Is List: False)
- color: Color (Is List: False)
Then download the following code and upload it there:
Adaptive layout
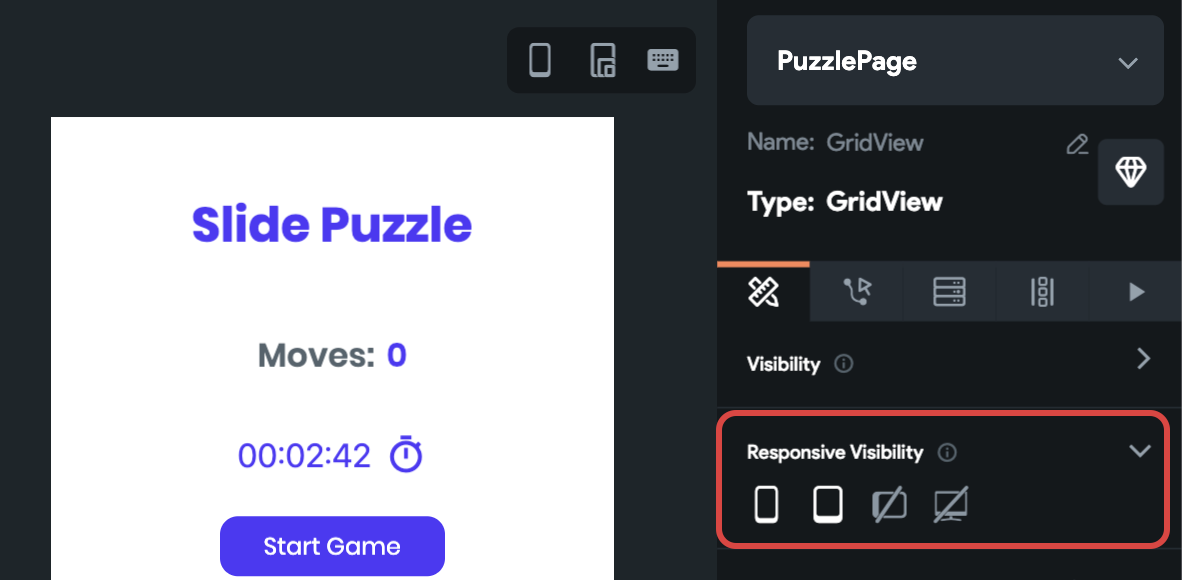
As this Flutter challenge is focused on the Web platform, responsive layout is one of the major criteria to get an edge over the other competitors. In FlutterFlow, you can select any widget and use the Responsive Visibility section (present inside the Properties Panel) to set on which type of display that particular widget should be visible. With the help of this, you can use different dimensions of widgets depending upon the screen sizes.
Adding dark mode support
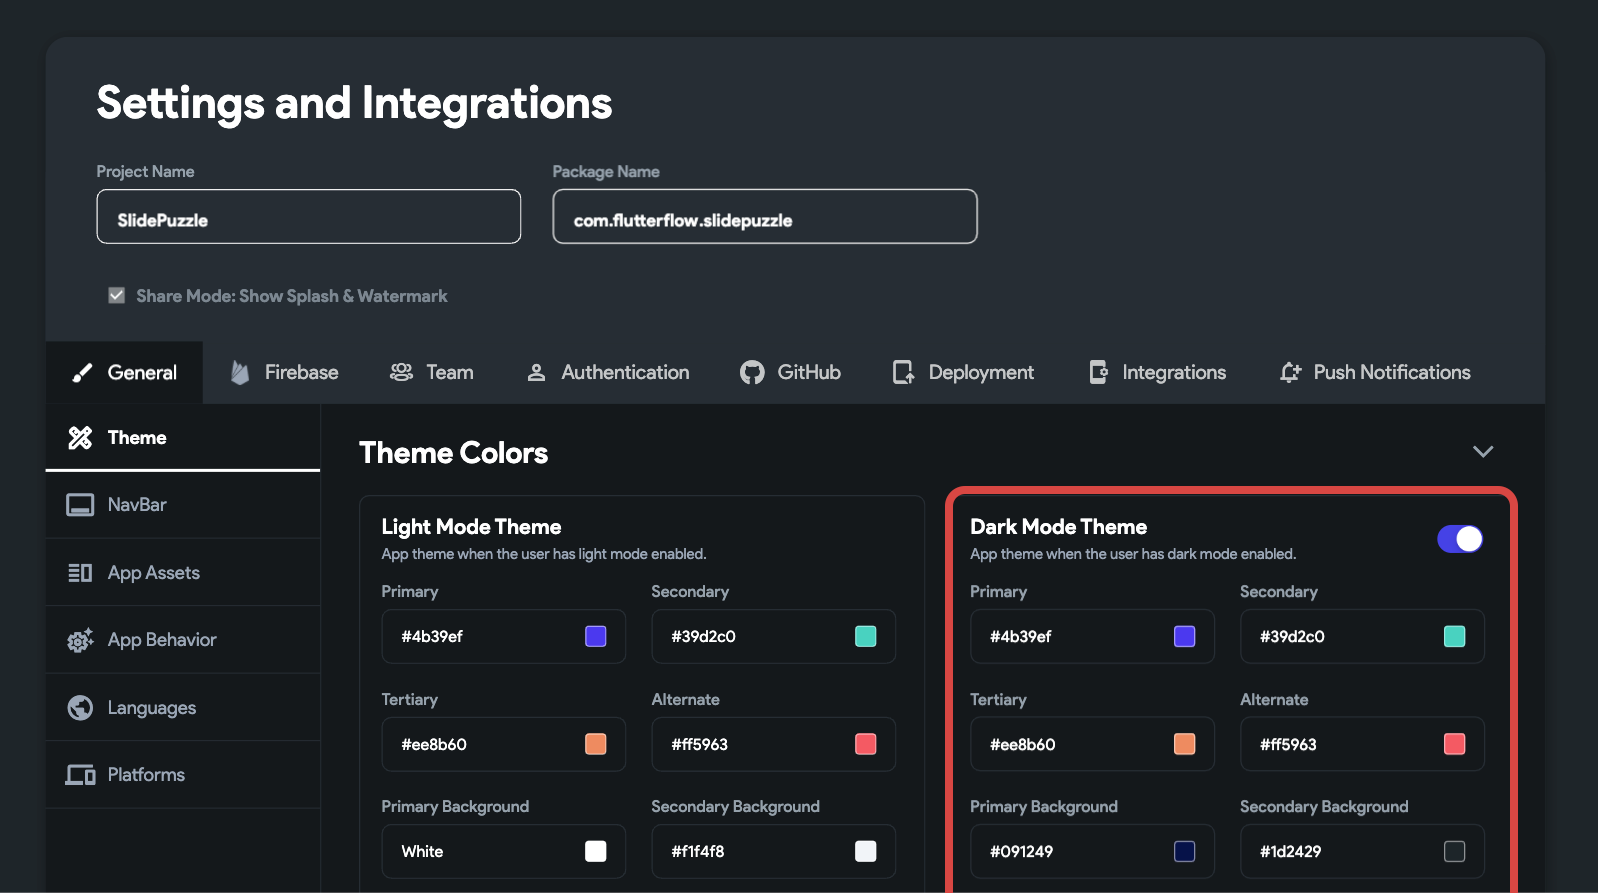
Dark mode support can be easily added to the Puzzle by going to the Settings & Integrations > Theme > Theme Colors, enable Dark Mode Theme using the toggle, and choose the appropriate colors to be used in the dark mode.
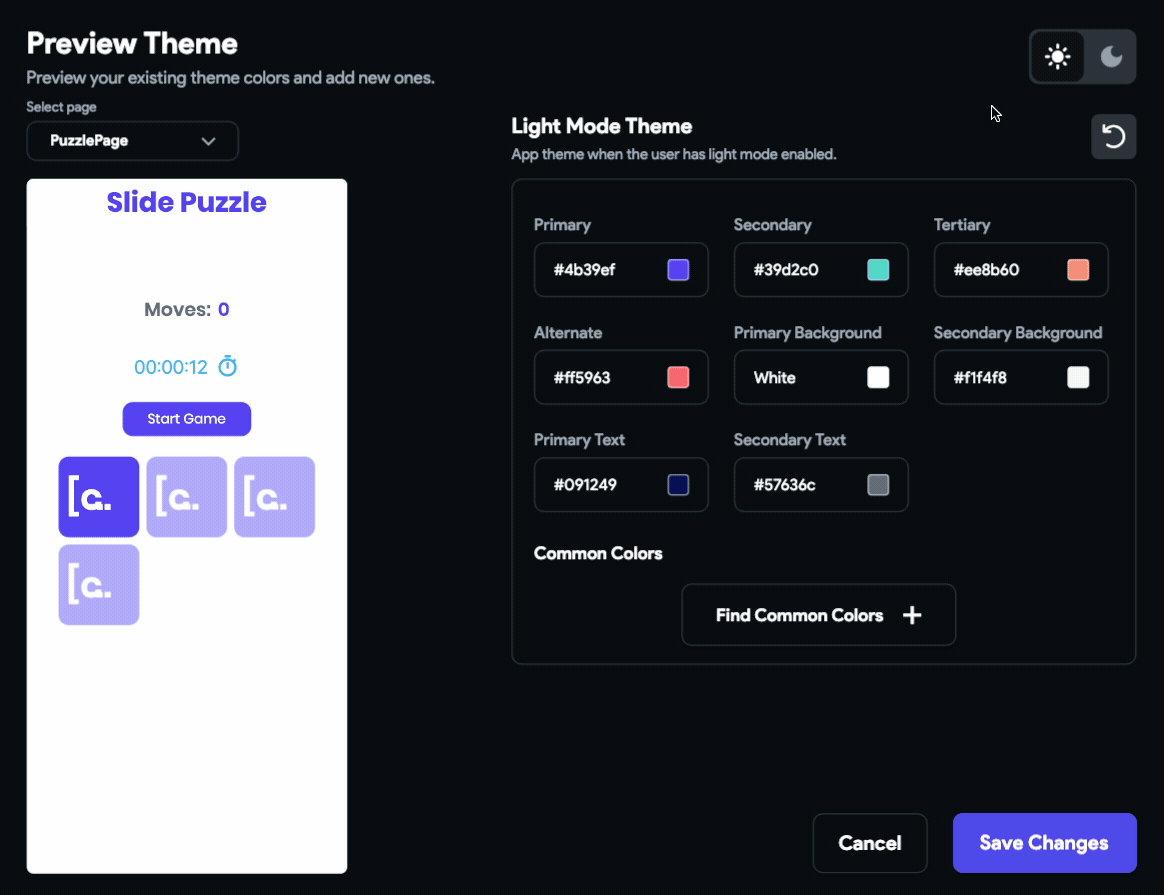
Click the Preview Themes button to see how the light and the dark mode themes look when applied on your PuzzlePage:
Wrapping up
FlutterFlow should help you to build your version of the Slide Puzzle even if you don't know how to write Flutter code at all.
Finally, to submit your project to this challenge:
- You can go to the challenge page to start your submission.
- You need to provide a link to your code during submission. Using FlutterFlow you can directly upload your code to GitHub. Just share that link, don't forget to make your repository public.
- Record a video (less than 3 minutes) of the puzzle by starting it in the Run mode of FlutterFlow. Upload it to YouTube, Vimeo, Facebook Video, etc., and provide the link during submission.
- Lastly, you should host your Flutter web app and provide the link. You can use Firebase Hosting or GitHub Pages to host the website.
Share your puzzle on Twitter with the #FlutterPuzzleHack and don't forget to tag FlutterFlow (@flutterflow). We can't wait to see your creations!
