
Whenever you build your apps inside FlutterFlow, it uses the underlying framework called Flutter to generate your app's code.
Flutter has the vision to give users the power to maintain a single code base (having just Dart code - language used by Flutter) and be able to run the app on any device capable of displaying pixels.
As of now, FlutterFlow already supports building apps for Android, iOS, Web, macOS (beta), Windows (alpha), and Linux using its UI Builder.
Today, we'll try using an app generated by FlutterFlow in a unique way and run it as a Chrome Extension. This showcases the sheer power that "low code + Flutter" is unlocking for the future.
TL;DR: You can create the entire app using FlutterFlow, download the generated code, use a specific Flutter Web build command, and your extension is ready to use!
Follow along for more details.
What's a Chrome extension?
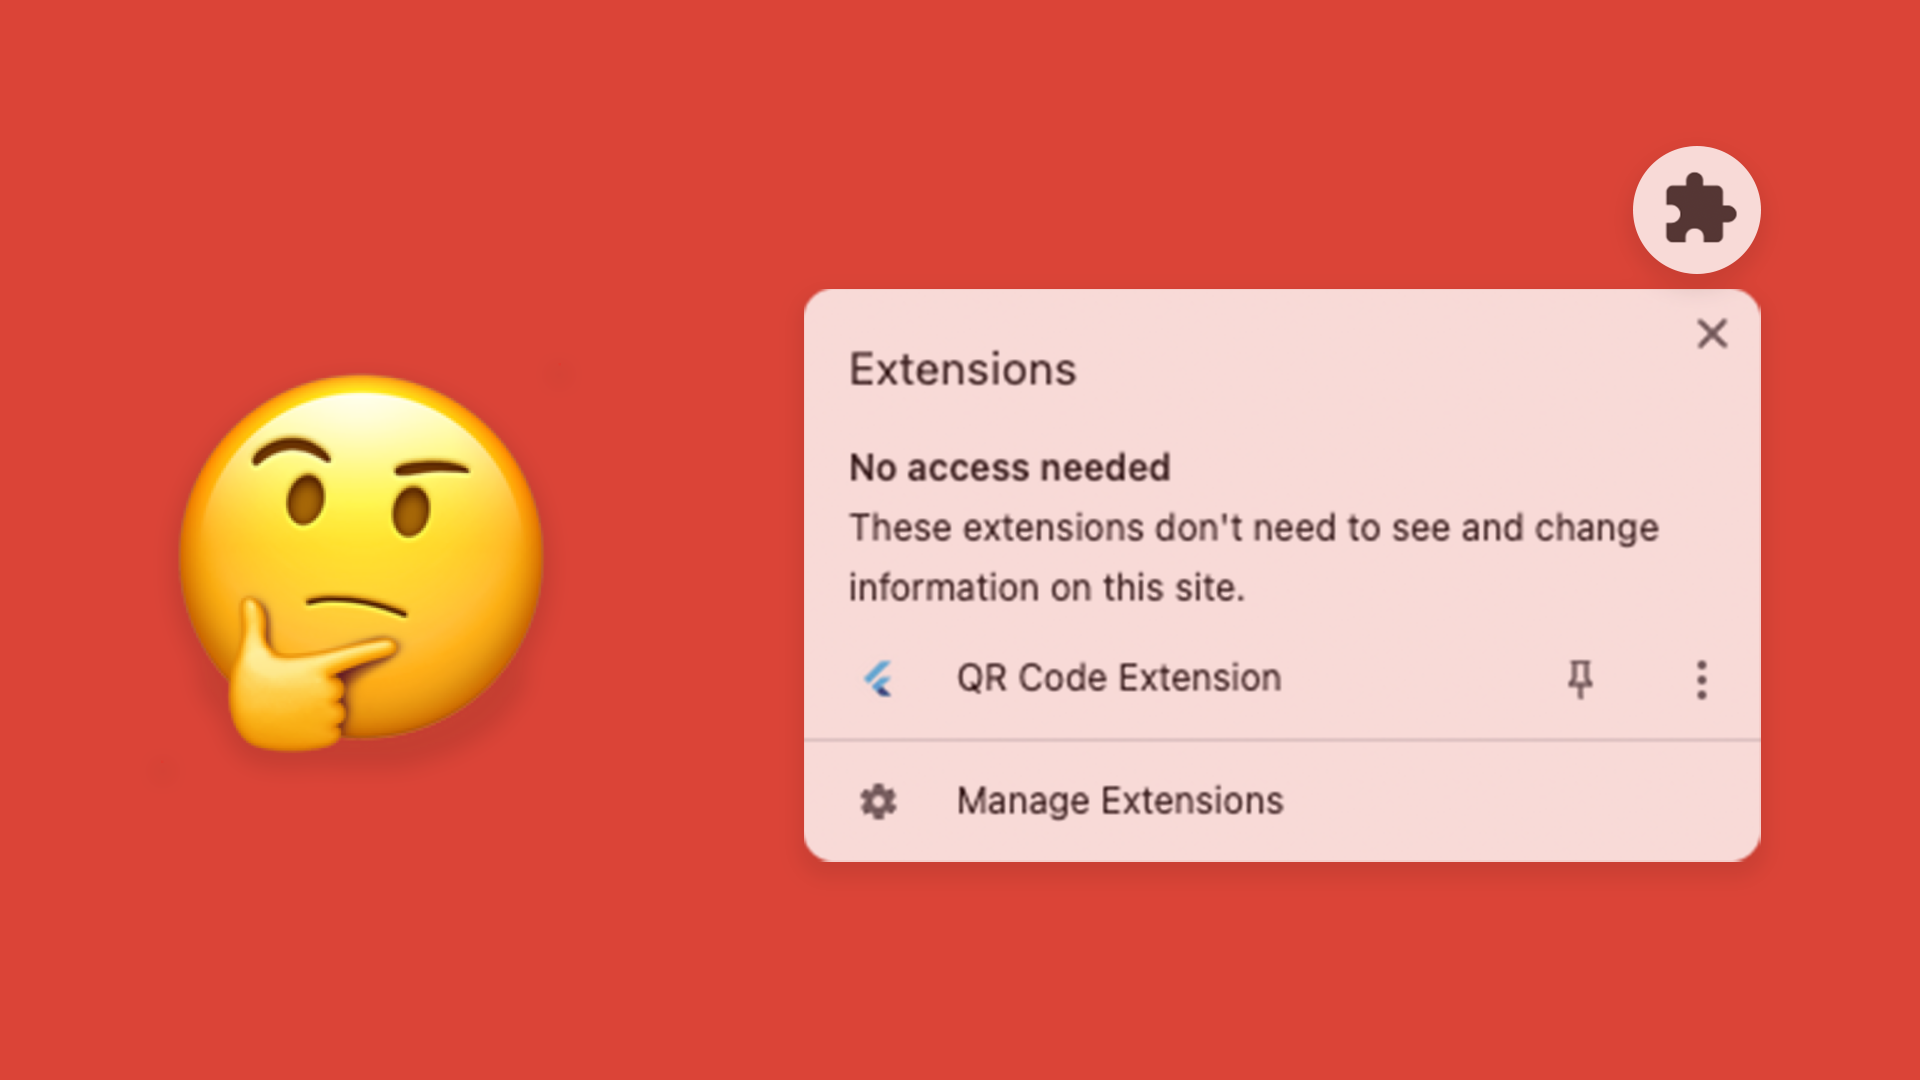
Extensions are lightweight software programs that can be installed in the browser. They are easily accessible inside the browser and help enhance the user's experience.
You can check out and install any extension from the Chrome Web Store. There’s a variety of extensions available like productivity tools, shopping, fun games, etc.
Extensions are very similar to web apps as they use the same core technologies such as HTML, JavaScript, and CSS. But they run in a separate sandboxed execution environment.
What's cooking?
Before getting started, here's a brief look at the extension that you'll be building.
NoteKeeper is a simple extension for saving notes quickly inside your browser. Using this extension, you can save notes and view them without having to navigate to any other webpage.
Getting started
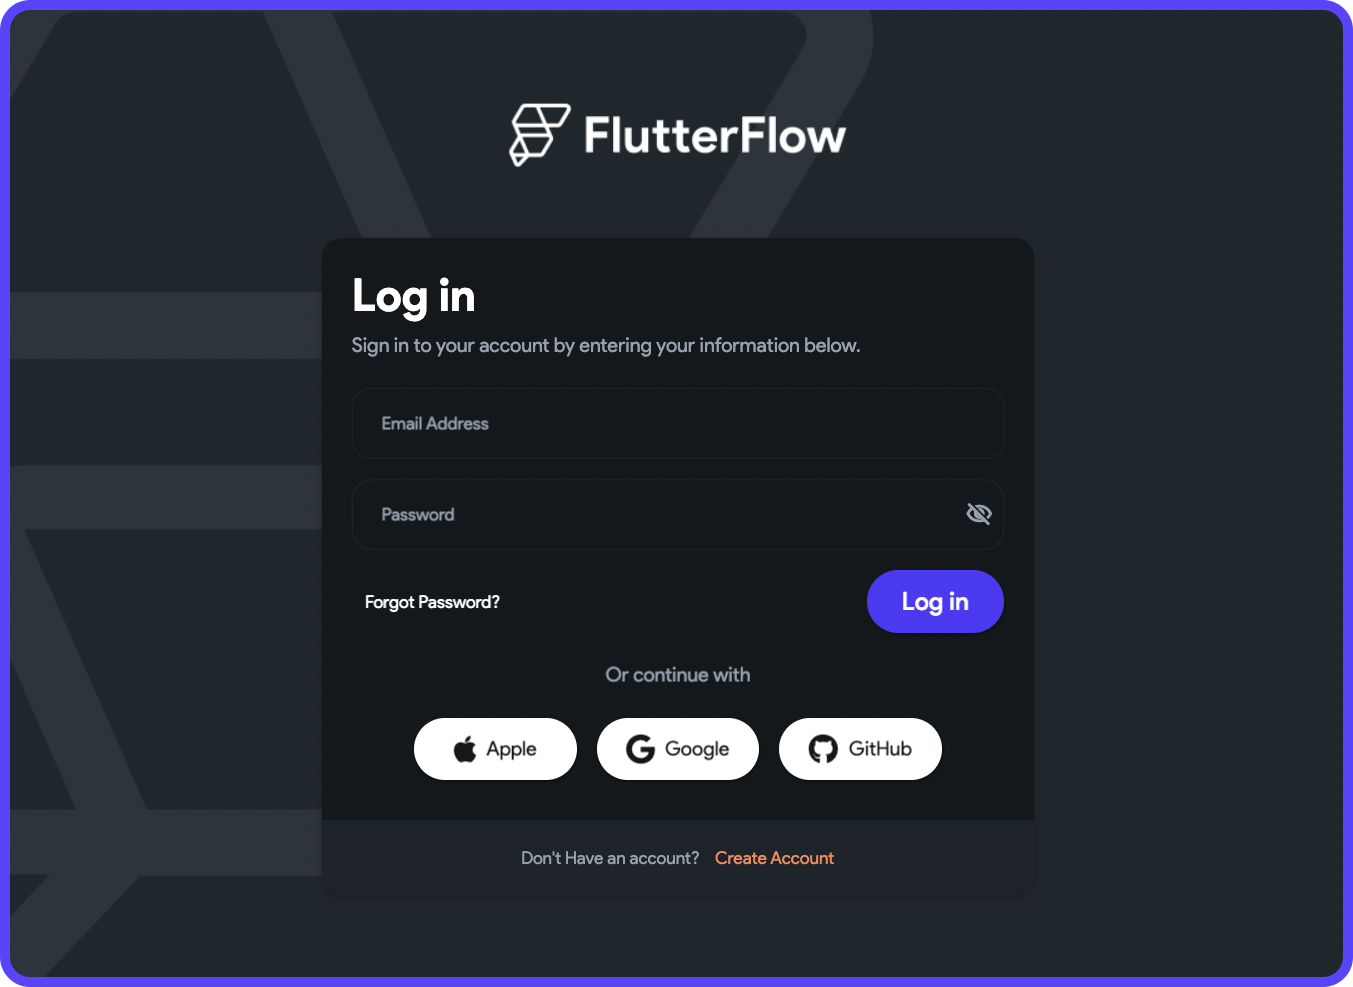
1. To get started, first, you need to Login into FlutterFlow. If you don't have an account, you can create one from the same page.
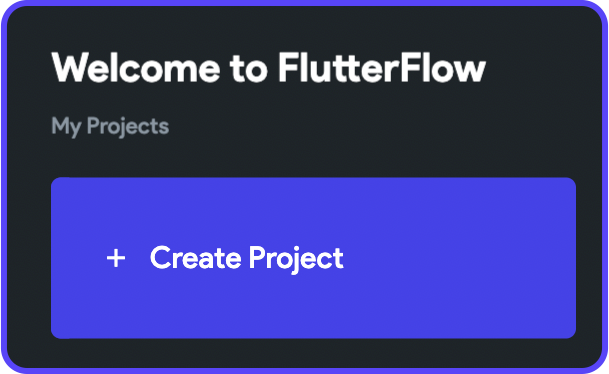
2. Once logged in, you will be taken to the dashboard page. Click the "+ Create Project" button to start creating a new FlutterFlow project.
3. Enter the project name and click the"+ Create New" button inside the Blank App.
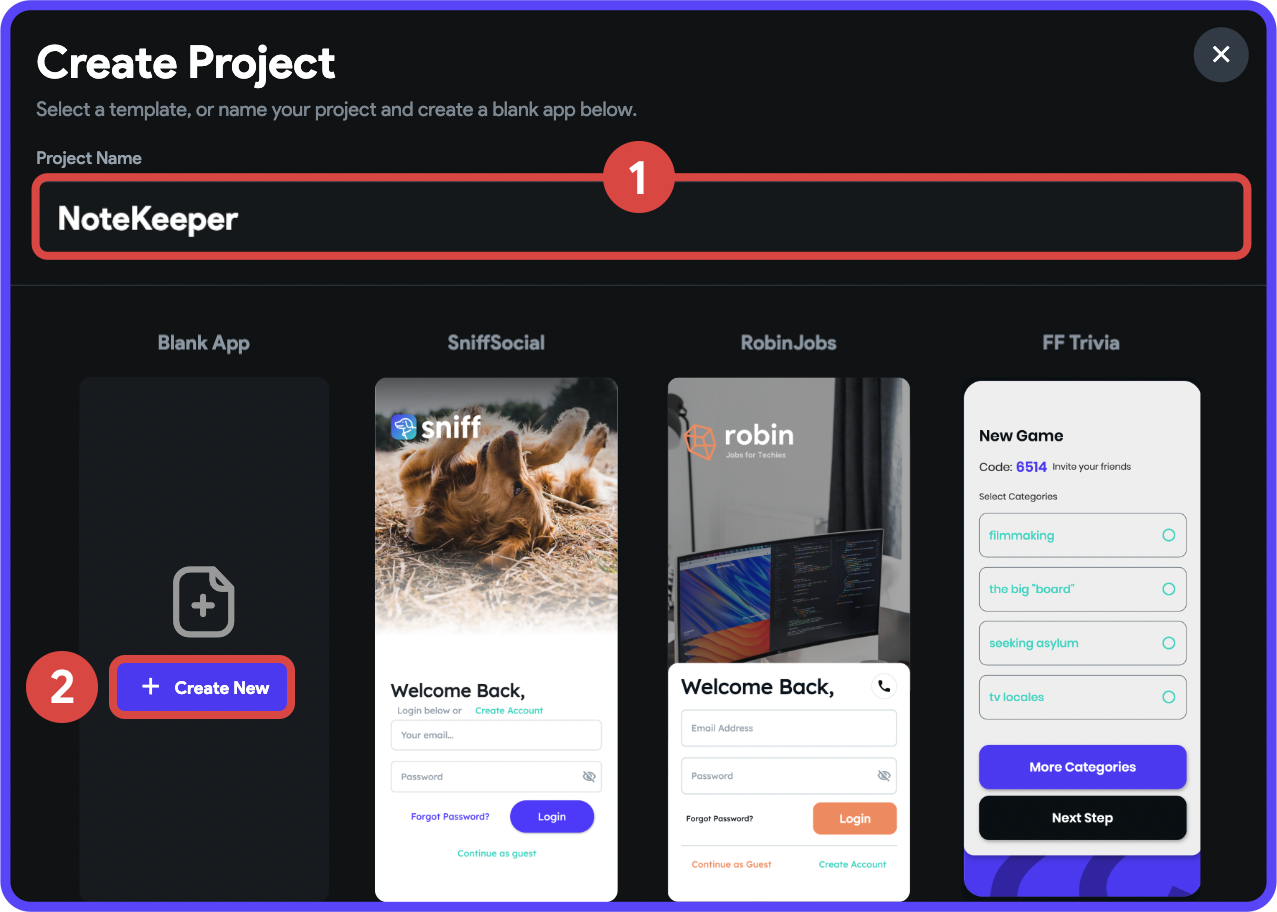
4. In the Project Setup Step, disable the Setup Firebase toggle and click the Start Building button.

This will navigate you to the UI Builder page of the project, which you can use to give shape to your app.
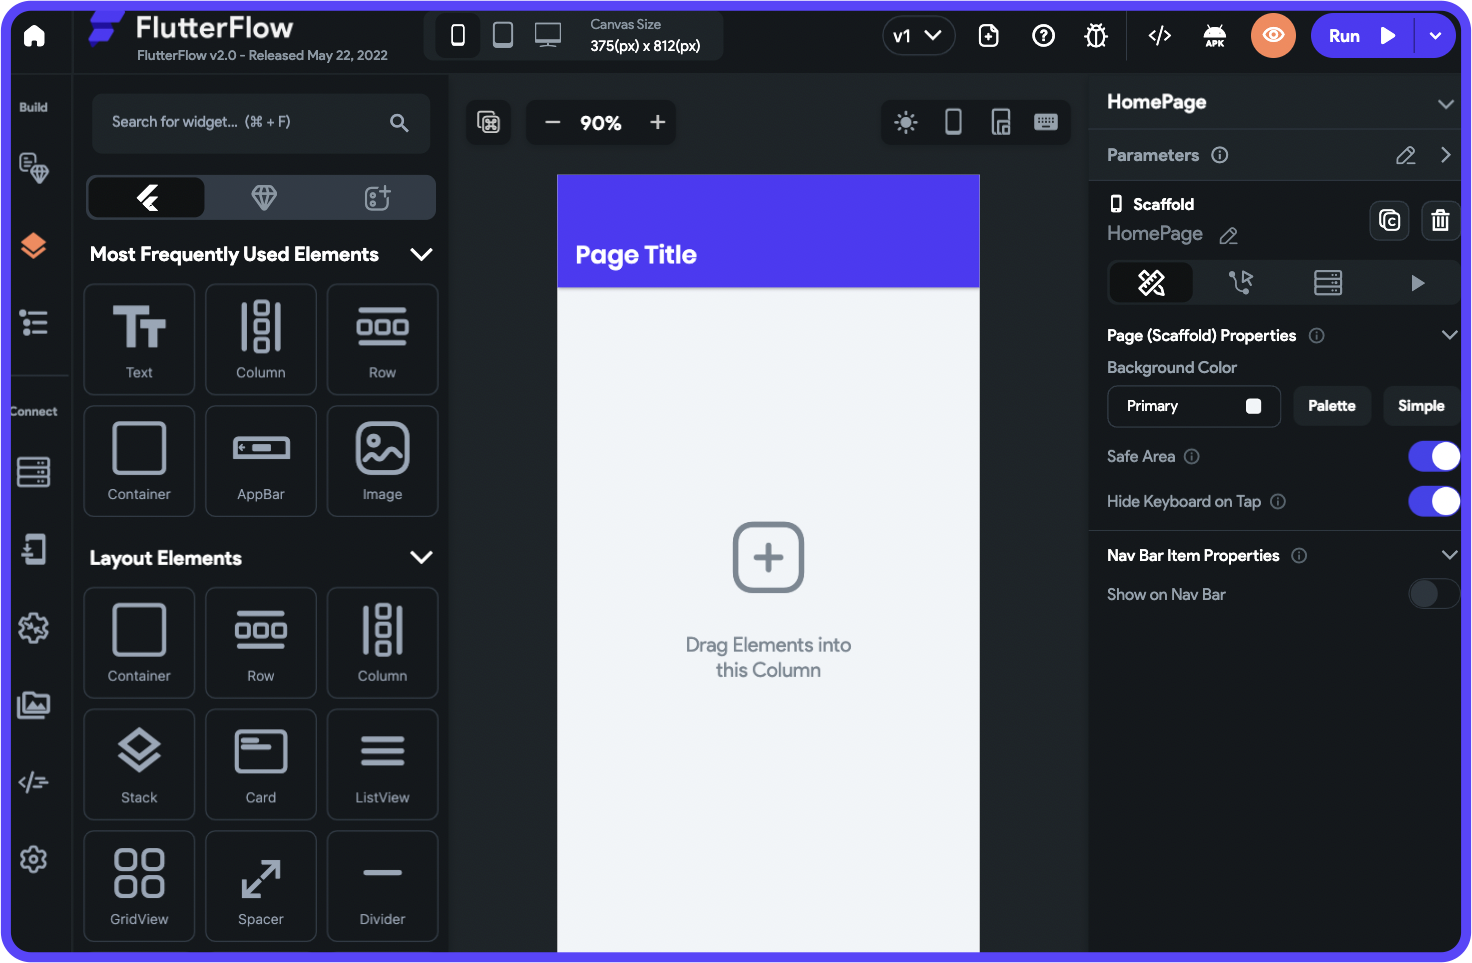
By default, the UI Builder is set to a typical mobile view. But as you'll be building a Chrome extension that can have various dimensions, let's resize the view to a dimension suitable to our use case.
Click on the Display Resize Handle Bars button, this will let you set a custom size to the view. Use the handlebars beside the view to resize it to a landscape view (i.e., having a greater horizontal dimension).
Building the UI
The user interface of the NoteKeeper extension would be quite simple, it will consist of the following:
- Single page to display the notes (inside a Column having ListTile(s))
- Floating action button to open an end-drawer.
- End-drawer to take the user input for the note content and save it.
The following video gives a quick walkthrough of building the basic user interface of this extension:
- Customize the AppBar with white background color and modify the title to "Notes".
- Add a ListTile widget inside the Column and customize it with a color, icon, and sample text.
- Add a FloatingActionButton widget containing an "add" icon.
- Add an EndDrawer widget to the page. Insert a Column widget, and place a Text, TextField (set the max lines to 5), and Button widget inside it.
- Add a Slidable to the ListTile with an option for removing an item.
Adding functionalities
Now that you have the UI ready, it's time to add the functionalities to the app for storing a new note and also be able to delete any note that's not required.
You must store the notes inside a Local State variable with the "Persisted" option enabled. This will allow the notes to be persisted between app sessions and to keep them saved locally.
Follow the steps below:
- Go to the Local State page from the Navigation Menu (left menu).
- Click "+ Add State Variable" button.
- Enter the field name as "notes", keep the data type as String, and enable the List and Persisted toggles. Click Create.
Add an Open End Drawer action on the Floating Action Button:
- Select the Floating Action Button from the canvas.
- Go to the Actions tab from the Properties Panel (right menu).
- Click "+ Add Action".
- Choose the Action as Drawer.
- Select Open End Drawer as the Drawer Action Type.
To save a note inside the Local State variable:
- Click outside of the canvas view (to select the Scaffold).
- Click Edit End Drawer from the Properties Panel. This will open up the end-drawer.
- Select the SAVE Button.
- Go to the Actions tab from the Properties Panel.
- Click "+ Add Action".
- Select the Action as Update Local State.
- Choose the field to update as notes.
- Select Update Type as Add to List.
- Select the Value to add as From Variable > Widget State > Text Field name.
- You should also add an action to automatically close the end-drawer once the note is saved. Click Open beside the Action Flow Editor.
- Click the "+" button present at the bottom of the Update Local State tile and select Add Action.
- Choose the Action as Drawer.
- Select Close Drawers under the Drawer Action Type.
- Add one more action by clicking on the "+" button.
- Select the Action as Clear Text Fields.
- Check TextField_1.
- Click Close.
To display the saved notes inside the ListTile widgets:
- Select the Column wrapping the ListTile widget.
- Go to Generate Dynamic Children tab from the Properties Panel.
- Enter the variable name as "noteList".
- Choose the Source as Local State.
- Under Available Options, choose notes.
- Click Save.
- A dialog box will pop up, click Ok inside it.
- To use the note texts saved inside the Local State variable, select the first ListTile widget.
- From the Properties Panel, click Set from Variable beside the Title Text.
- Choose the Source as noteList item.
- Click Save.
To remove/delete a saved note from the Local State variable:
- Select the ListTile widget from the canvas.
- Click Open Slidable.
- Select the SlidableActionWidget from the canvas.
- Go to the Actions tab from the Properties Panel.
- Click "+ Add Action".
- Select the Action as Update Local State.
- Choose the field to update as notes.
- Select Update Type as Remove from List.
- Select the Value to remove as From Variable > noteList item.
Testing the app
To make sure the NoteKeeper app is working as expected, you can try it out in the Test mode of FlutterFlow.
Click on the arrow beside the Run button and select Test. This would open up a new window (it takes around 2-3 minutes for the app to build).
Once the build is complete, you will be able to try out the app.
Configuring locally
Now, we have arrived at the most crucial section of the article.
How to use this app as an extension? It's pretty straightforward, just follow the steps properly, and your app should be ready to use as a Chrome extension.
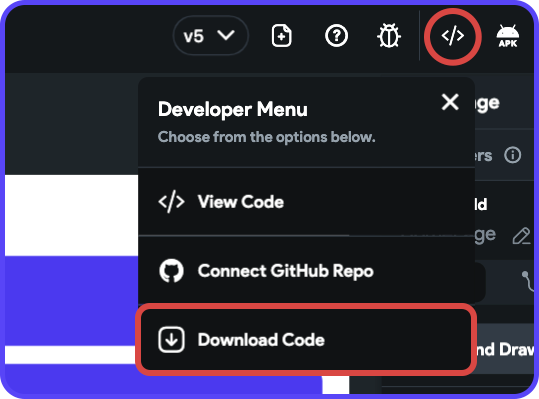
1. Firstly, you have to download the source code of this app. Click on the Developer Menu button present on the Tool Bar (top menu), and select Download Code. This will start the download.
Once the project is downloaded, extract the contents from the .zip file, and open it using any code editor (VS Code, IntelliJ, and Android Studio are the recommended options).
2. Run the following command from the project directory:
flutter pub getThis will fetch all the required dependencies for this project.
3. You would need to make some modifications in just two files to get a working extension.
From the code editor, open web/index.html file. Scroll to the bottom of this file and remove the following <script> tag:
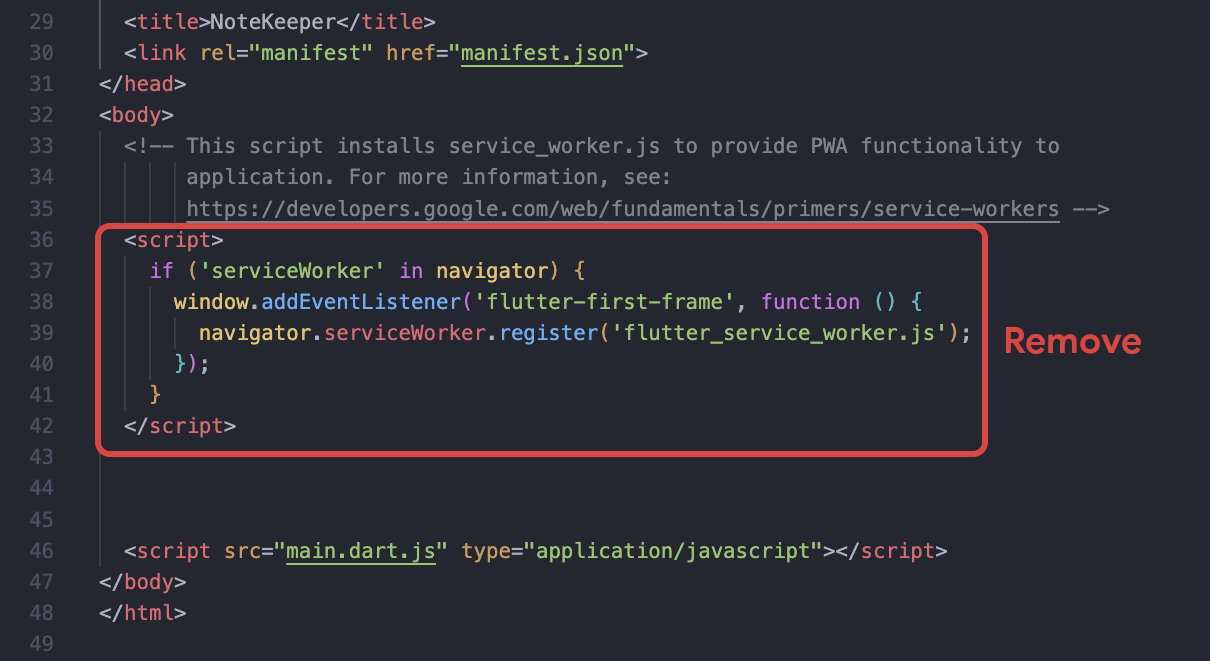
Only the <script> tag with main.dart.js should be present in the index.html file.
4. Extensions have to be given a fixed dimension of the view. Replace the starting <html> tag of the index.html file with the following:
<html style="height: 350px; width: 650px">This will set the extension view’s height and width to 350 pixels and 650 pixels respectively.
5. Now, open the web/manifest.json file. Replace the entire content with the following:
{
    "name": "Note Keeper",
    "description": "Note Keeper",
    "version": "1.0.0",
    "content_security_policy": {
        "extension_pages": "script-src 'self' ; object-src 'self'"
    },
    "action": {
        "default_popup": "index.html",
        "default_icon": "icons/Icon-192.png"
    },
    "manifest_version": 3
}
You are ready to generate the extension!
6. Basically, you have to generate a Flutter web build. Run the following Flutter command:
flutter build web --web-renderer html --cspThis will generate the build files inside the <project_directory>/build/web folder.
Trying out the extension
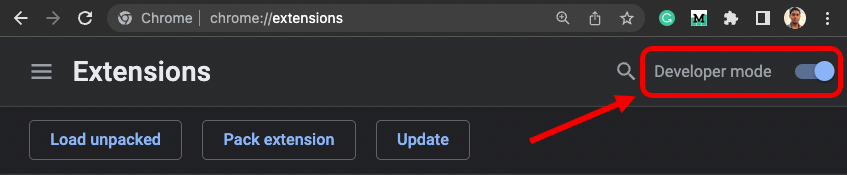
To install and use the extension, go to this URL from the Chrome browser:
chrome://extensionsThis page lists all the Chrome extensions if you have any installed.
1. Enable the Developer mode toggle present in the top-right corner of the webpage.
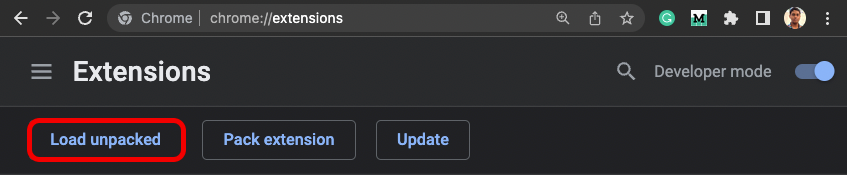
2. Click Load unpacked.
3. Select the <project_directory>/build/web folder.
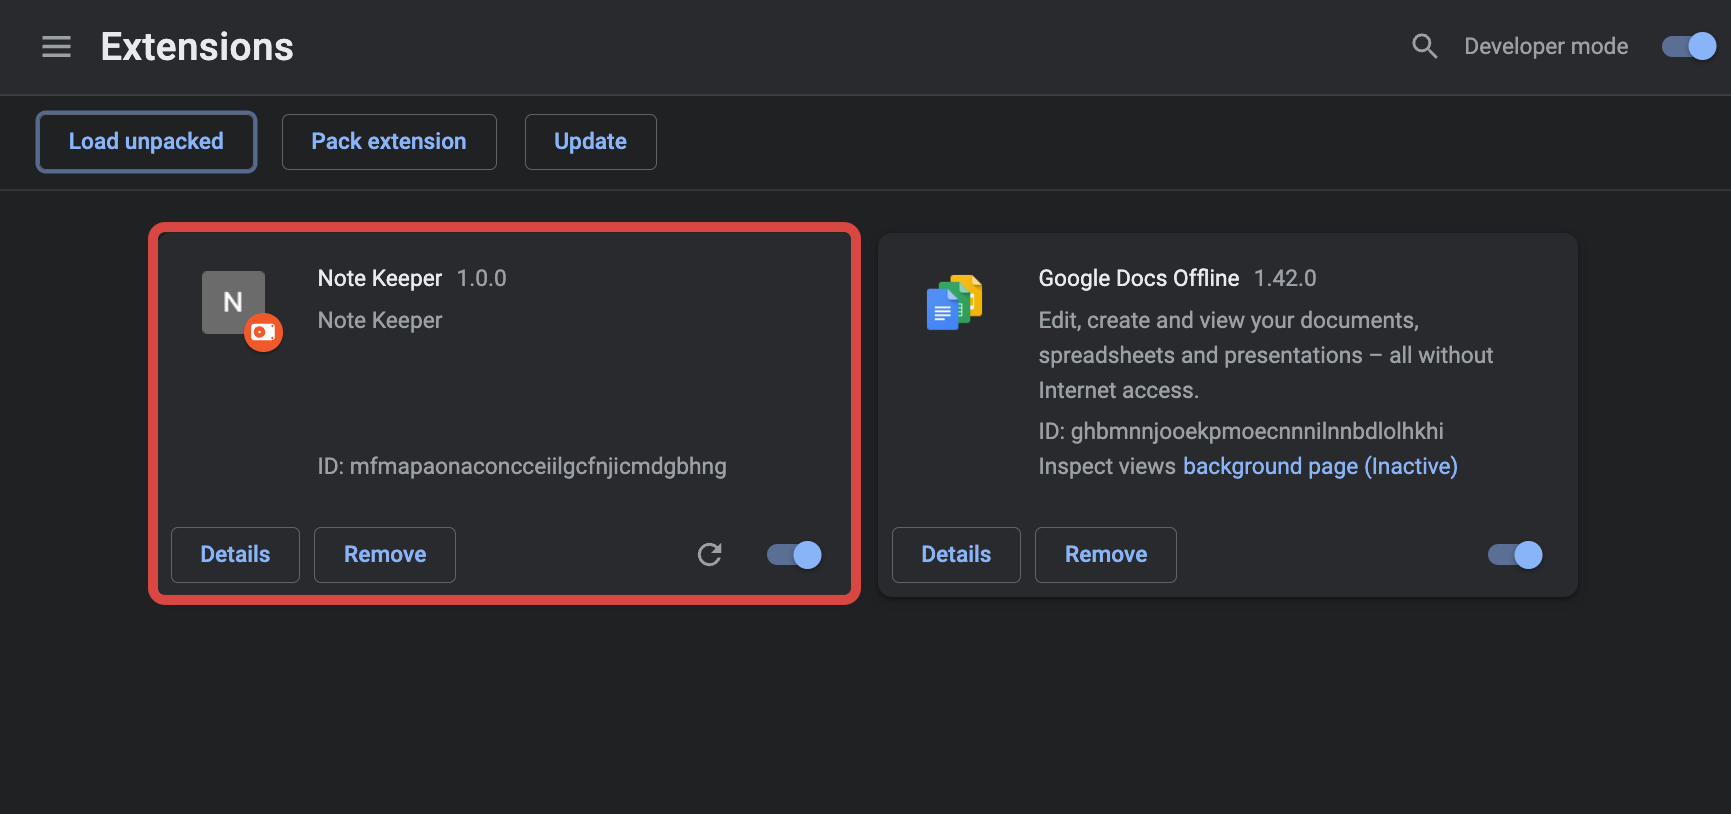
You will see that the new extension is now added to that page.
The extension will get automatically installed. You will be able to access it just like any regular extension by clicking on the extension icon present in the top bar (it can also be pinned for easy access).
Congratulations! Your Note Keeper extension is ready to use. 🎉
Wrapping up
Hope you have found this article interesting.
Flutter has a massive potential that people are still unlocking, and FlutterFlow is enhancing and making them accessible to everyone with its low code approach.
If you want to explore more, there's an in-depth article on building this extension using Flutter (which also covers some of the limitations of running Flutter as an extension).
