
Firebase provides various cloud-based services that are maintained by Google. Developers can connect their apps with these services without managing any cloud infrastructural resources. That's why Firebase is also referred to as a Backend-as-a-Service (Baas) platform.
FlutterFlow supports direct integration with Firebase making it a lot faster to build a totally serverless Flutter app.
In this series of blog posts, you will learn to build a complete ToDo app using FlutterFlow.
Clone the starter project for this tutorial to follow along: Todo Starter 1.
This article will provide a walkthrough of integrating email/password sign-in and Google Sign In using Firebase Authentication to a FlutterFlow app and get you started on building the ToDo app.
Links to other blogs that are part of this series:
App user interface
We'll be using the user interface of an app called RobinDo, which you can also find among the sample apps of FlutterFlow.
As in this part, we will only focus on integrating authentication into the app, so let's take a look at the pages required for authentication.
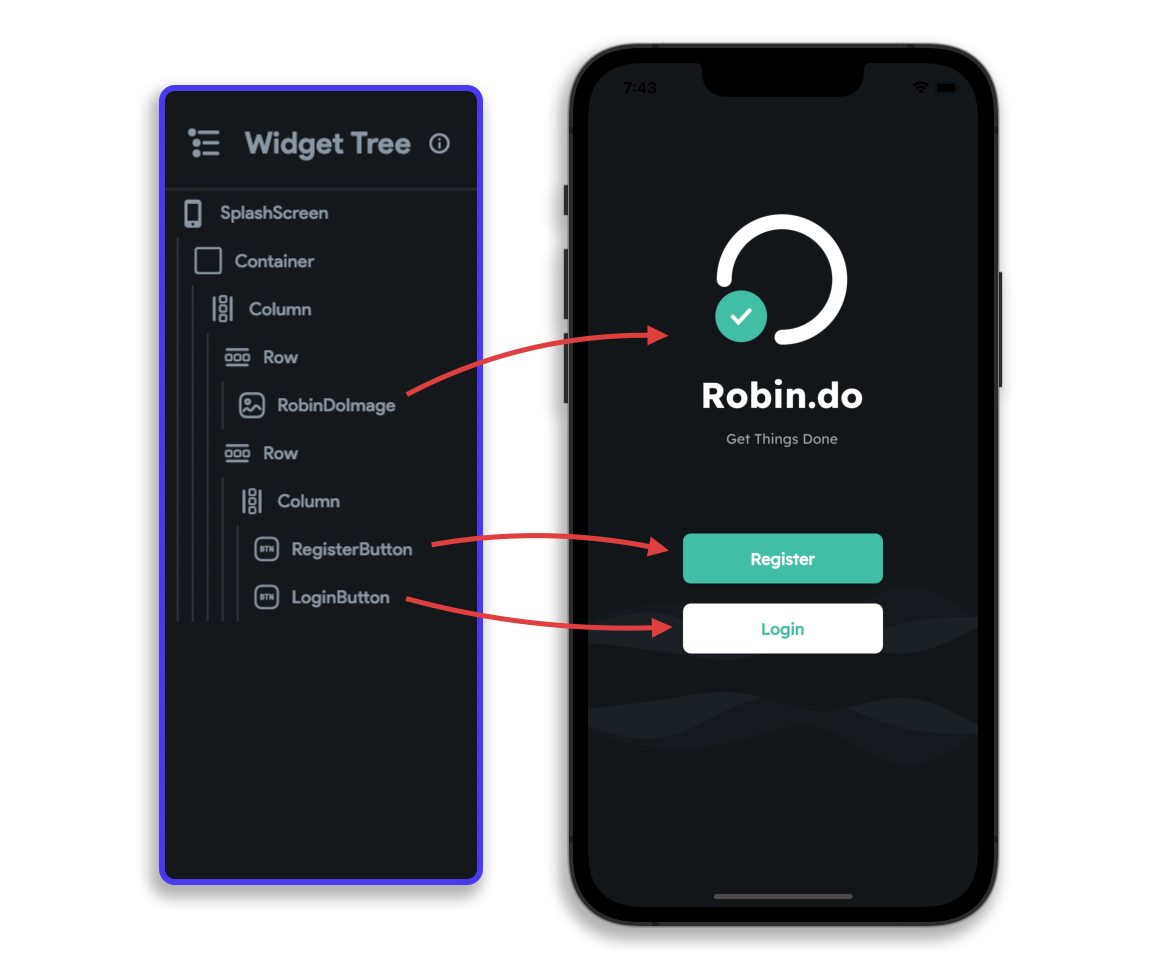
SplashScreen
The app's initial screen will have buttons for navigating to the LoginScreen and RegisterScreen pages.
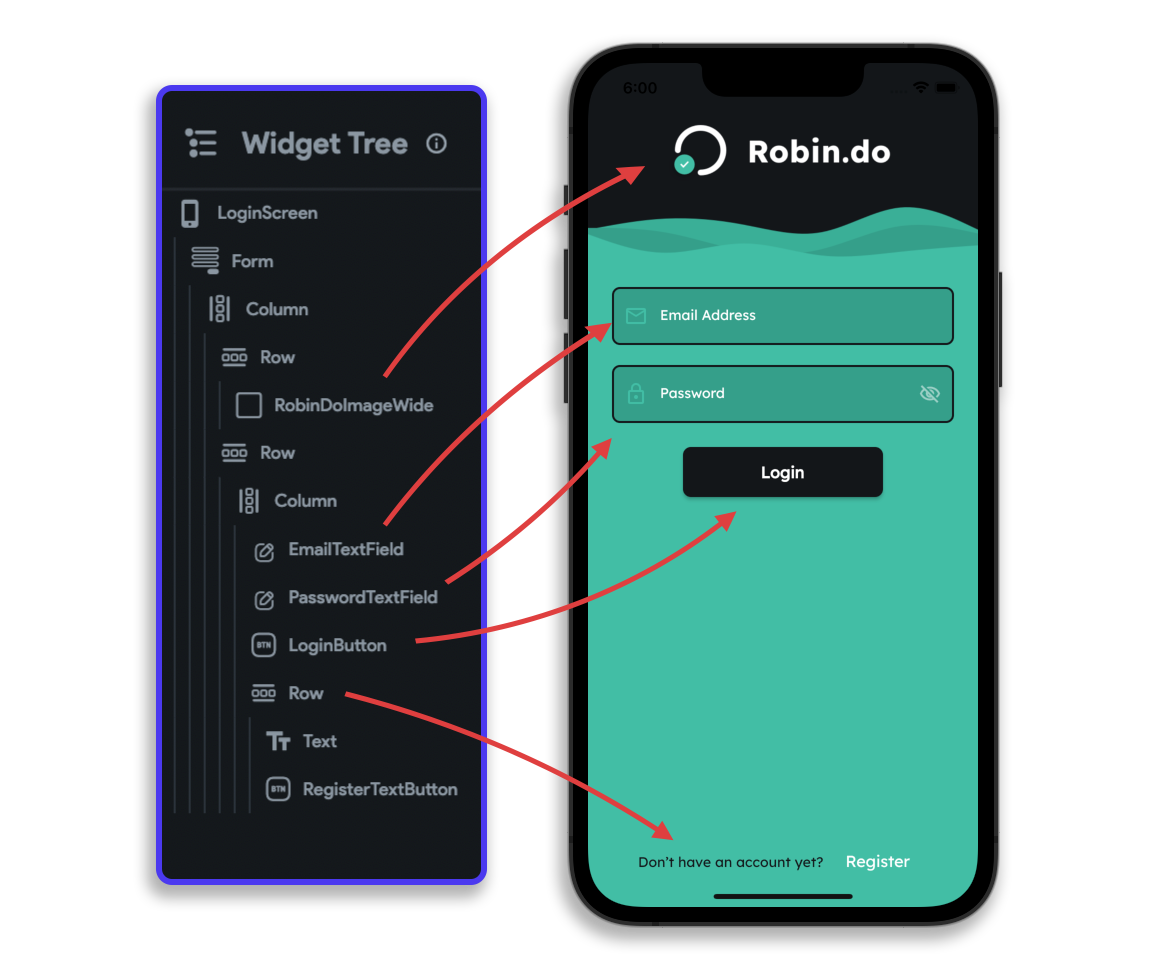
LoginScreen
Existing users can log in to the app from this page.
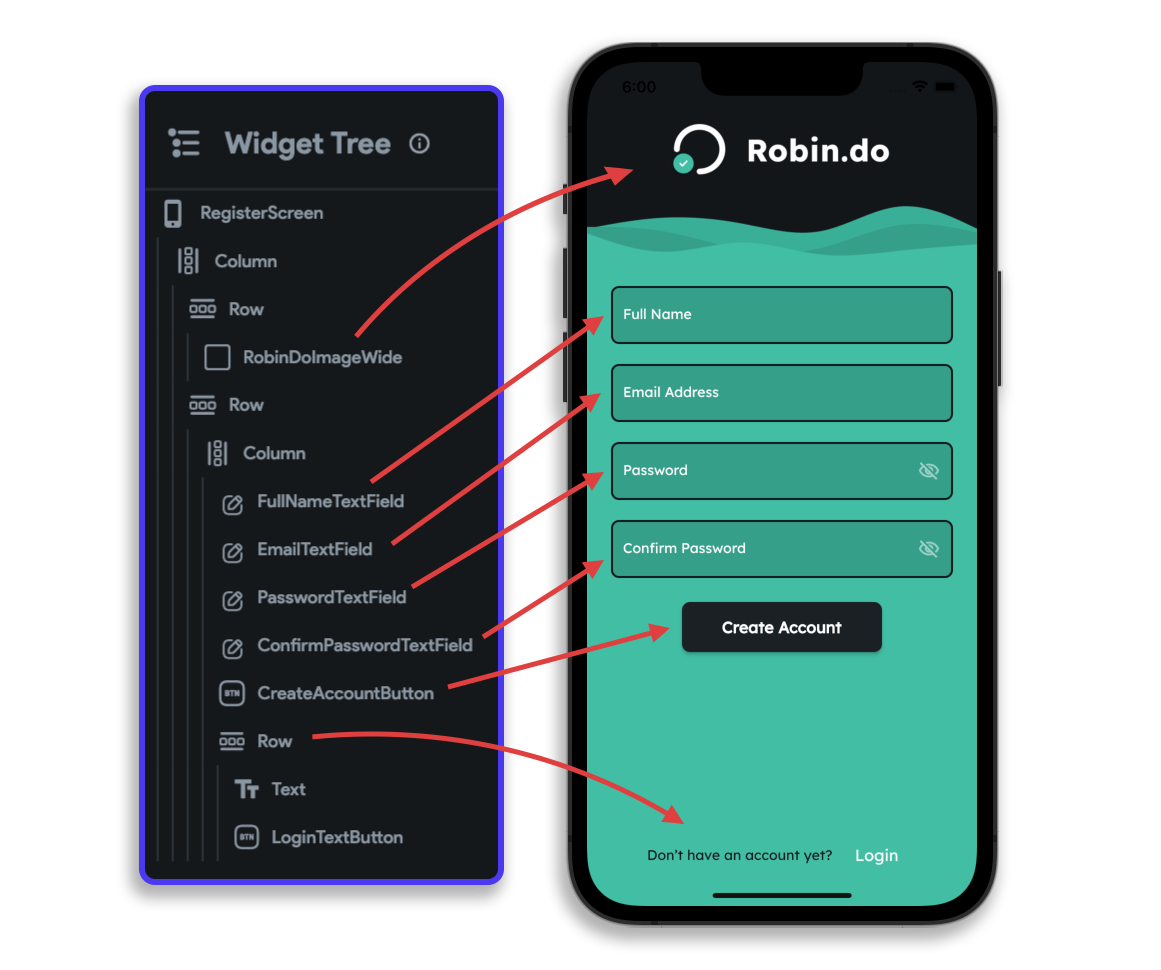
RegisterScreen
New users can create an account from this page.
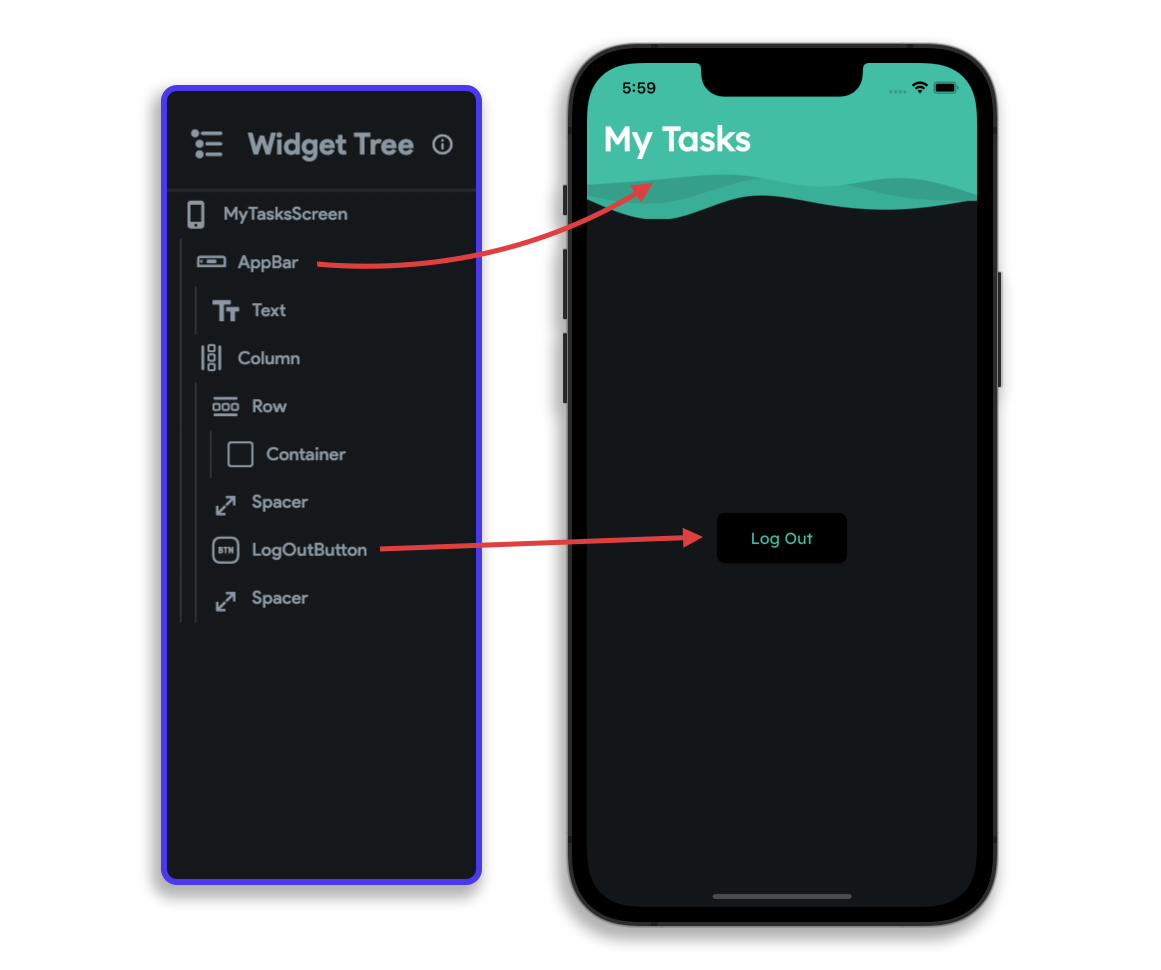
MyTasksScreen
This page will be the app's main screen, where the user would be navigated to after being authenticated. A list of all the tasks created by the user will be displayed here.
We will cover the complete user interface of this page in the next part of this series. It will only have a Log Out button for now.
Configuring Firebase
Let's start by creating a new Firebase project. It's needed in order to get access to any of the Firebase services like authentication, database, and many more.
Follow the steps below to create a Firebase project:
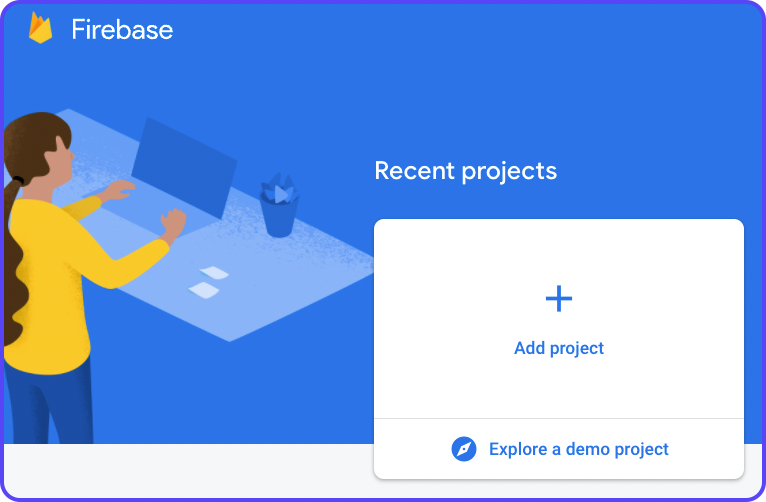
- Go to Firebase Console. You'll need to log in using your Google account.
- Click Add project.
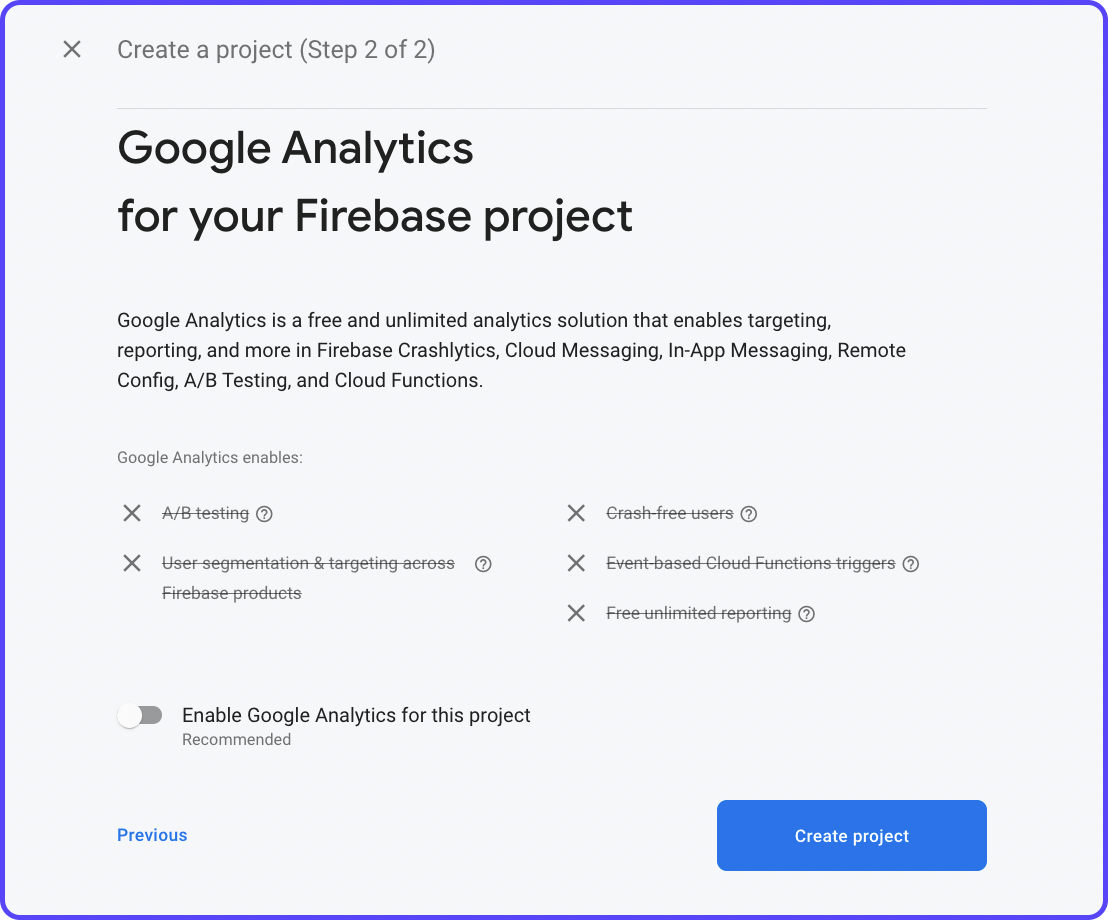
3. Give a name to your project and click Continue.

4. Disable Google Analytics as this is just a demo project. But if you are using Firebase for any production application, it's recommended you enable analytics. Click Create project.
5. Wait for the project to complete the initialization process. Once it's ready, click Continue.
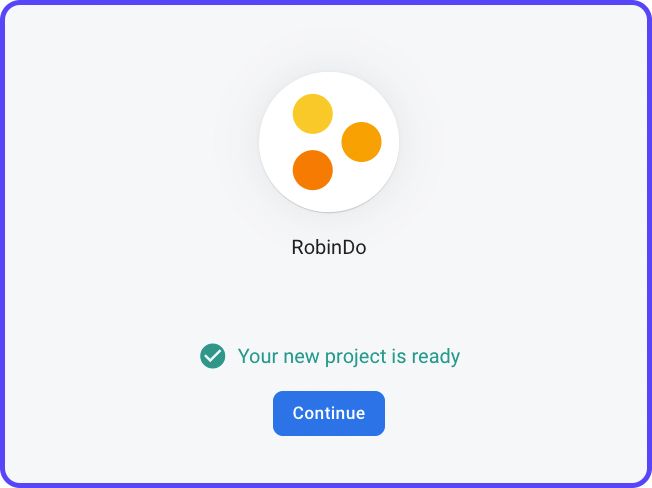
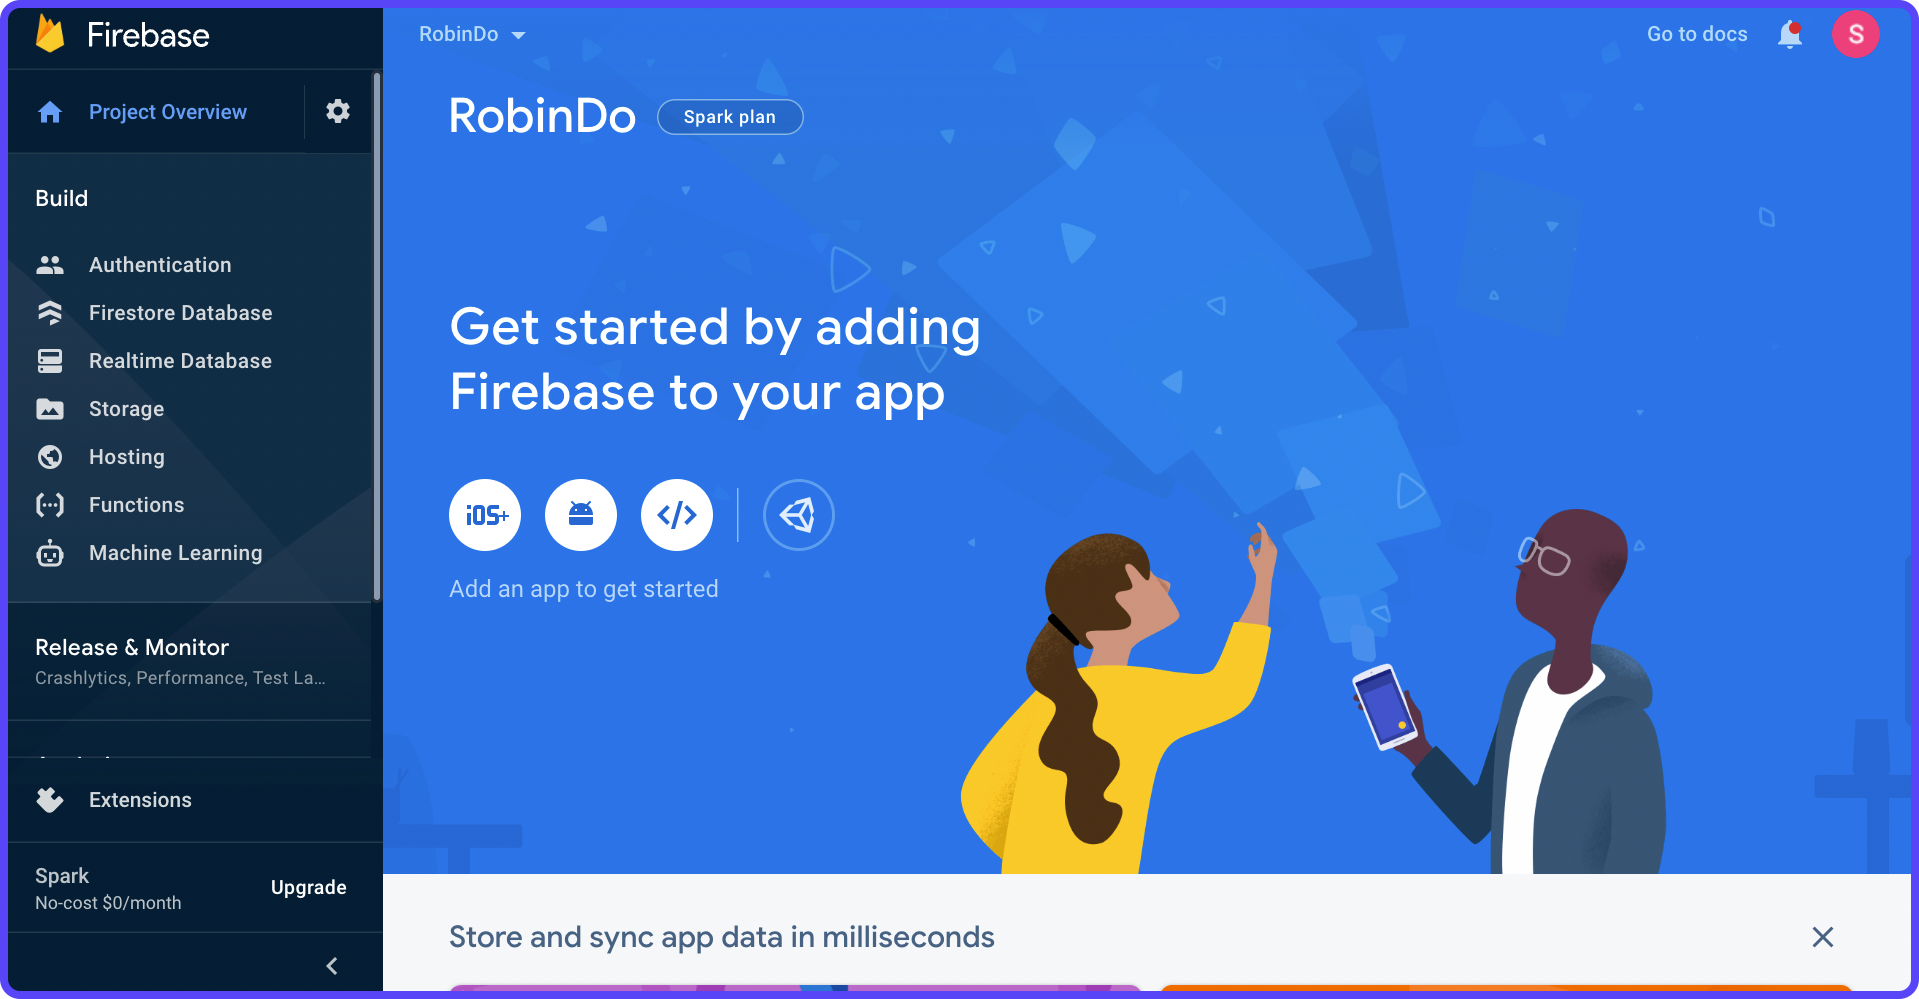
This will navigate you to the Firebase dashboard page.
You need to give FlutterFlow access to this Firebase project for the integration to work.
Follow the steps below:
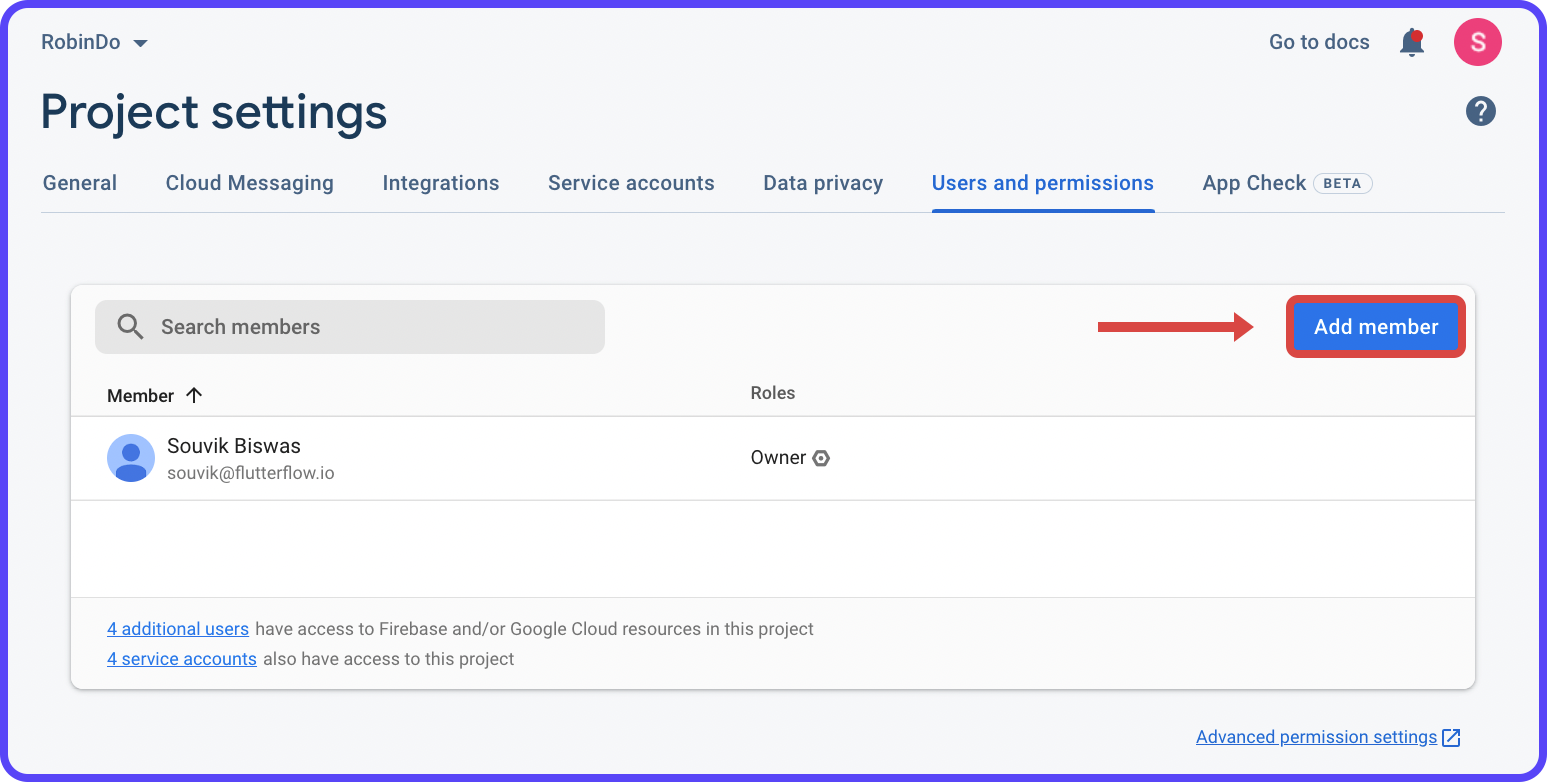
1. Navigate to the Users and permissions settings by clicking on the gear icon (present in the left menu).
2. Click Add member.
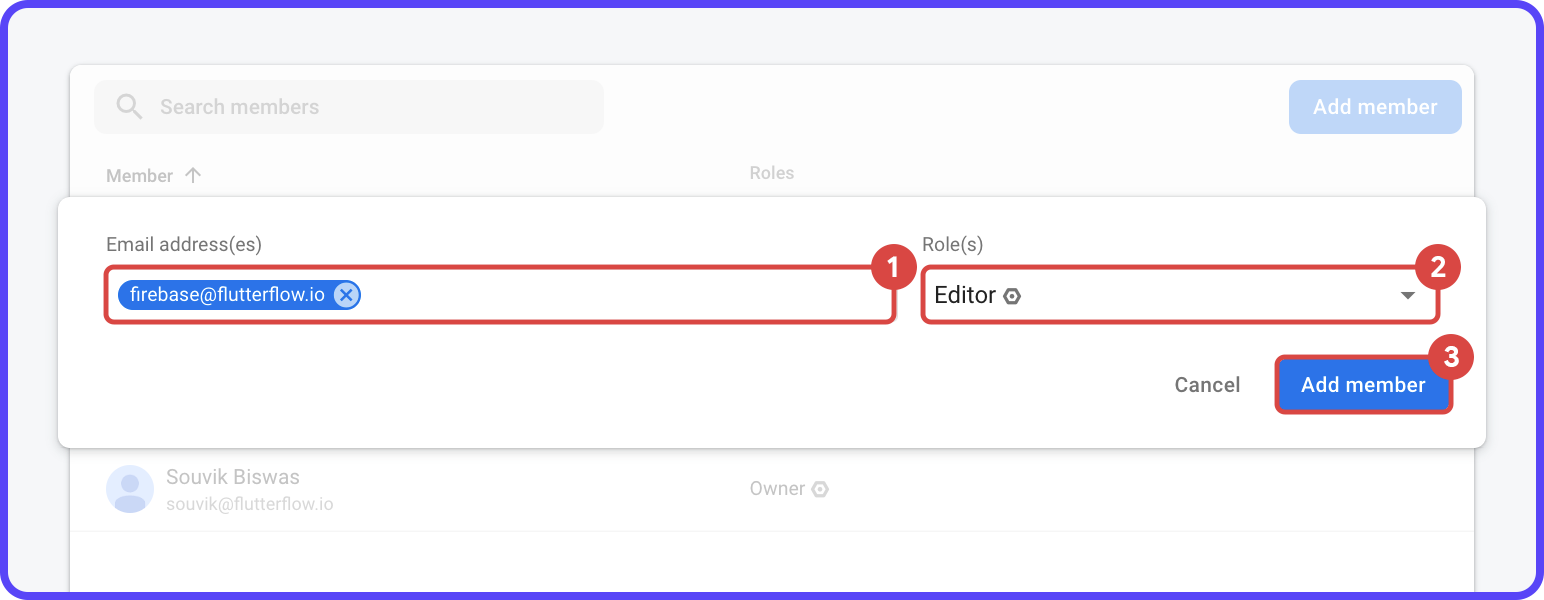
3. Enter the Email address as firebase@flutterflow.io and choose the Role as Editor. Click Add member.
Connecting with FlutterFlow
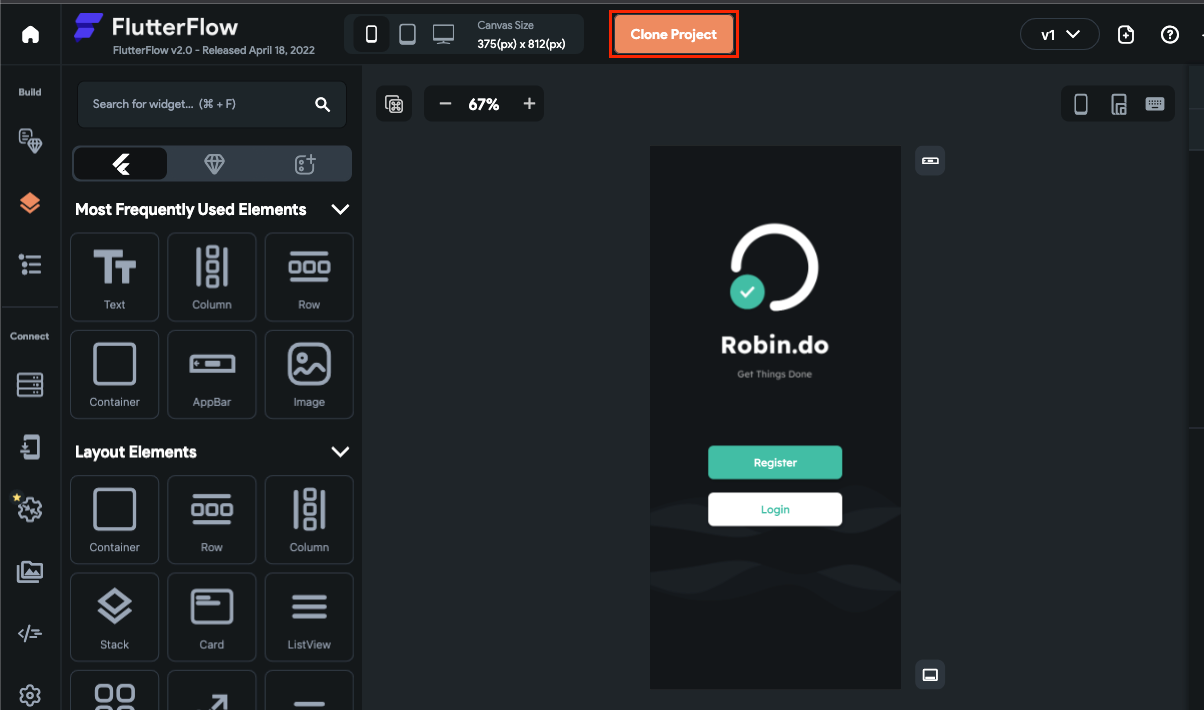
To get started, clone the project for this tutorial.
1. Login to FlutterFlow here. If you don't have an account, you can create one easily from the same page.
2. Open the starter project for this tutorial and clone the project.
Let's connect the Firebase project (that you created in the previous section) with FlutterFlow. Follow the steps below:
- Go to the Settings and Integrations page from the Navigation Menu (present on the left).
- Under Project Setup section, select Firebase.
- Now, you will need the Firebase Project ID. Get it by going to the
Firebase dashboard > Project settings > General. Copy the Project ID from that page and paste it into the respective field of FlutterFlow. - Click Connect. It will take a few moments to connect to the Firebase project.
- Firebase requires configuration files for each platform (e.g., Android, iOS, Web, etc.) to communicate with them. Click Auto Generate Config Files.
- Choose a Package Name (used for uniquely identifying the app) and enter a Project Nickname (used inside the Firebase console to represent this app). Click Generate Files.
It should take under a minute to generate the files. Once it's done, you should see "Firebase Setup Complete!" written there.
Setting up authentication
To use authentication inside your FlutterFlow app, you must enable it from the Firebase console. Follow the steps below:
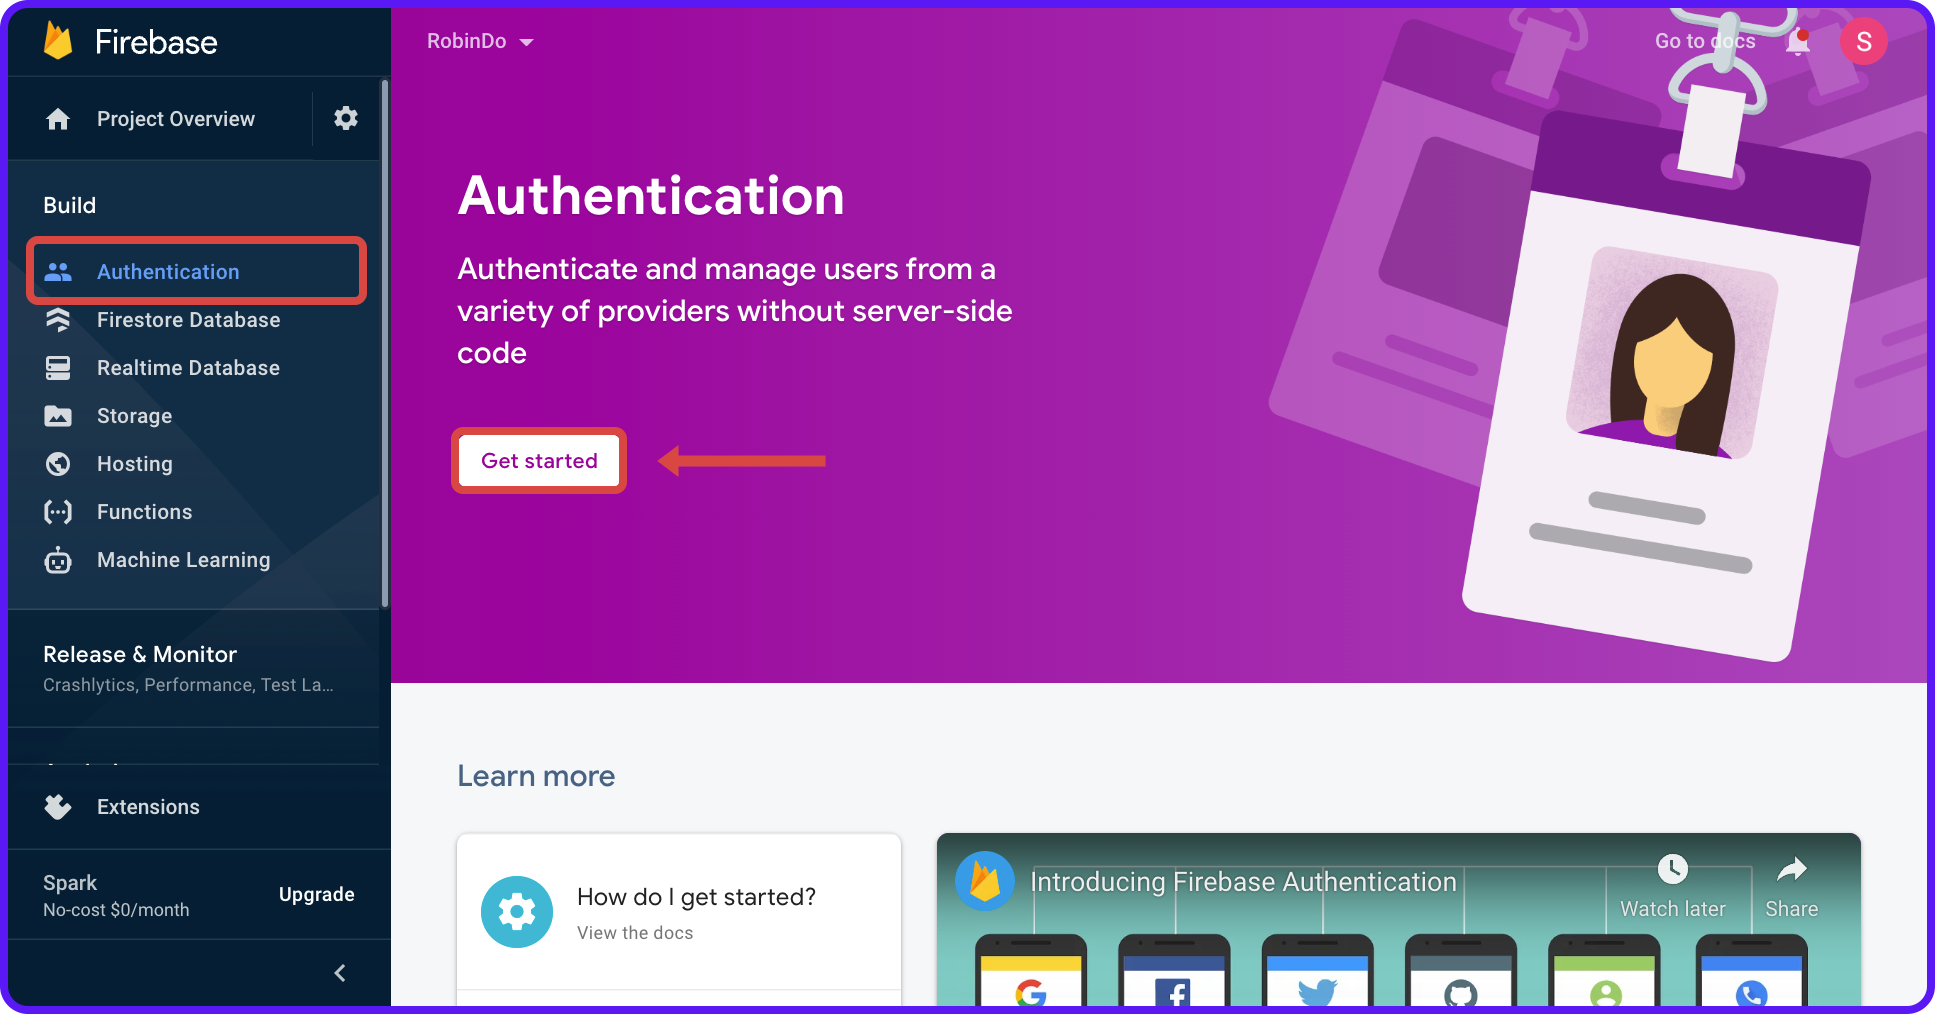
1. Navigate to your Firebase project.
2. Select Authentication (under Build section) from the left menu and click on Get started.
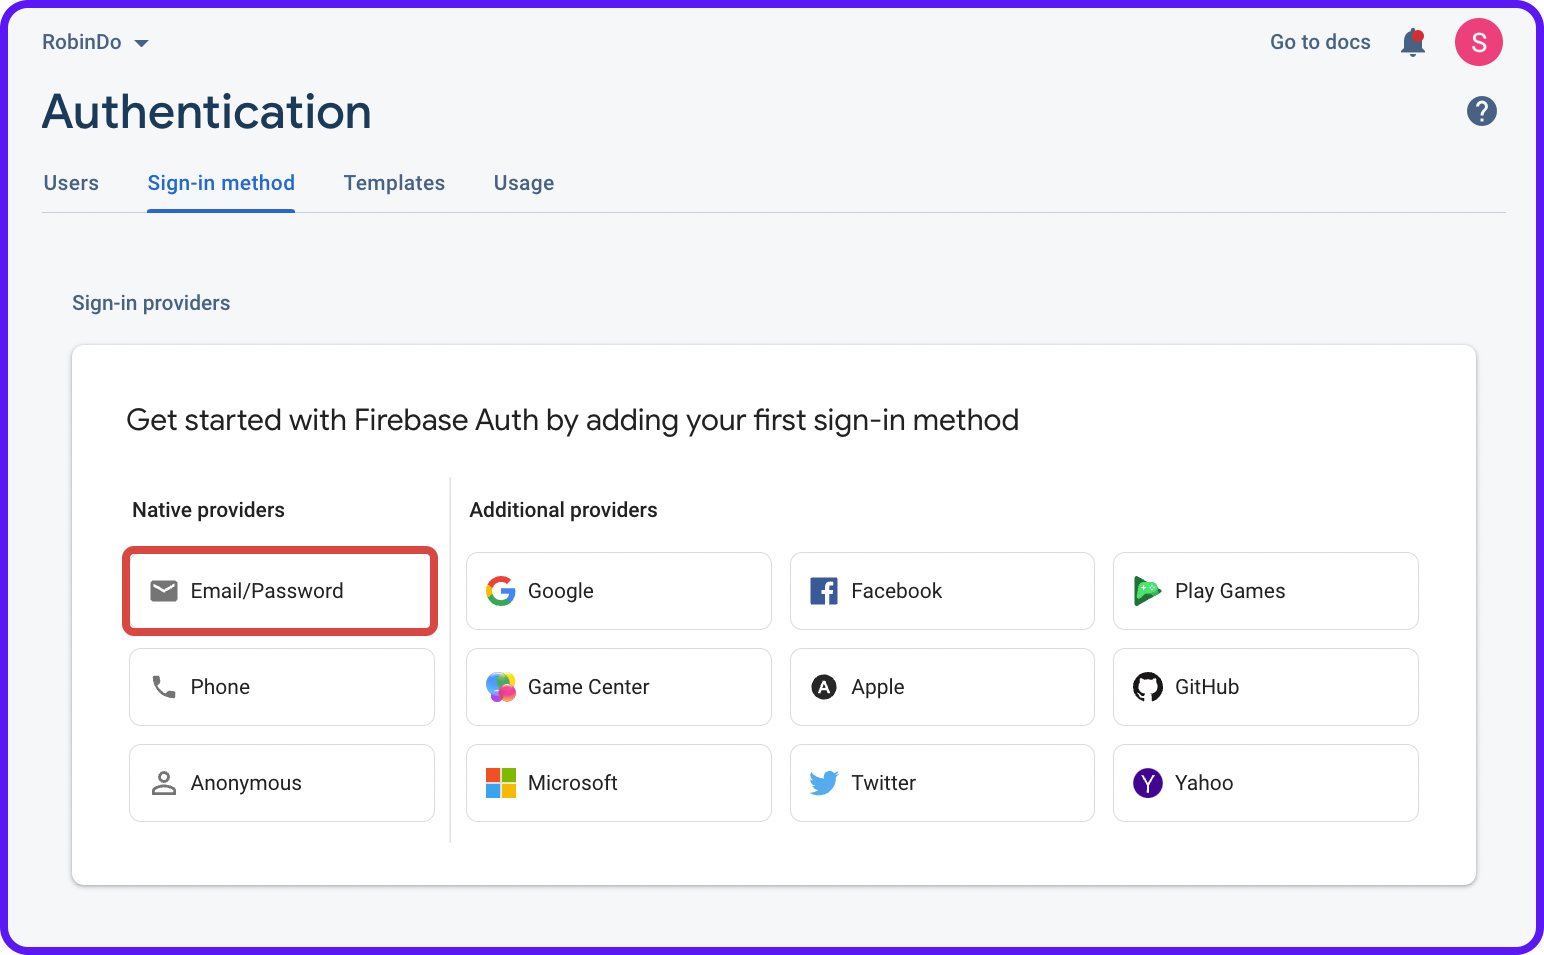
3. Click Email/Password under Native providers from the Sign-in providers section.
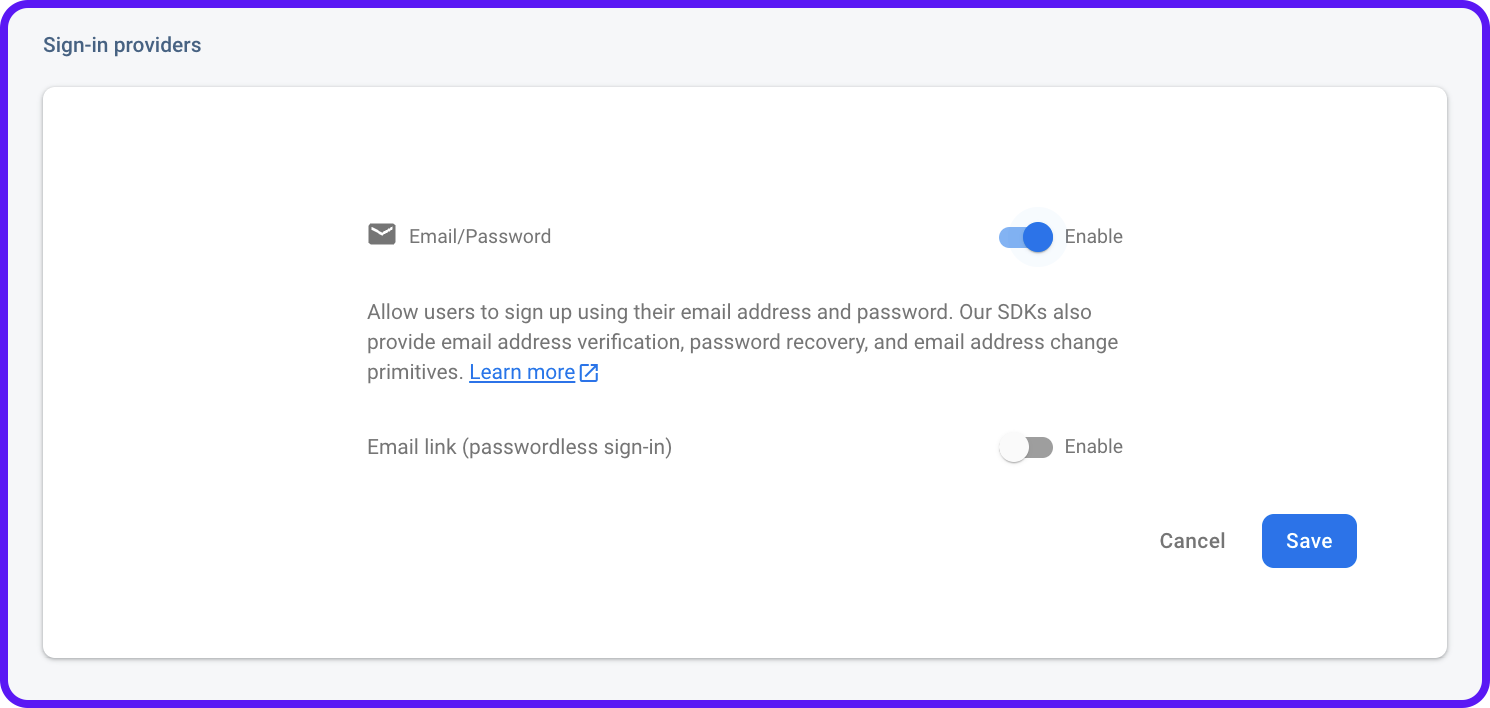
4. Use the toggle to enable Email/Password sign-in. Click Save.
Now, go back to your FlutterFlow project:
1. Select Settings and Integrations from the Navigation Menu.
2. Choose Authentication under App Settings.
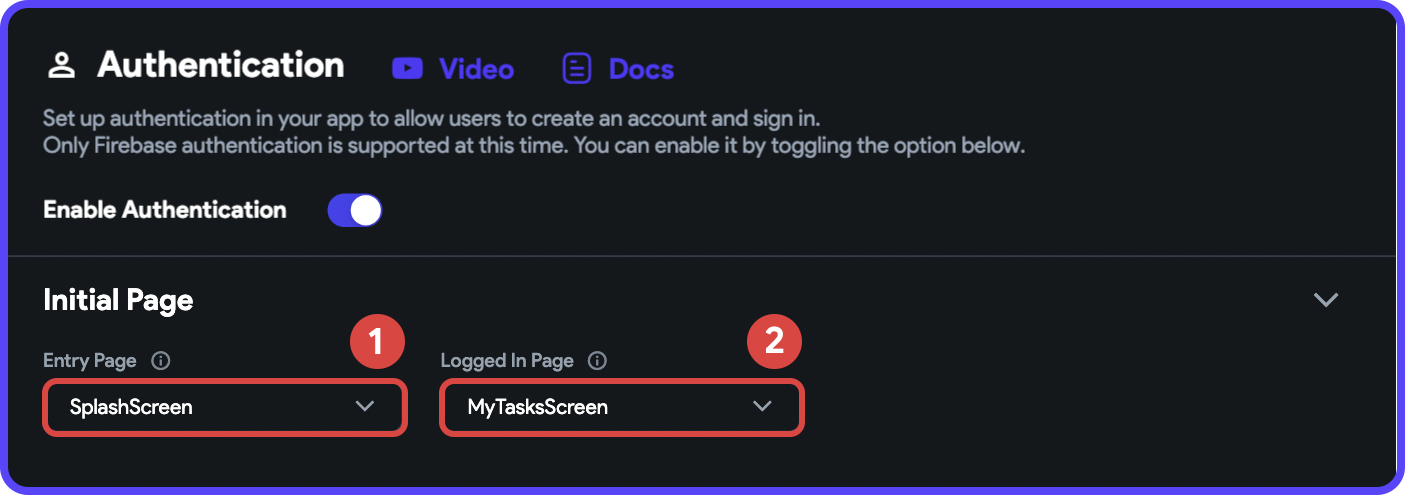
3. Enable Authentication using the toggle.
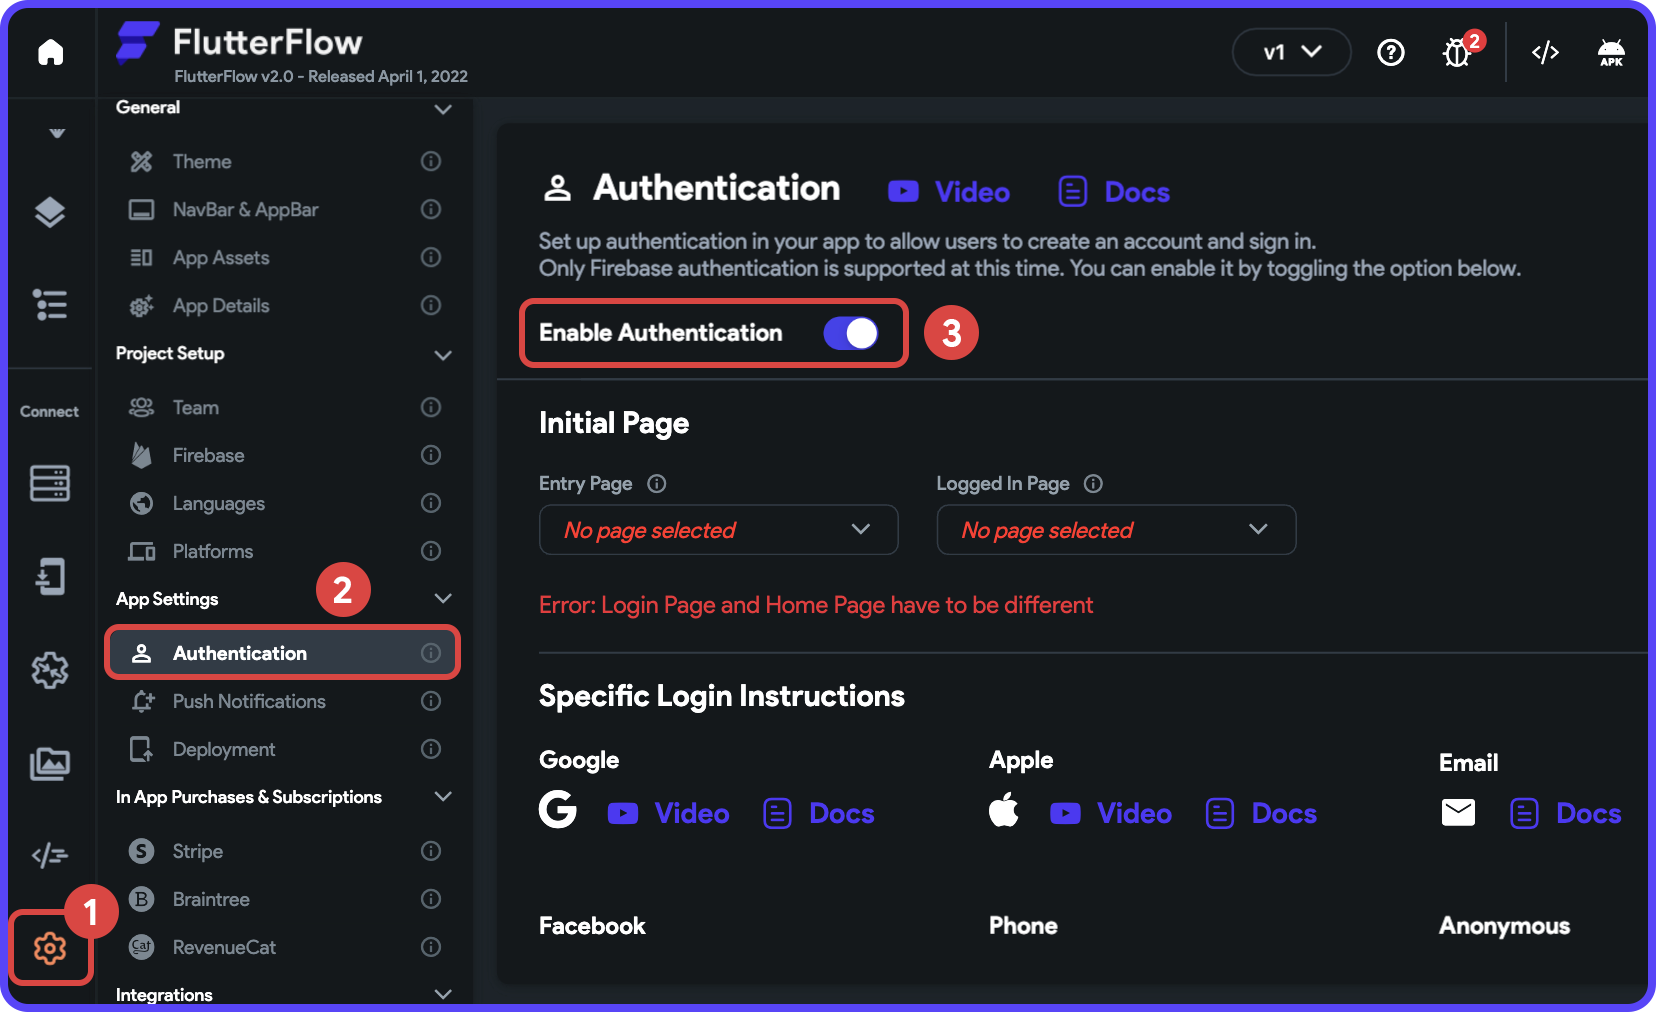
You will notice an error because the Entry Page and the Logged In Page are not specified. While using authentication, it's required to set these two pages.
- Entry Page: On app start, this page will load if the user is not logged in.
- Logged In Page: On app start, this page will load if the user has already logged in.
Choose the SplashScreen as the Entry Page and myTasks as the Logged In Page.
With this, you have completed the authentication setup inside FlutterFlow. Next, you will learn to start the register or login process from the app's user interface.
Adding Email Authentication
Once the app is launched, the user will be navigated to the SplashScreen page, which contains the two buttons. But the buttons don't yet navigate to any screen because we haven't defined any Action.
Navigate Action
To set the Navigate action on the Register Button, follow the steps below:
- Select the Register Button widget from the canvas or the widget tree.
- From the Properties Panel (right menu), click + Add inside the Actions section.
- Make sure On Tap is selected on the top, click + Add Action.
- Select the Action as Navigate To and choose RegisterScreen from the dropdown.
- Disable Allow Back Navigation using the toggle because we don't want the user to return back to the SplashScreen.
- Click Close.
Follow the similar steps to set a Navigate action on the Login Button that takes the user to the LoginScreen.
Authentication Action
Let's start by adding an action to the Register Button that would create a new account for the user.
Follow the steps below to define the create account action:
- Go to the RegisterScreen using the dropdown present on top of the Properties Panel.
- Select the Create Account Button widget from the canvas or the widget tree.
- From the Properties Panel, click + Add inside the Actions section.
- Make sure On Tap is selected on the top, click + Add Action.
- Select the Action as Authentication and choose Create Account from the dropdown.
- From Auth Provider dropdown, select Email.
- Select the respective TextFields for Email, Password, and Confirm Password.
- Click Close.
Now, go to the LoginScreen, follow the steps below to define the login action:
- Select the Login Button widget.
- From the Properties Panel, click + Add inside the Actions section.
- Make sure On Tap is selected on the top, click + Add Action.
- Select the Action as Authentication and choose Log in from the dropdown.
- From Auth Provider dropdown, select Email.
- Select the respective TextFields for Email and Password.
- Click Close.
Integrating Google Sign In
Google Sign In allows users to quickly sign in using their existing Google account without creating another account just for this app. It requires a couple of steps to set up Google Sign In for your FlutterFlow app.
Enable Google provider
To use Google Sign In inside your app, you must first add Google as a provider inside your Firebase project.
Follow the steps below:
1. Navigate to your Firebase project.
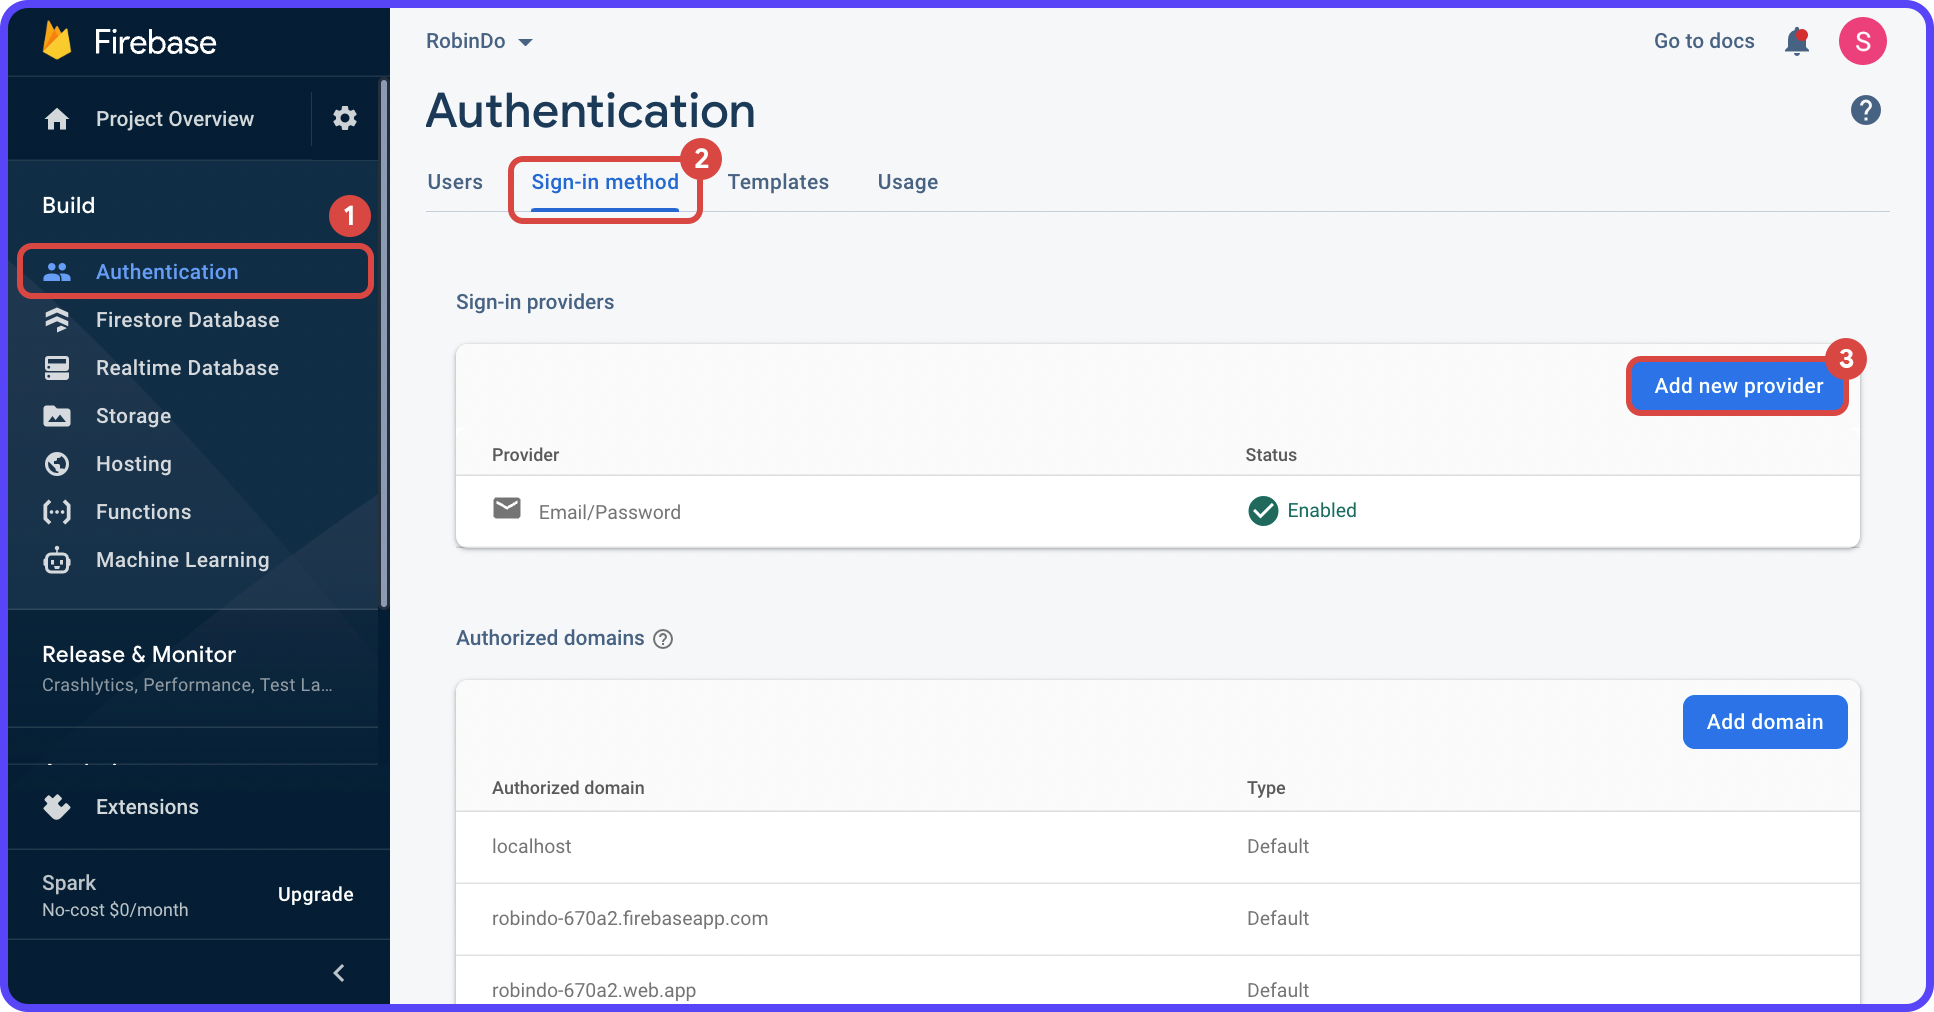
2. Select Authentication from the left menu and go to Sign-in method tab. Click Add new provider.
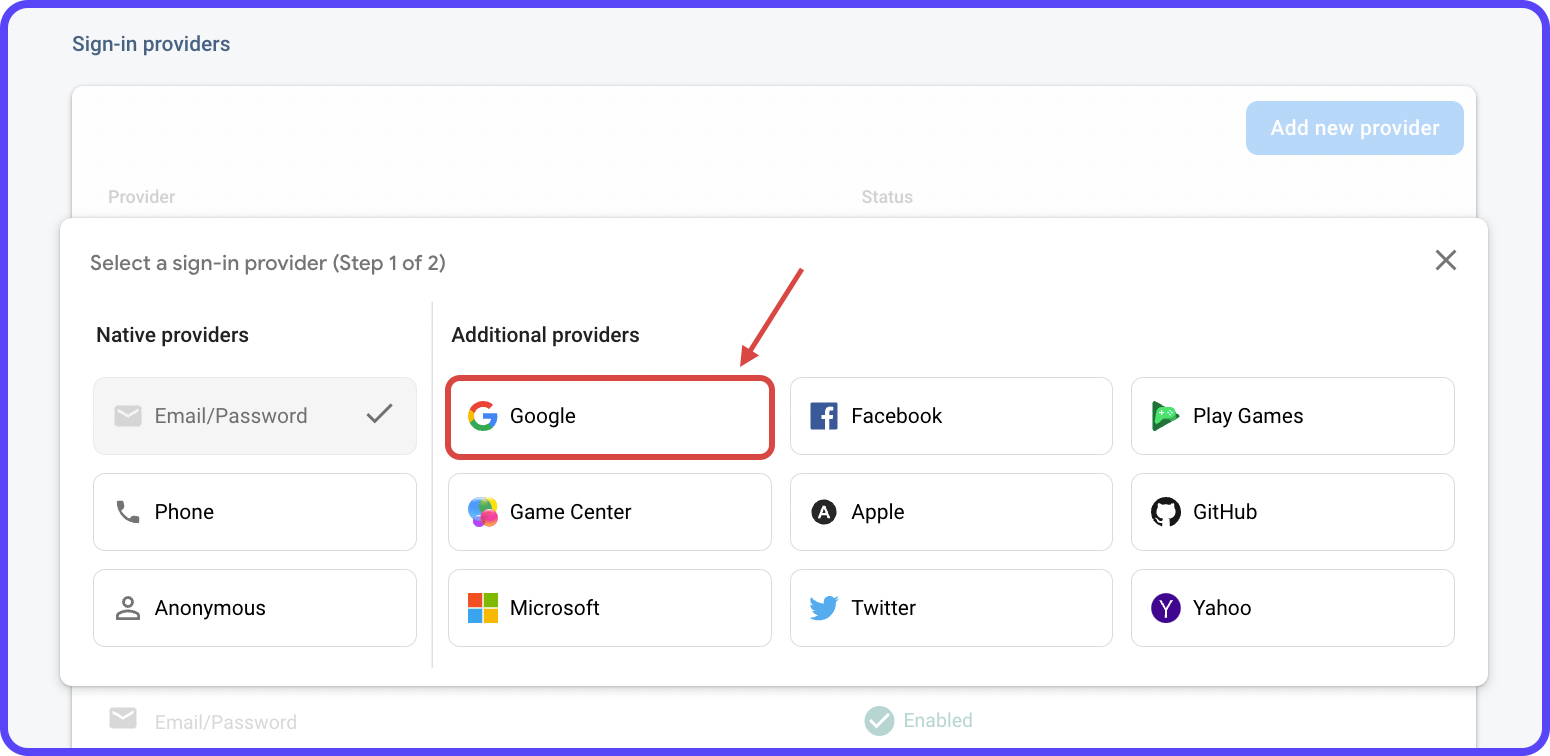
3. Select Google as the sign-in provider.
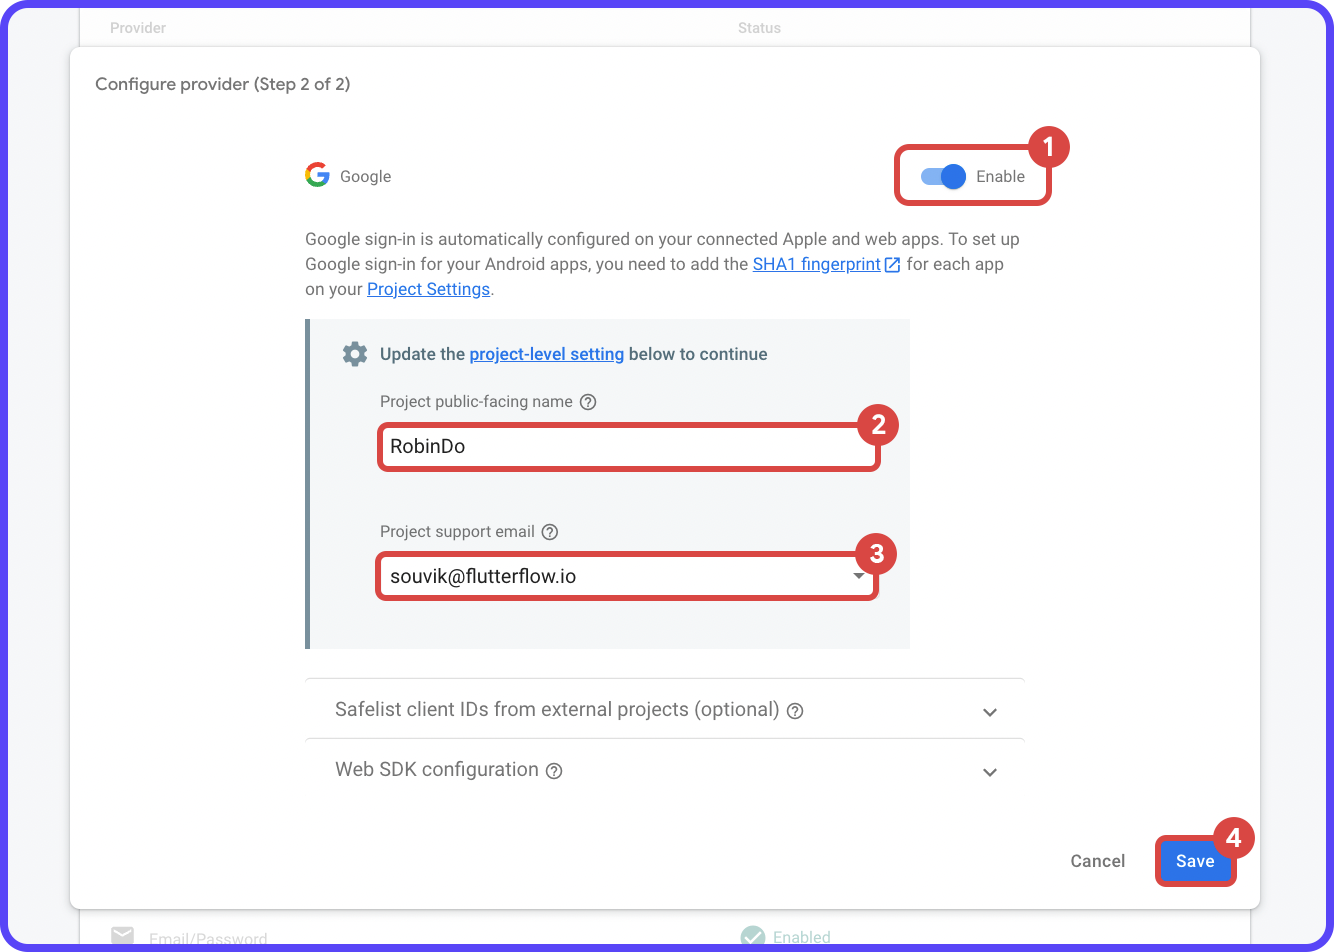
4. Enable Google provider using the toggle. Update the project's public facing name and support email. Click Save.
Add Google Sign In Button
To provide an alternative to the traditional email/password login method, let's add a Google Sign In button inside the app.
There are some banding guidelines for designing the sign-in button, but you don't need to worry about them as FlutterFlow comes with a built-in Sign in with Google component.
- Go to the SplashScreen of the app.
- Drag and drop or use the widget tree to add the Sign in with Google component (you will find it inside
Components > UI Elements). - Add a Divider between the traditional login/register buttons and the Google Sign In button.
- Modify the Divider properties to make it blend nicely with your existing theme.
Define Google Sign In Action
To trigger the signing-in process using Google provider, you have to define an authentication action on the Sign in with Google button.
Follow the steps below:
- Select the Sign in with Google button from the canvas.
- From the Properties Panel, click + Add inside the Actions section.
- Make sure On Tap is selected on the top, click + Add Action.
- Select the Action as Authentication and choose Log in from the dropdown.
- From the Auth Provider dropdown, select Google.
- Click Close.
Signing out user
It's important to give the users the option to sign out of the current account. If a user wants to use a different account inside the app, this comes in handy.
Follow the steps below to define a logout action that would sign out the user from the current account and navigate to the SplashScreen of the app:
- Go to the MyTasksScreen.
- Select the Log out button from the canvas.
- From the Properties Panel, click + Add inside the Actions section.
- Make sure On Tap is selected on the top, click + Add Action.
- Select the Action as Authentication and choose Logout from the dropdown.
- Click on the "+" button present at the bottom of the Action 1 tile and click Add Action.
- Select the Action as Navigate To and choose SplashScreen from the dropdown.
- Disable Allow Back Navigation using the toggle.
- Click Close.
Authentication in action
You can try out the authentication process by running the app either using the Run mode or by downloading the project and running it from your system.
Run mode configuration for Google Sign In
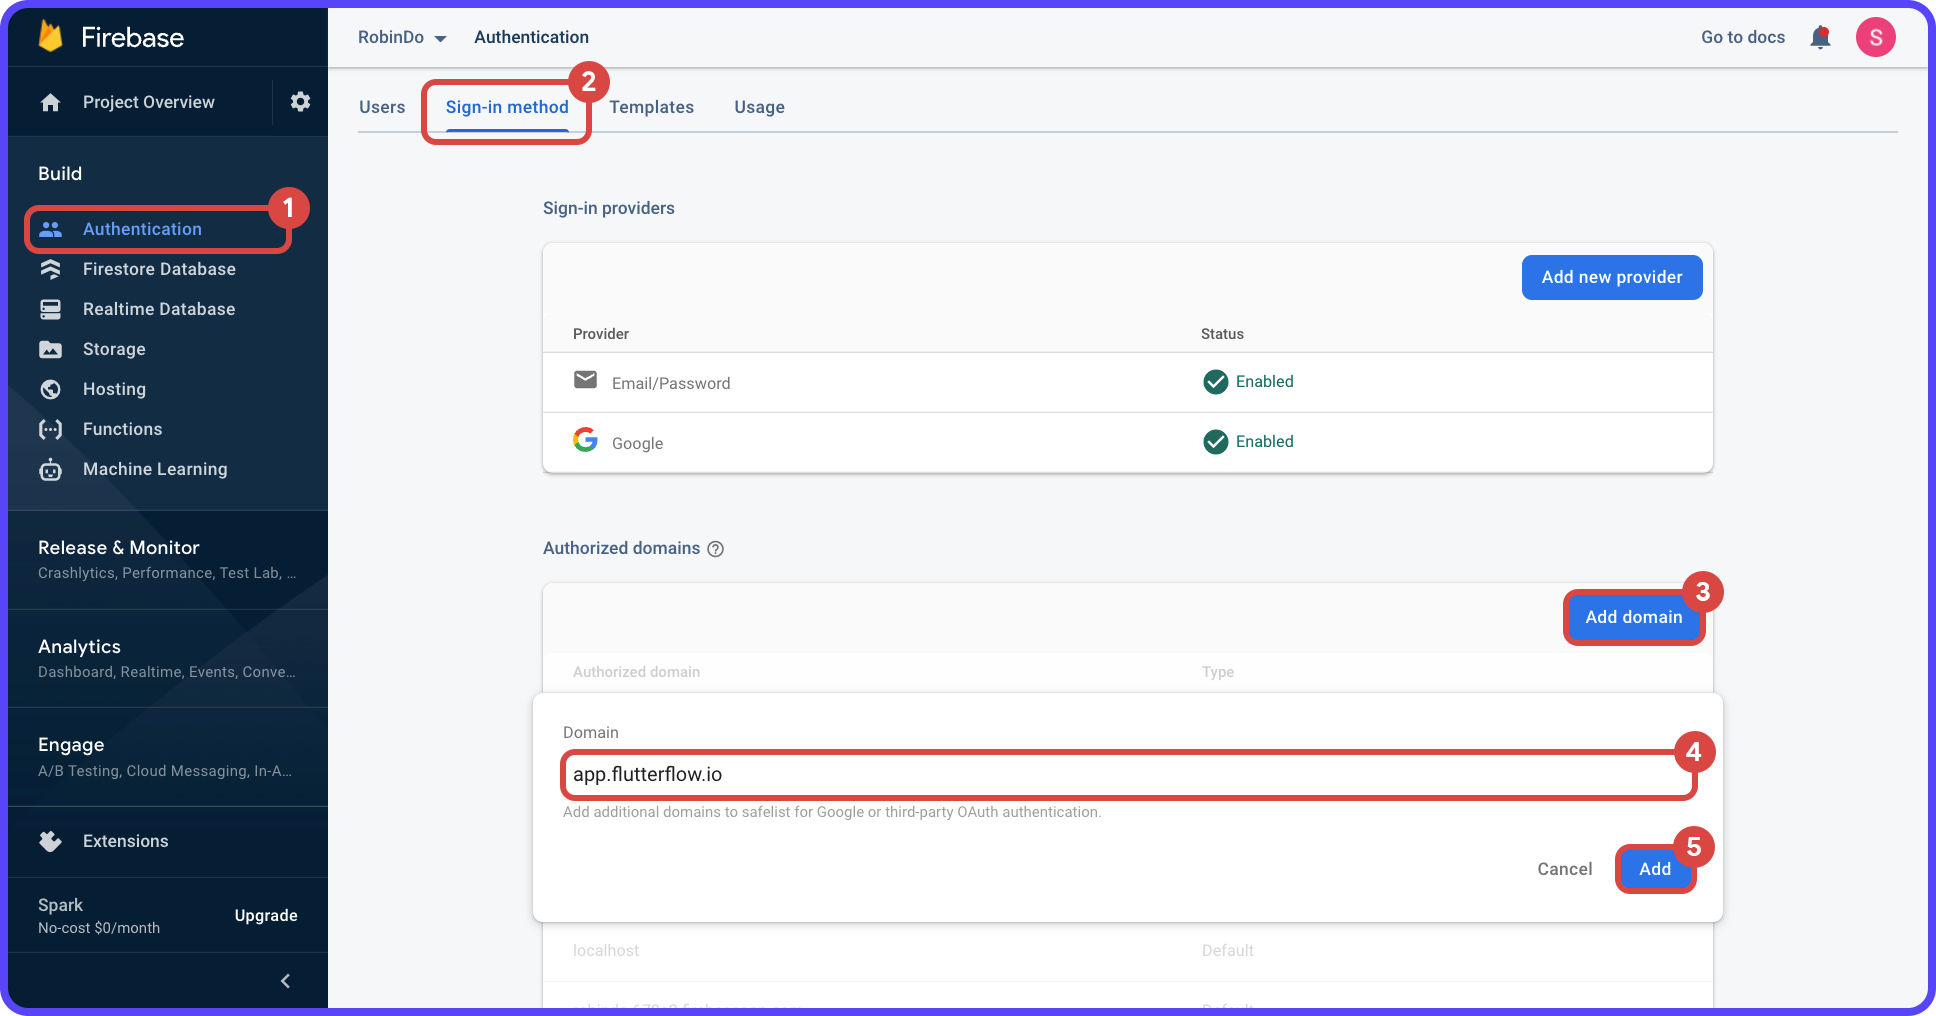
To test the login using Google, you need to complete one more configuration step. You have to add app.flutterflow.io as an authorized domain inside Firebase.
Go to your Firebase project, navigate to Authentication > Sign-in method, and click Add domain (under Authorized domains). Enter app.flutterflow.io and click Add.
Now, you are ready to test the Google Sign In of your app in Run mode!
Wrapping up
We hope this article will help you to integrate authentication into your app. Firebase provides a lot of other authentication providers (like Apple Sign In, Phone Sign In, and Anonymous Sign In) that can be integrated into your FlutterFlow app. Learn more about them here.
You can try out the sample app here.
The next part of this blog post series will give you a deep dive into Firestore, a NoSQL cloud database service provided by Firebase.
