
Search functionality is the most common feature to include inside a Todo app. It helps to improve the user experience by letting them easily search through their list of tasks.
In the previous blog post, we integrated the Todo app with Firestore to securely store the users' tasks on the cloud. If you haven't yet checked out the previous two parts of this blog post series, here are the links to them:
- Integrating Firebase Authentication and Google Sign In (1/3)
- Storing data to the cloud using Firestore (2/3)
Today, you will learn to add simple search functionality to the Todo app inside FlutterFlow.
Building the search UI
Let's start by adding a search bar to the user interface where the user can enter the search term. Follow the steps below:
- Add a new Container widget inside the Column, place it as the first element inside the Column and modify some of its properties to match the current theme (change its color to Primary, width to infinity, and height to 60 pixels).
- Go to the UI Builder menu and select the Templates tab.
- Drag and drop the UI Inputs - Search 2 template inside the Container.
- Add some padding to the template component and change the wrapped Container color to 80% opacity.
- Remove the Search button from the template.
- Modify some of the TextField properties to match the theme.
- Add an Icon inside the Row beside the TextField widget. Change the icon to Close.
Updating Backend Query
If you have followed the previous article to integrate Firestore, you would have set the Backend Query on the TaskListColumn widget. But it's below the search bar, so you won't get access to the results of the query from the search. You would need to do a simple modification before proceeding further.
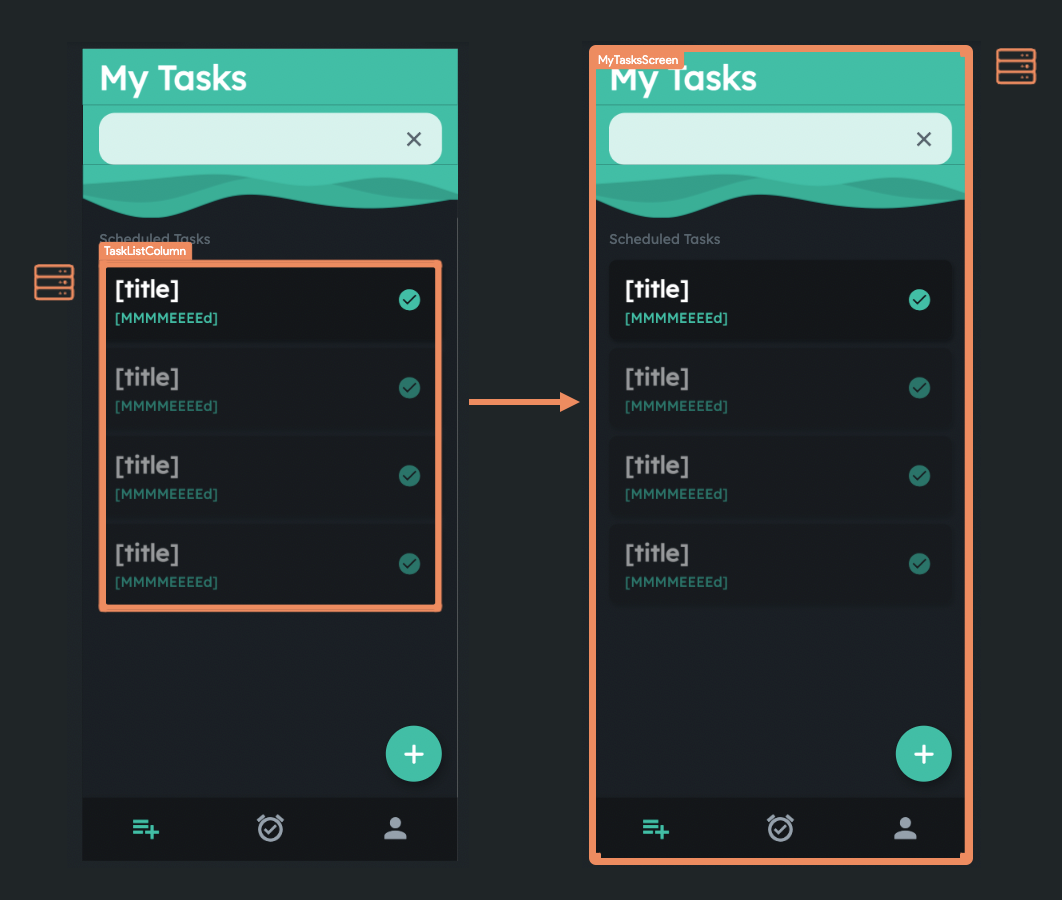
Instead of setting the backend query on just the TaskListColumn widget, you have to set it on the entire page.
Follow the steps below:
- Remove the Backend Query from the TaskListColumn widget.
- Define the exactly same Backend Query on the entire page.
- Select the TaskListColumn widget and go to the Generate Dynamic Children tab from the Properties Panel (right).
- Enter the Variable Name as "todoList" and select the Source as todos Records. Click Confirm. A dialog box will pop up, click Ok inside it.
- Set the todo title and timestamp from the correct variables.
- Go to the Action set on the TaskTileContainer widget and pass the todoList item as the taskData parameter.
Adding search action
We allow users to search for tasks by just inputting a keyword, and it would automatically trigger the action to retrieve the search results. To implement this, you will need to define an On Change action on the TextField.
Follow the steps below to define a Simple Search Action:
- Select the TextField from the canvas.
- From the Properties Panel, go to the Actions tab.
- Click the "+ Add Action" button.
- Choose the Type of Action as On Change.
- Select the action as Simple Search (On Device).
- Choose the Search Type as Documents.
- Select todos Documents > Documents as the Source.
- Select title as the only Searchable field (you can also choose description along with it to improve the search results).
- Choose the Search Term from: From Variable > Widget State > the TextField value (here it is "Enter the search term" value).
By default, the page updates after 2000ms of the TextField value change. But you can customize the update delay.
To customize the delay:
- Select the TextField widget.
- Under TextField Properties, you can specify the delay in the Update Delay (ms) field.
Now, we'll also add a Local State variable with boolean data type. This will help in a later step while we display the search results. You can add the local state variable with the name "isFullListShown". If it's true, then we'll show all the tasks. Otherwise, just display the tasks that are returned from the search result.
To add the local state variable:
- Go to Local State page from the Navigation Menu (left).
- Click the "+ Add State Variable" button.
- Enter the field name as "isFullListShown".
- Choose the data type as Boolean.
- Click Create.
- Click on the Default Value check box to mark it true initially.
Add another action inside the On Submit of the TextField to set the isFullListShown local state variable value to false:
- Go back to the On Change Action of the TextField by clicking Open besides the Action Flow Editor.
- Add a new action below the Simple Search by clicking on the "+" button and selecting Add Action.
- Select the Action as Update Local State.
- Select the field to update as isFullListShown.
- Choose the Update Type as Set Value.
- Choose the value as Specific Value > False.
- Click Close.
Clearing search results
To clear the search term from the TextField and revert to the full list view, you can set some actions on the Close Icon that had added beside the TextField.
Follow the steps below:
- Select Close Icon from the canvas.
- Go to the Actions tab from the Properties Panel.
- Click the "+ Add Action" button.
- Choose the action as Clear Text Fields and select the TextField to clear.
- Click Open besides the Action Flow Editor text.
- Add a new action below the Clear Text Fields by clicking on the "+" button and selecting Add Action.
- Select the Action as Update Local State.
- Select the field to update as isFullListShown.
- Choose the Update Type as Set Value.
- Choose the value as Specific Value > True.
- Click Close.
Displaying search results
It's a bit tricky to display both the entire tasks list and only the search results on the same page, but here the local state variable should help to make this quite easy.
The search results should only be displayed when the user enters any keyword inside the TextField. Otherwise, the entire list would be shown. And once the user searches for a keyword and then taps the Clear Icon, it should display the entire tasks list again.
Follow the steps below to implement this displaying strategy:
- Select the TaskListColumn widget and make a copy of it (on Windows/Linux use Ctrl + C, and on macOS use command + C shortcut, or you can right click on the widget and select copy).
- Select the Row widget wrapping the TaskListColumn, and paste the previously copied widget (on Windows/Linux use Ctrl + V, and on macOS use command + V shortcut, or you can right click on the widget and select paste).
- Now, you'll see there are two TaskListColumn widgets inside the Row. Rename one of them to FullTaskListColumn and the other one to SearchTaskListColumn (this will make it easier to identify them).
- Select the FullTaskListColumn widget. From the Properties Panel, enable the Conditional Visibility.
- Click on Unset, select the Source as Local State, and under Available Options choose isFullListShown. Click Confirm.
- You can uncheck Show in UI Builder for the FullTaskListColumn widget. It will make it easier to work on the SearchTaskListColumn widget in the next steps.
- Select the SearchTaskListColumn. Go to the Generate Dynamic Children tab from the Properties Panel.
- Enter the variable name as "searchResults" and choose the Source as simpleSearchResults. Click Confirm.
- You should already have the title and timestamp values set from the new variable.
- Enable the Conditional Visibility of the SearchTaskListColumn widget.
- Click on Unset, select the Source as Local State, under Available Options choose isFullListShown, enable Apply Opposite Statement. Click Confirm.
Search in action
You can try out the simple search action by running the app either using the Test/Run mode or by downloading the project and running it from your system.
The following demonstrates the simple search action performed inside the app running on an iOS Simulator.
You can try out this sample app here.
Conclusion
The concepts used for implementing the Simple Search Action in the Todo app can also be used similarly for any of your apps.
This search action is easy to implement without requiring any additional setup, but it has certain limitations. If you have a large Firestore Collection, using simple search might be a bit slow. In that case, you should consider using Algolia Search.
This article marks the end of the Todo blog series, hope these articles will help you while working on your apps.
Find the clonable version of this entire app here.
