
We're excited to announce the native integration of Gemini AI into FlutterFlow, making it easier for you to use Gemini APIs by simply adding a Gemini action.
For more details about this announcement, please watch the following video:
In today's tutorial, we'll be creating a smart Travel Diary app with Gemini. This app will cleverly extract event information from diary entries and add contextual information to image attachments.
To start, clone the starter project, which already has the UI set up for a travel diary app.
Use Case #1: Extract Event information from Diary Entries
Imagine a Travel Diary app that allows you to create diary entries and then uses AI to generate calendar invites based on those notes. We're going to build something similar.
Here's how we'll do it:
Step 1: Get Your API Key
Before you can use the Gemini API, you need to set up your API key. To create a new key, follow this link and click on "Create API Key". You can either create a key for a new project or select one of your existing Google Cloud projects. Make sure to store this key securely, as it serves as your authentication for accessing the Gemini API.
Step 2: Add Your Key to FlutterFlow project
Now that you have your API key, navigate to your cloned project and click on the Settings icon located in the left side panel. Scroll down to the end of the Integrations section and find "Gemini." Open the Gemini settings page, where you can enable Gemini by toggling the "Enable Gemini" switch. Then, add your API key in secret to the project.
Step 3: Set Up Your Prompt Instructions
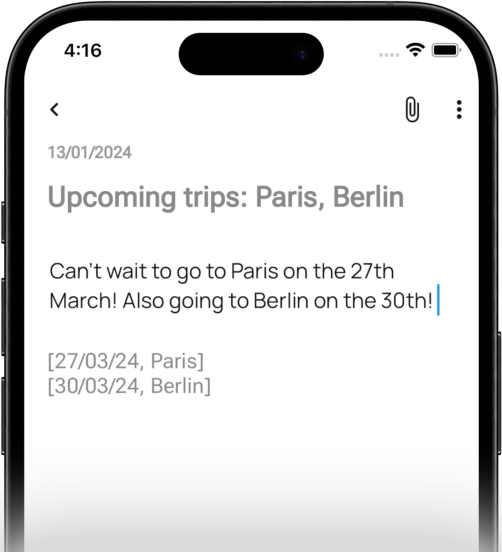
This app works by taking your diary entries and, with a bit of AI magic, giving back a list of dates and places ([DateTime, Place]). This list can be used for various purposes, such as creating a consolidated travel plan or generating events for the calendar.
You'll need to provide a specific instruction prompt for the AI, something like this:
Please reply using only "[DateTime, Place]". DateTime must be in dd/MM/YY format. Assume year as 2024 unless another year explictly mentioned. If a month is mentioned once, use it again for just dates after. Find the [DateTime, Place] in this paragraph.
When users add their notes, this prompt will be combined with the notes, creating a combined instruction for Gemini to follow.
Step 4: Invoke Gemini from the app
Now, let's put Gemini to work in our app. In the "TravelDiaryPage," look for the TextField userNotes where user can enter their notes. Set up a new action for the TextField's onChange - Gemini of the type "Generate Text" so we can generate text responses from text inputs. For the prompt, set the "Combined Text", where Text 1 is our set instruction from Step 3 and Text 2 is set from notesField under Widget State.
Make sure to name the output something like generatedResponse. This will help us catch Gemini's response and use it to update our app.
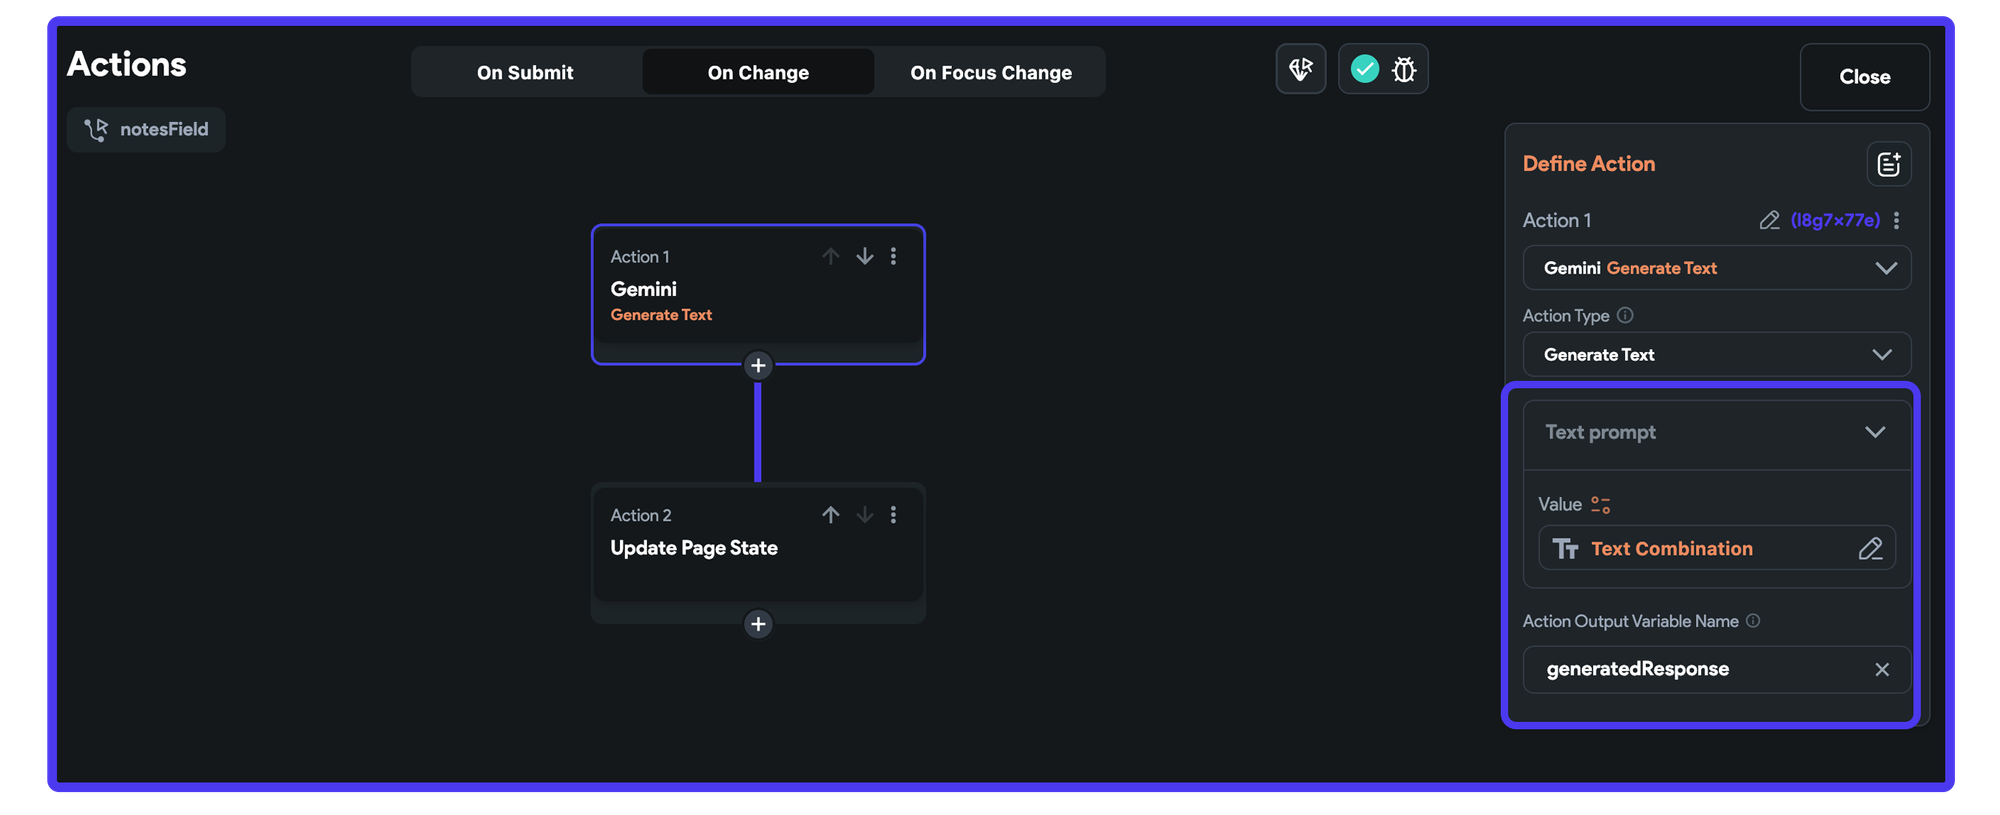
Implement an additional action to modify the Page State - detectedPlan and set it to generatedResponse under Action Outputs.
Once you set this up, every couple of seconds (2000 ms by default), the detectedPlan will refresh, showing a list of dates and places from the user notes.
Usecase #2 : Adding context to images
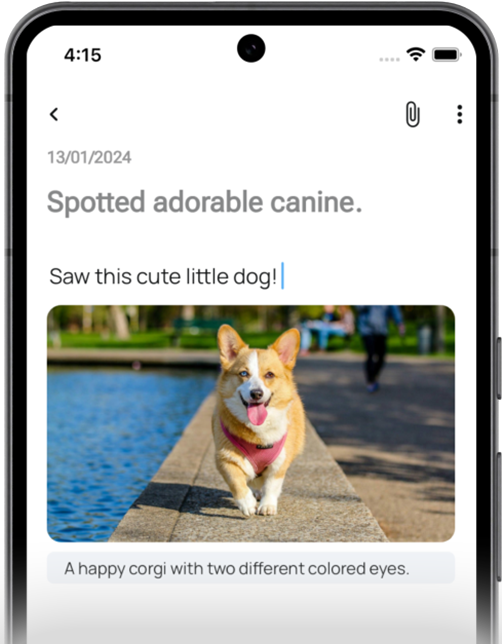
Many travel diary apps let you add photos to your entries. We're going to make those photos even more interesting by using Gemini to automatically add captions.
Here's how we'll do it:
Step 1: Generate a Caption on Image Upload from Gallery
The starter project already includes an attachment icon on the AppBar (located at the top-right corner). To this Icon Button, you'll need to add a sequence of actions.
Firstly, the "Store media for upload" action allows users to upload images from their Gallery or Camera.
Following this, we invoke Gemini, selecting "Text from Image" as the Action type. This is because we're generating text based on inputs from both text and image. The prompt for Gemini is an instruction to generate a caption for the provided image, using the following guideline:
Provide a caption for this image in under 20 words.
Set the Image Type to "Uploaded Image File," and choose the variable source from the "Uploaded Local File" value listed under Action Outputs. Ensure the Action Output Variable from the Gemini Action is named "generatedCaption" or something similar.
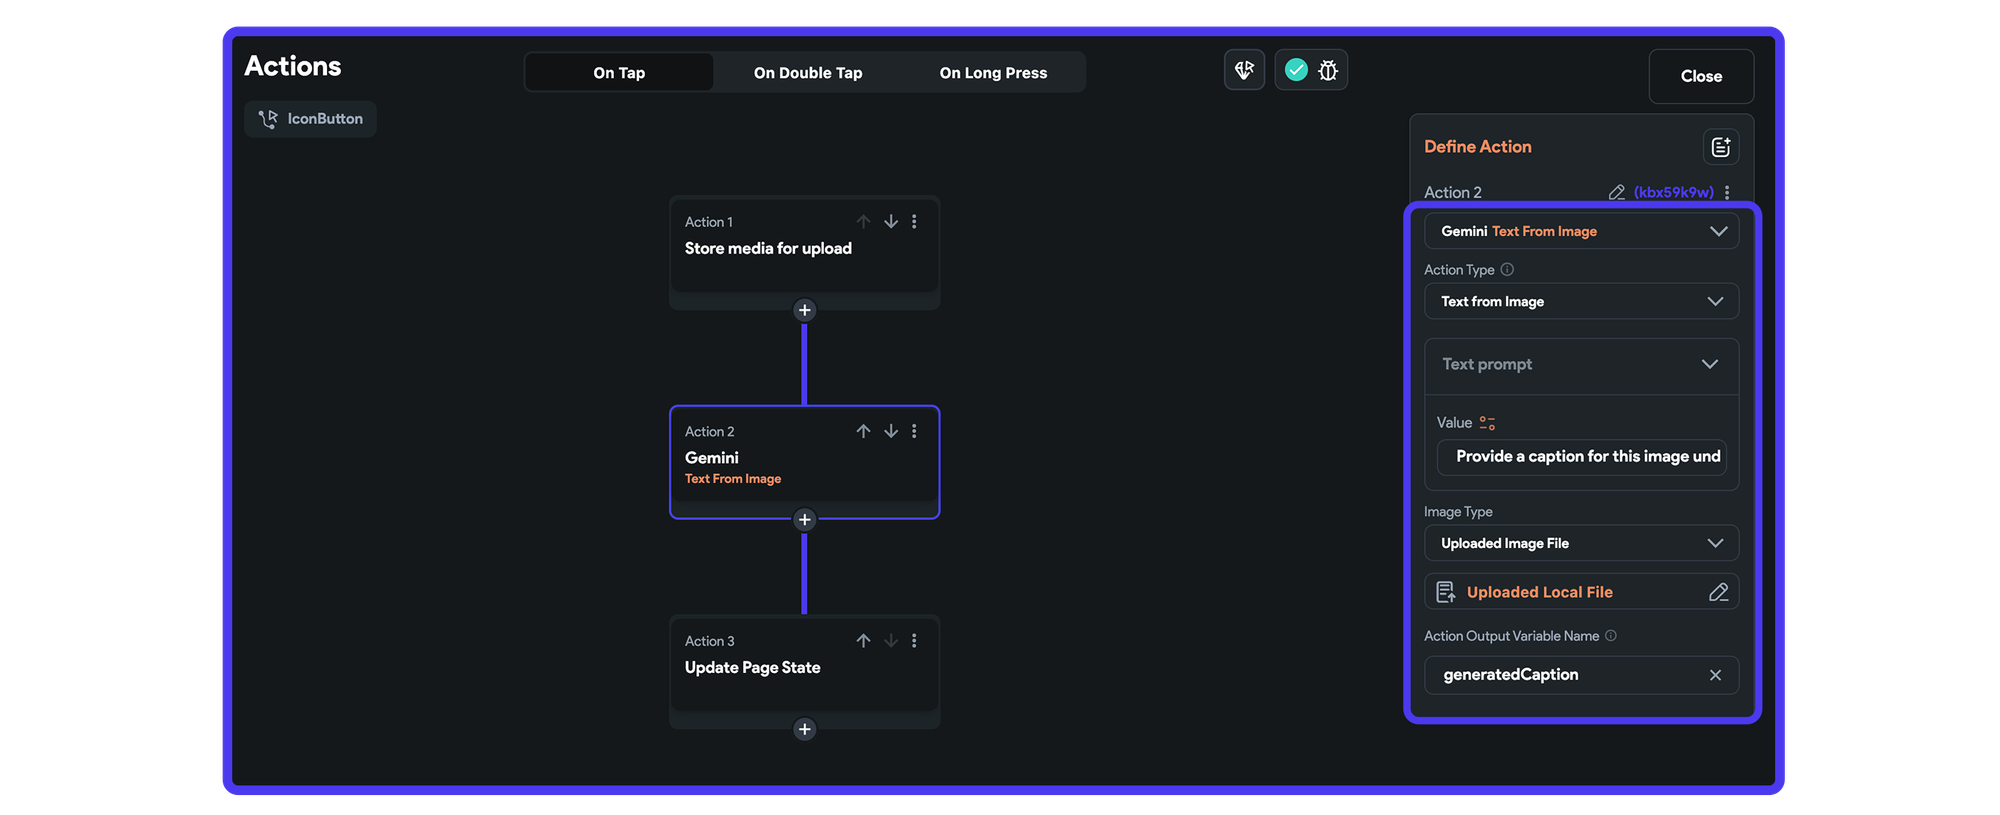
After executing this action, introduce another action to Update the Page State for detectedCaption and this will be set from the Action Ouputs - generatedCaption
This sequence of events ensures that once the image is locally uploaded from the gallery or camera, Gemini will generate a caption for the image and assign to the relevant variable.
Step 2: Link the Image to the Uploaded File
Return to the UI builder and configure the source for the uploadedImage Image Widget as "Uploaded Local File" within the Widget State.
Step 3: Implement Conditional Visibility for the Image and Caption
The image should only become visible when the user attaches an image, and the caption text should appear only after Gemini generates a caption. To achieve this, apply Conditional Visibility settings:
For the uploadedImage widget, add Conditional Visibility to check whether the "Uploaded Local File" is Set.
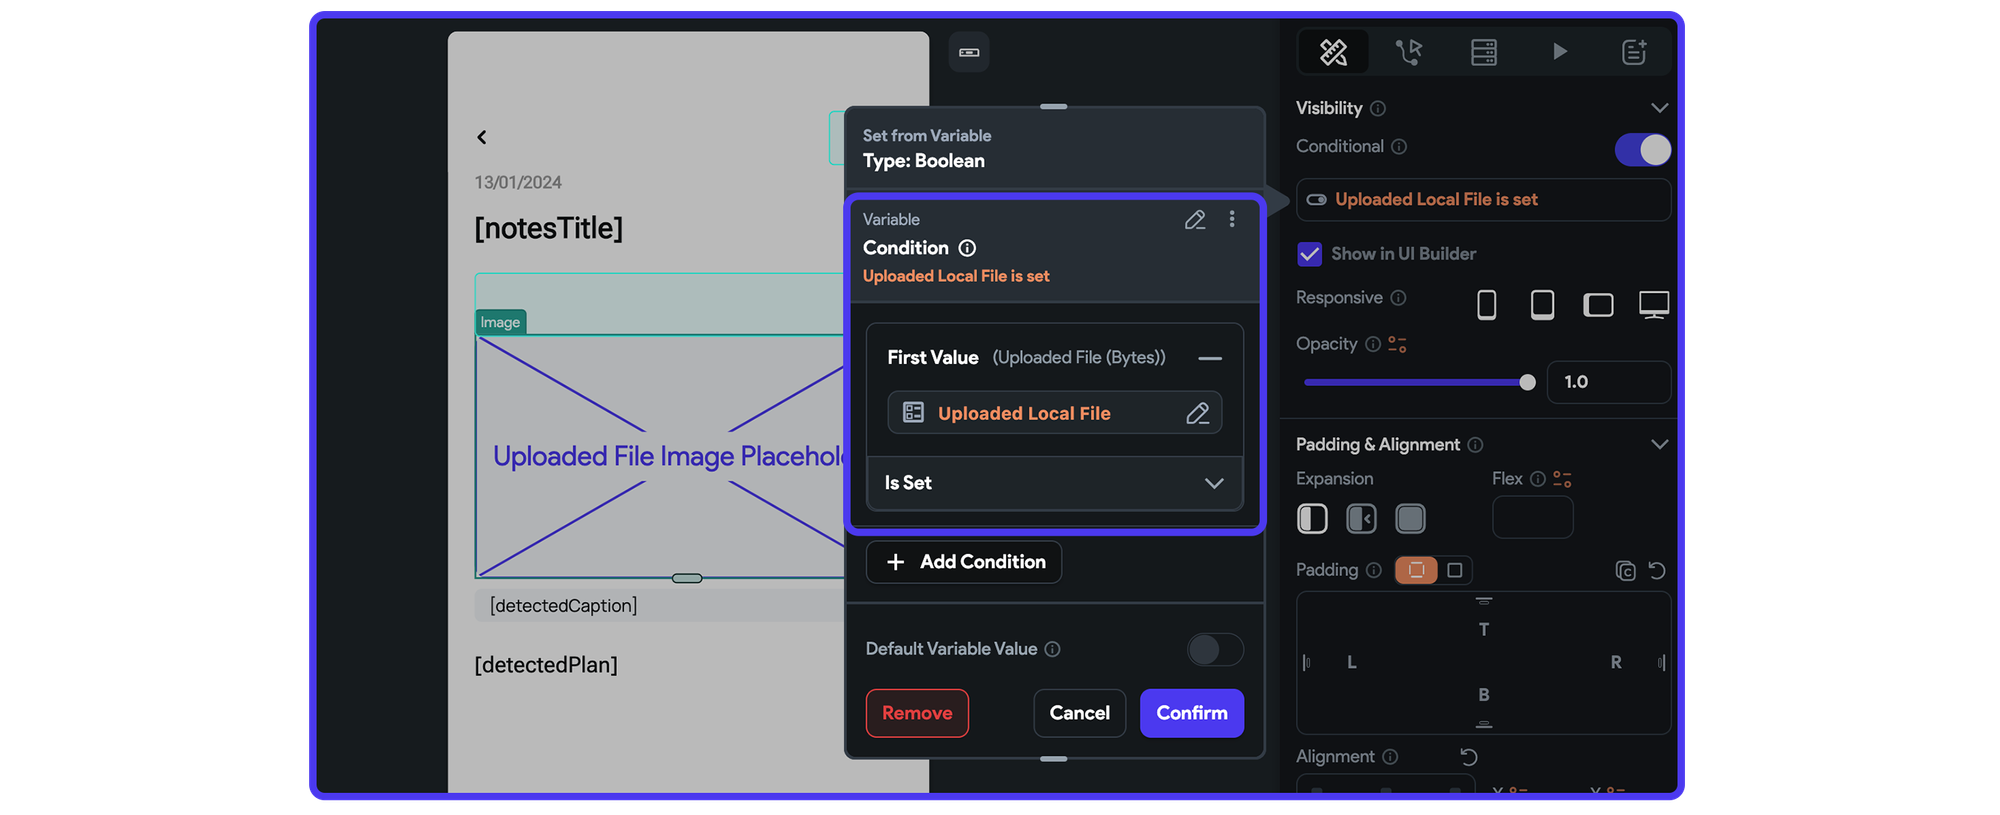
For the detectedCaption widget, also add Conditional Visibility, but this time ensure it checks if the "detectedCaption" Page State variable is set & not empty.
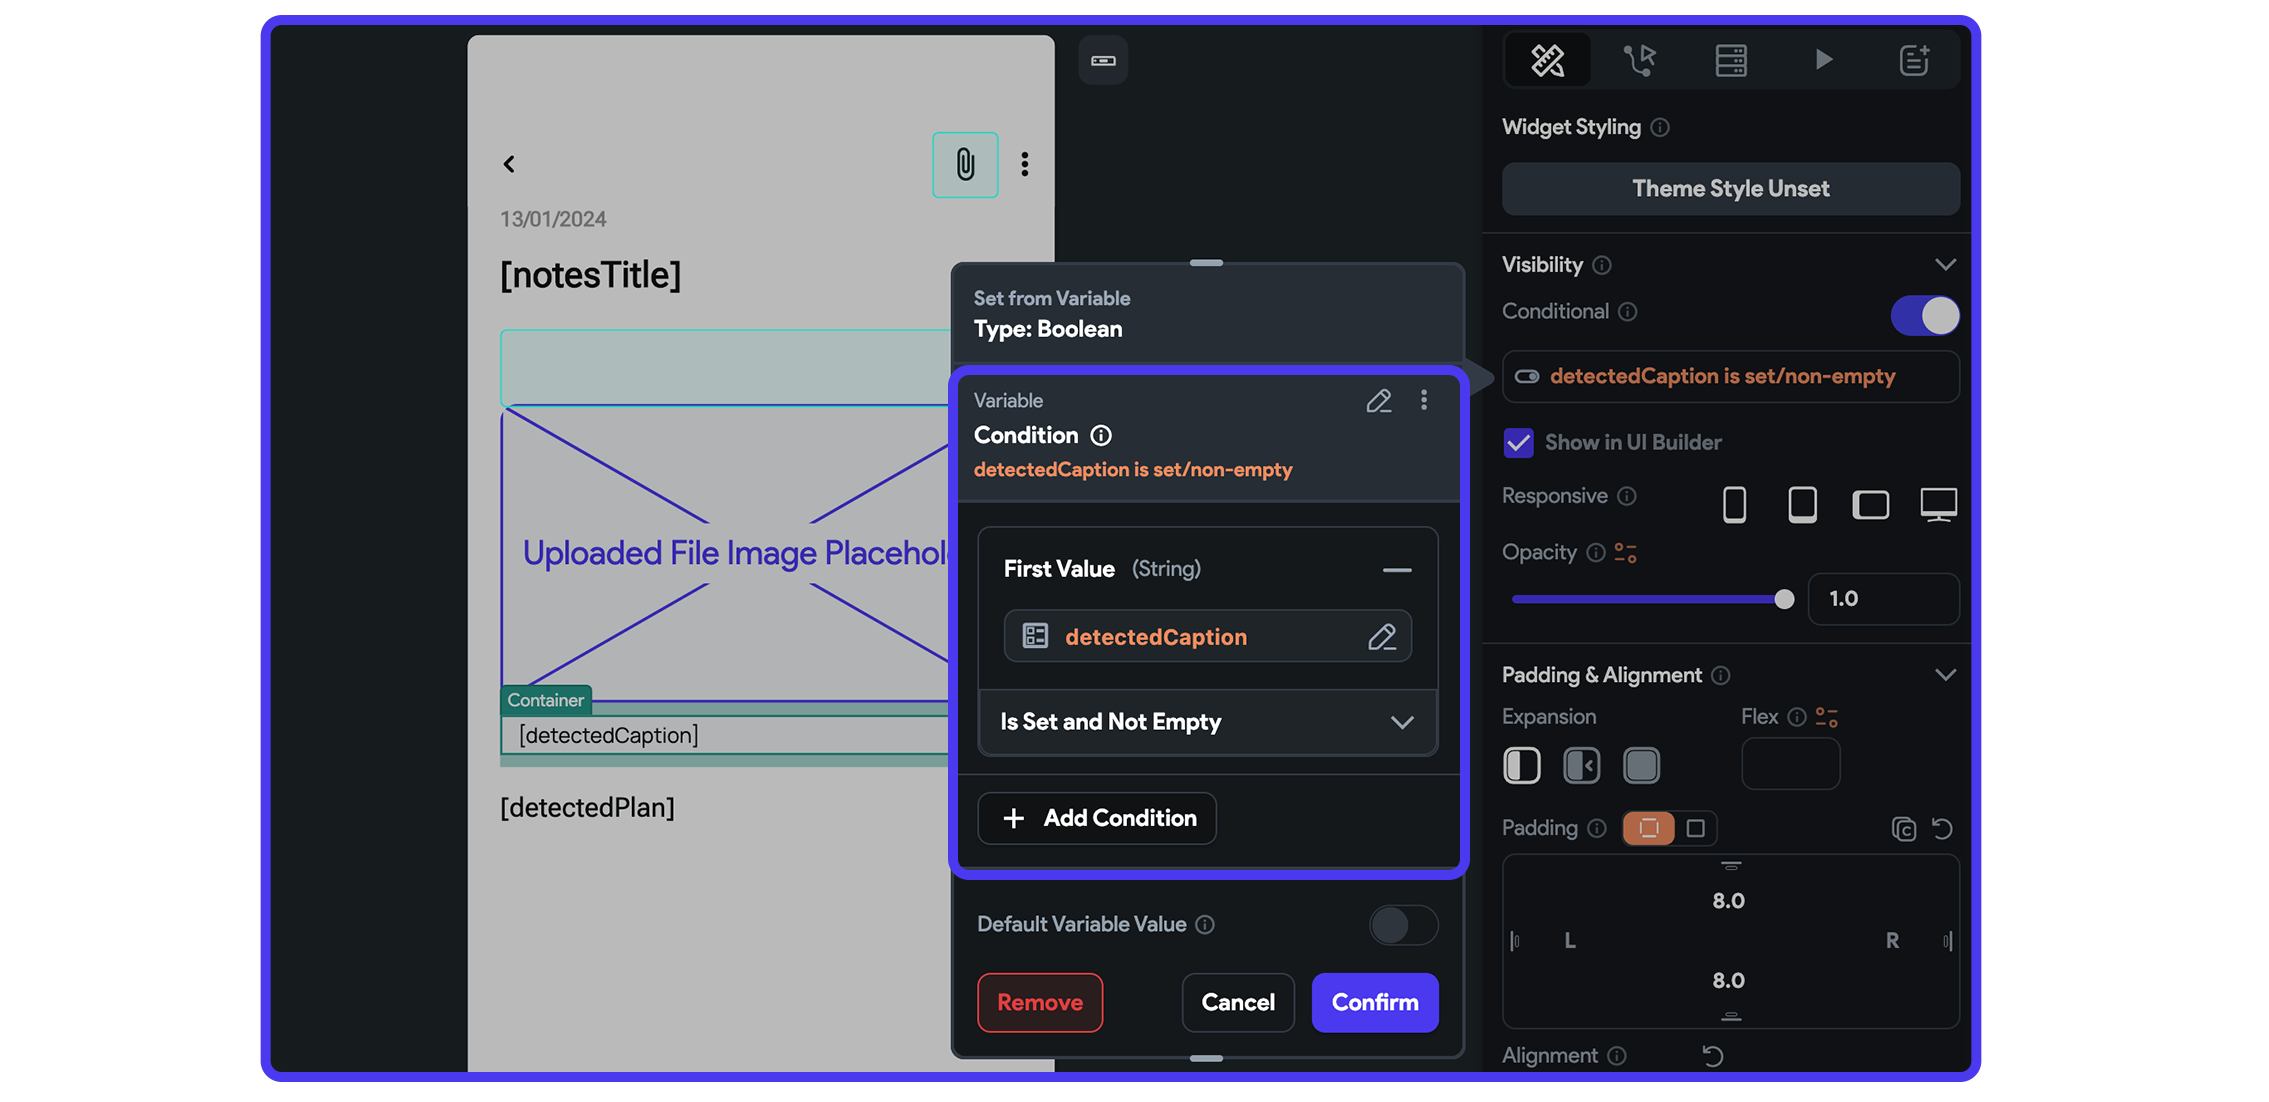
These steps will prevent the display of both widgets unless their respective conditions are met, eliminating any potential errors related to unset values.
And that were some of the use cases you can build with Gemini AI and FlutterFlow. Feel free to get creative for your own app. How about adding a "Record Audio" button that allows you to record a prompt, convert it to text, and then send it to Gemini? The possibilities are limitless.
We can't wait to see what you build. Share your creations with us by tagging FlutterFlow and using the hashtag #BuildWithGemini