
Live streaming has become one of the essential forms to distribute media content to people all across the globe. In specific industries like news, sports events, and online education, a live streaming facility gives people access to the content in real-time even though they can't attend in person.
Though streaming media helps grab people's attention and allows them to experience it in real-time, setting up and maintaining a live streaming platform can be challenging.
In this article, we'll look at the Mux platform that handles all the complexity of a live streaming pipeline and integrates it with a Flutter application.
Typically, Mux requires you to maintain a backend server to make the API calls securely. But today, we'll be using Firebase Cloud Functions for making those API calls, which prevents the hassle of maintaining a server, helping us to achieve a completely serverless architecture.
How does live streaming work?
Before diving into the actual implementation, it's essential to know how the streaming process works. The complexity of a live streaming platform comes primarily due to several moving components.
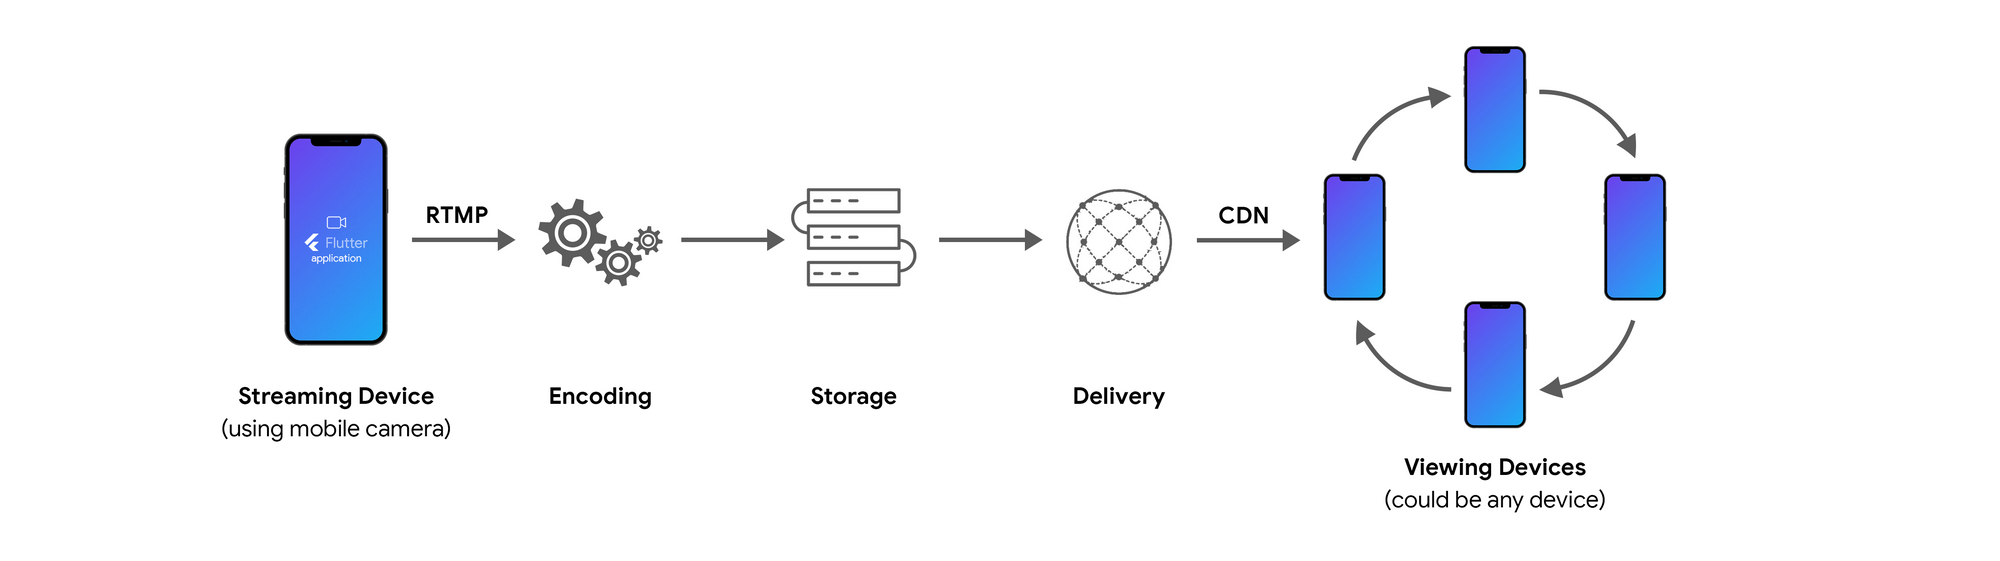
The above illustration shows a basic overview of the live streaming pipeline. Let's briefly understand what happens at each of these steps.
Streaming device
It can be any device capable of recording audio/video and sending it to the server. In today's article, we'll be using a mobile app built with Flutter to record using the device camera and stream it to an RTMP URL.
Real-Time Messaging Protocol (RTMP) is used for streaming audio/video over a network connection. It sends the raw data to the Mux servers to be processed in the next step.
Encoding
The audio/video data received over the network undergoes compression to decrease the video size, using a codec suitable for delivery over the internet. Encoded video is then stored in the Mux servers, ready to proceed to the next step.
Transcoding
In this phase, the stored encoded video is converted to various formats for streaming in different qualities (SD, HD, 4K, etc.). Transcoding helps to get a smooth video streaming experience without any stuttering, as the quality of the video is adjusted based on the network speed.
Delivery
Finally, the transcoded video is streamed to the users' devices with the help of a content delivery network (CDN). It's a group of connected servers that cache and deliver the content efficiently to a wide range of areas. CDN helps in minimizing the latency and the buffering time.
App overview
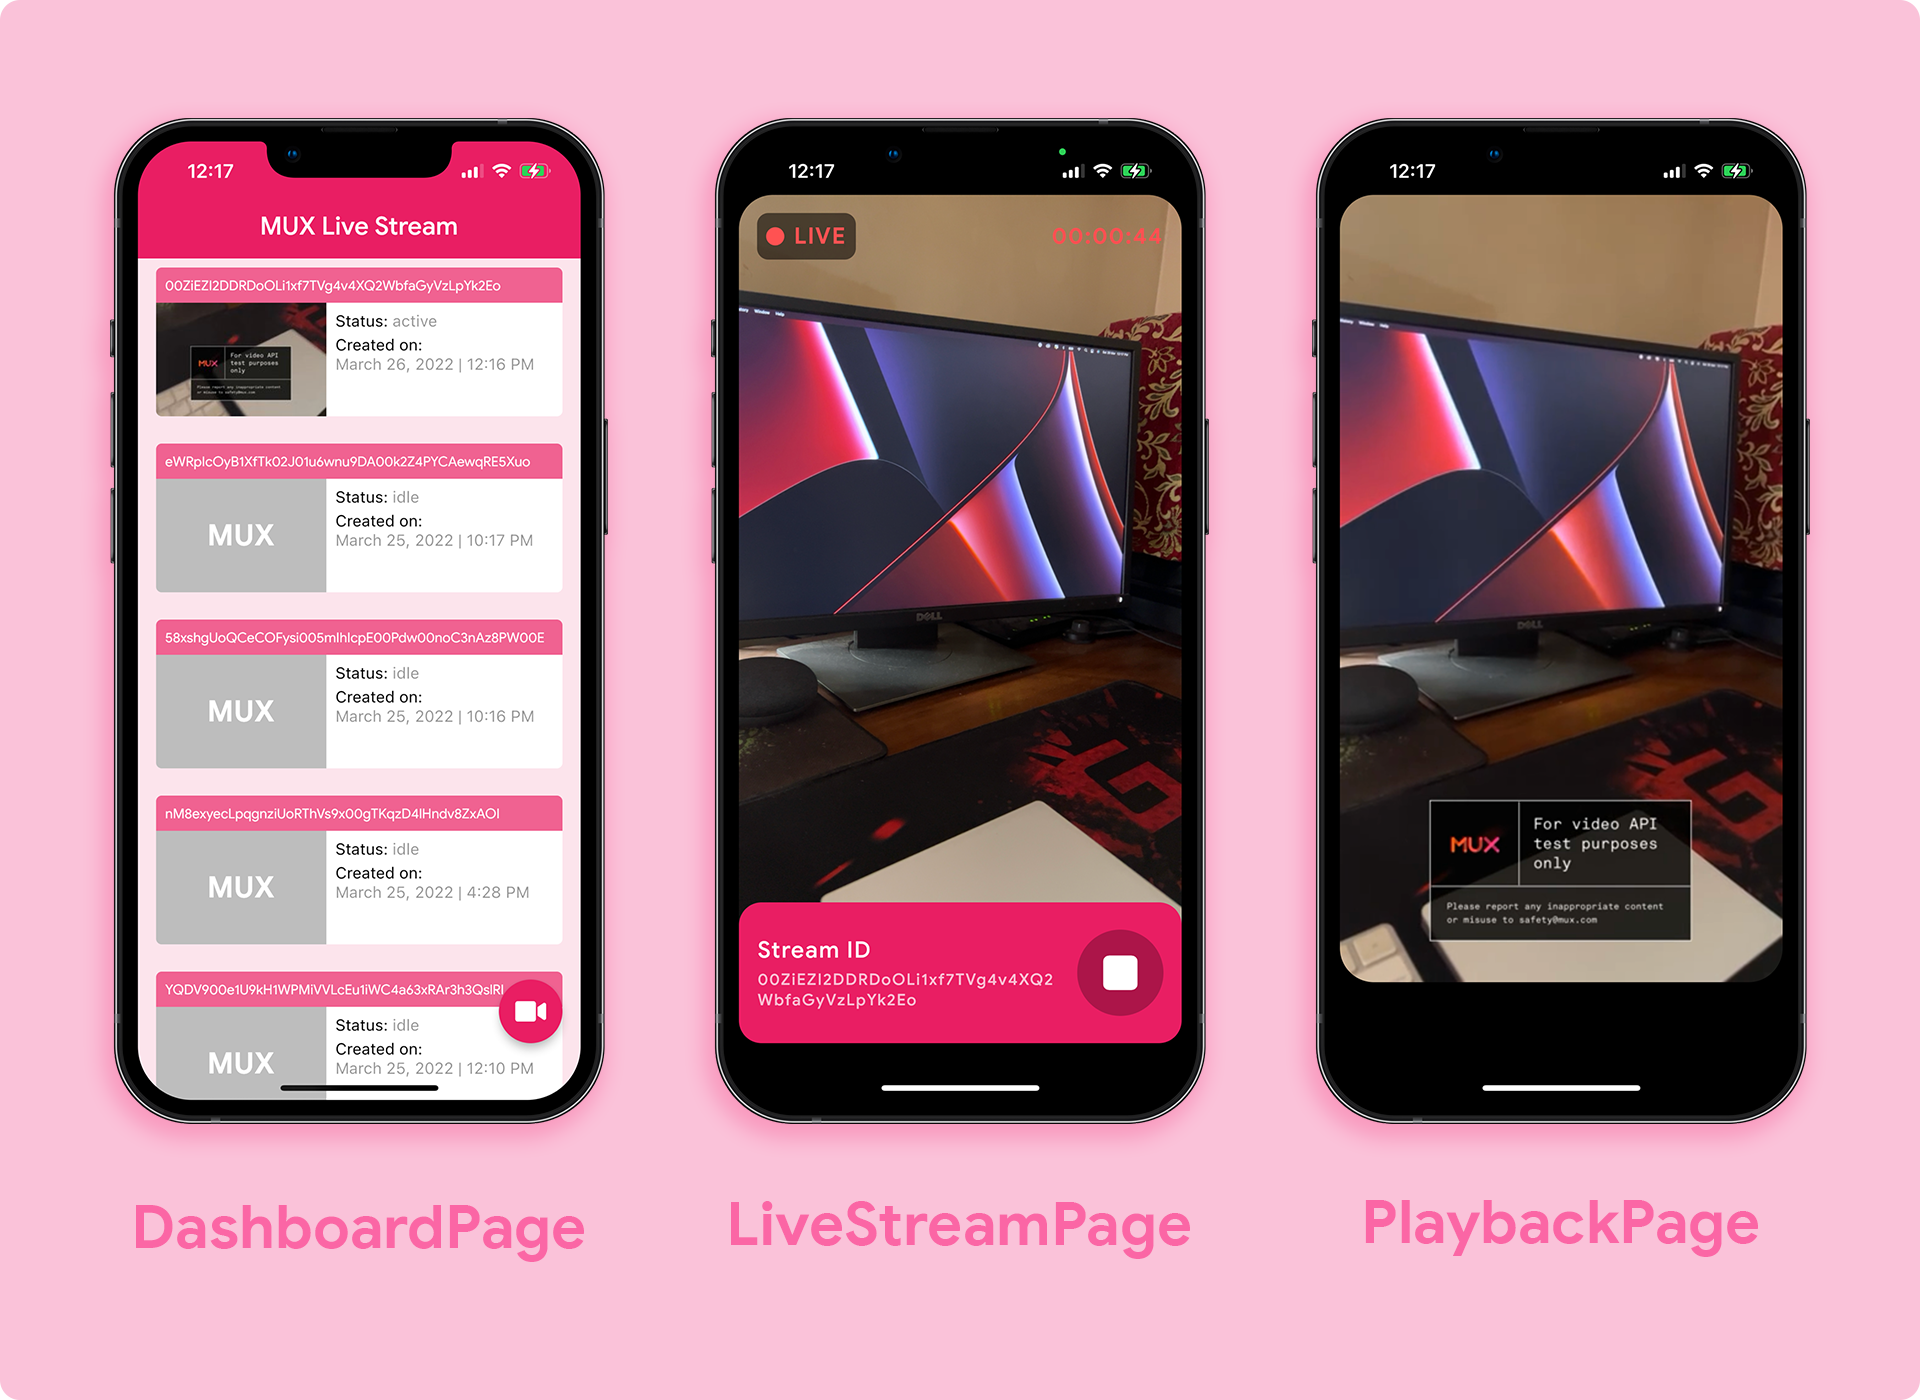
The final app will have three main screens:
- Dashboard Page: Showing a list of all the live streams.
- Live Stream Page: Create, start and stop a live stream using a device camera.
- Playback Page: Video playback of the live stream.
Basic Flutter app
Let's start creating a Flutter project. You can either use an IDE (like VS Code, IntelliJ, Android Studio) or just run the following command inside your terminal:
flutter create flutter_live_stream_muxflutter command, you should have Flutter SDK installed on your system. If you don't have it installed, follow the steps here.Open the project using your favorite IDE and navigate to the lib/main.dart file. By default, Flutter creates a demo counter app project, replace the entire code with the following:
import 'package:flutter/material.dart';

void main() {
  runApp(const MyApp());
}

class MyApp extends StatelessWidget {
  const MyApp({Key? key}) : super(key: key);

  @override
  Widget build(BuildContext context) {
    return MaterialApp(
      title: 'Live Stream',
      debugShowCheckedModeBanner: false,
      theme: ThemeData(
        primarySwatch: Colors.pink,
      ),
      home: const Scaffold(),
    );
  }
}
Adding dependencies
You will need a few dependencies for this app, head over to your pubspec.yaml file and add the following dependencies:
dependencies:
  video_stream: ^0.0.1
  video_player: ^2.3.0
  wakelock: ^0.6.1+2
  firebase_core: ^1.13.1
  cloud_functions: ^3.2.10
  intl: ^0.17.0
  font_awesome_flutter: ^9.2.0
  permission_handler: ^9.2.0
Platform configurations
To build the app with the new dependencies, you have to make a few configurations on the Android and iOS sides.
Android
Navigate to android/app/src/main/AndroidManifest.xml and add the following permissions:
<manifest xmlns:android="http://schemas.android.com/apk/res/android"
    package="io.flutterflow.flutter_mux_live">
   <!-- Add these permissions -->
   <uses-permission android:name="android.permission.INTERNET"/>
   <uses-permission android:name="android.permission.CAMERA"/>
   <application
        android:label="flutter_mux_live"
        ...
Go to android/app/build.gradle and change the minSdkVersion to 21:
defaultConfig {
    applicationId "io.flutterflow.flutter_mux_live"
    minSdkVersion 21 // <- use this version
    targetSdkVersion flutter.targetSdkVersion
    versionCode flutterVersionCode.toInteger()
    versionName flutterVersionName
}
iOS
Navigate to ios/Podfile, uncomment the platform line and specify the version as 10.0:
platform :ios, '10.0'To grant camera permissions using the permission_handler package, add the following to the Podfile:
post_install do |installer|
  installer.pods_project.targets.each do |target|
    flutter_additional_ios_build_settings(target)
    # Add this >>
    target.build_configurations.each do |config|
      config.build_settings['GCC_PREPROCESSOR_DEFINITIONS'] ||= [
        '$(inherited)',
        ## dart: PermissionGroup.camera
        'PERMISSION_CAMERA=1',
      ]
    end
    # << Upto this
  end
end
Go to ios/Runner/Info.plist file, add the following:
<key>NSCameraUsageDescription</key>
<string>Can I use the camera please?</string>
<key>NSMicrophoneUsageDescription</key>
<string>Can I use the mic please?</string>
Setup Mux
Mux is an API-based video streaming platform supporting live and on-demand video streaming. It also comes integrated with analytics that helps measure the performance metrics of the videos.
Mux provides two separate APIs:
- Mux Video API is for creating and steaming live and on-demand videos.
- Mux Data API helps in gathering performance metrics from videos.
Today, we'll use the Mux Video API to build the live streaming app in Flutter.
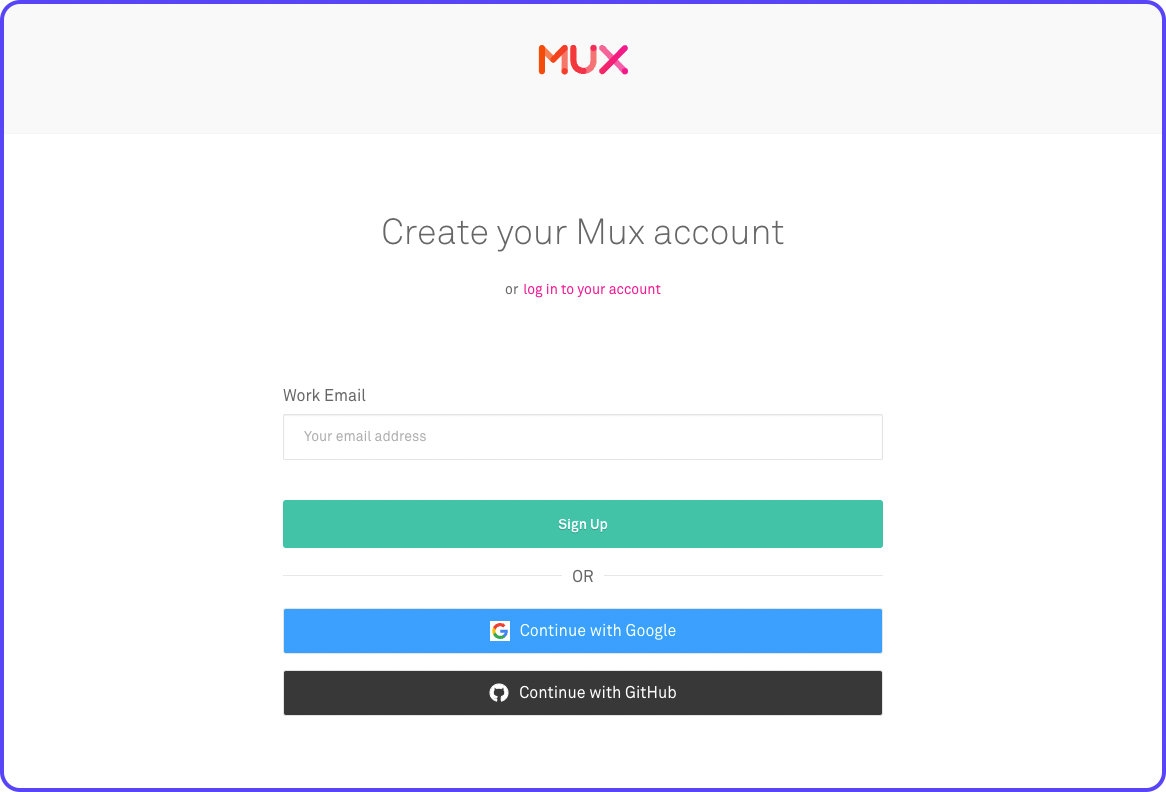
To get started using Mux, create an account by going here. If you already have an account in Mux, just use that to log in.
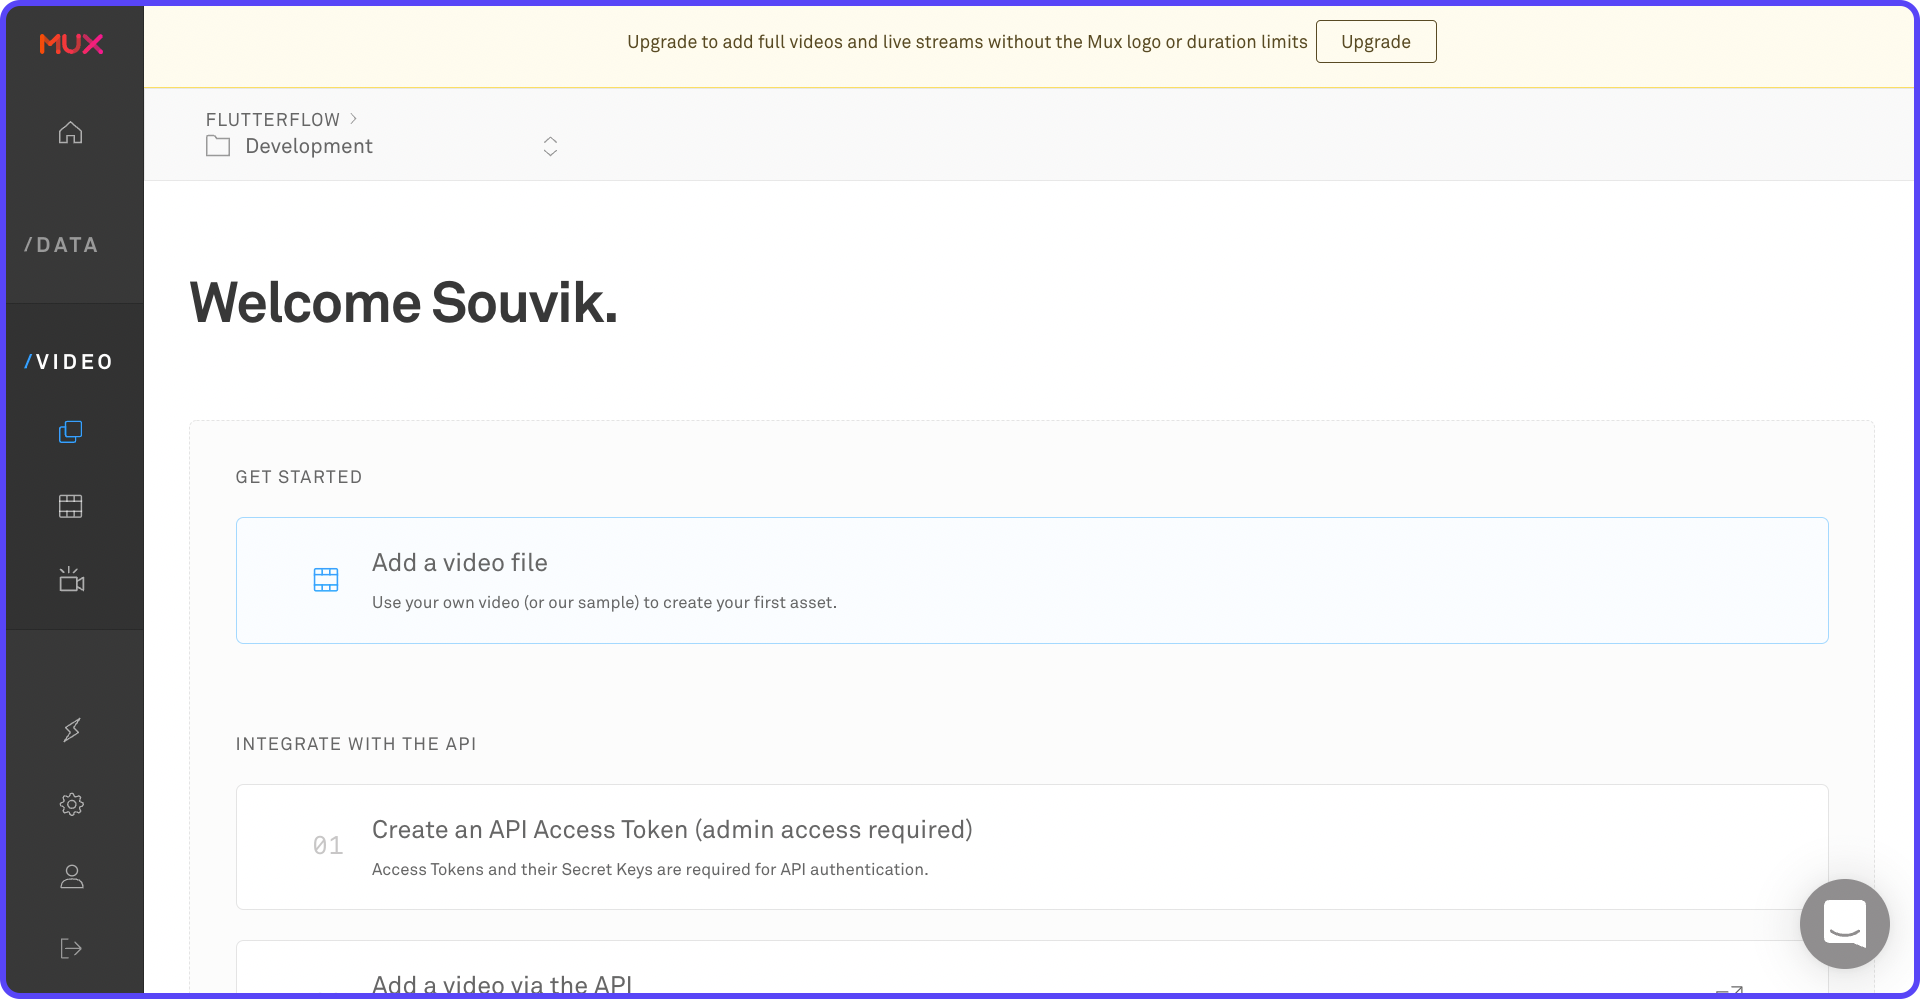
Once you have created an account and logged in to Mux, it will take you to the Dashboard page.
For accessing the Mux API, you need to generate an API Access Token from here. You can also navigate to this page from Settings > API Access Token.
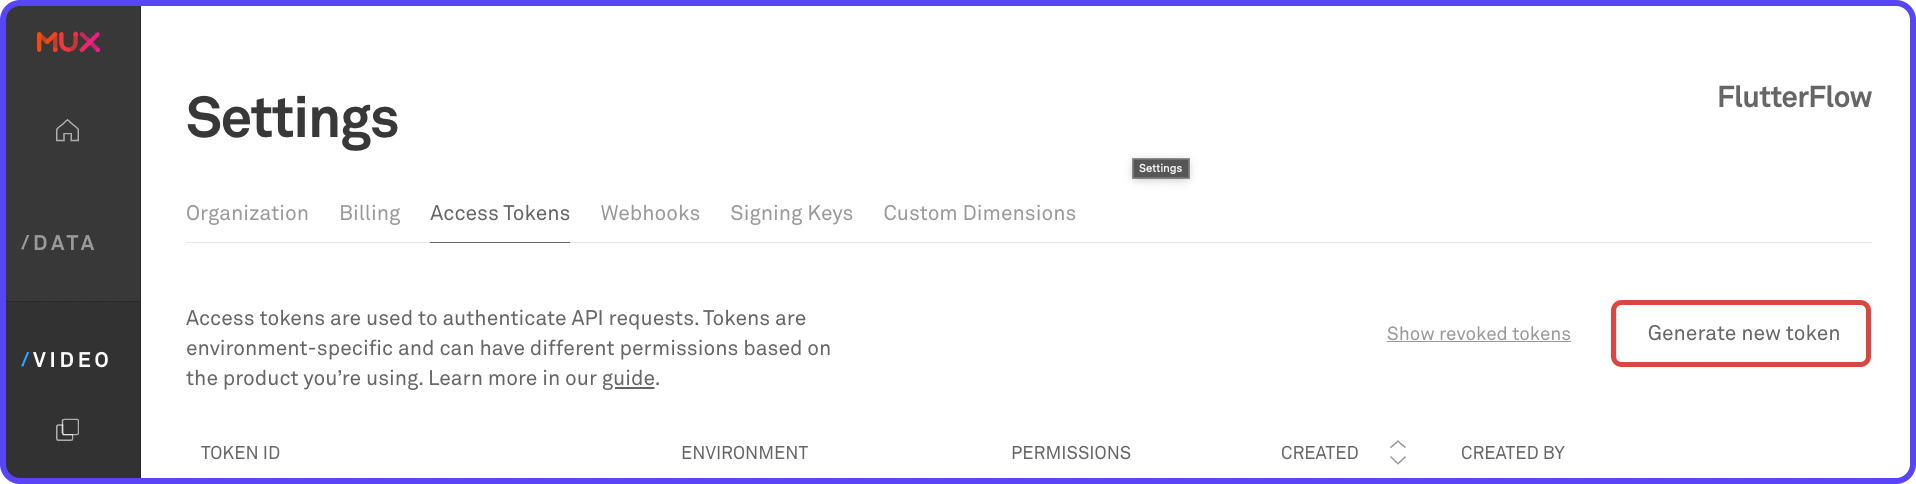
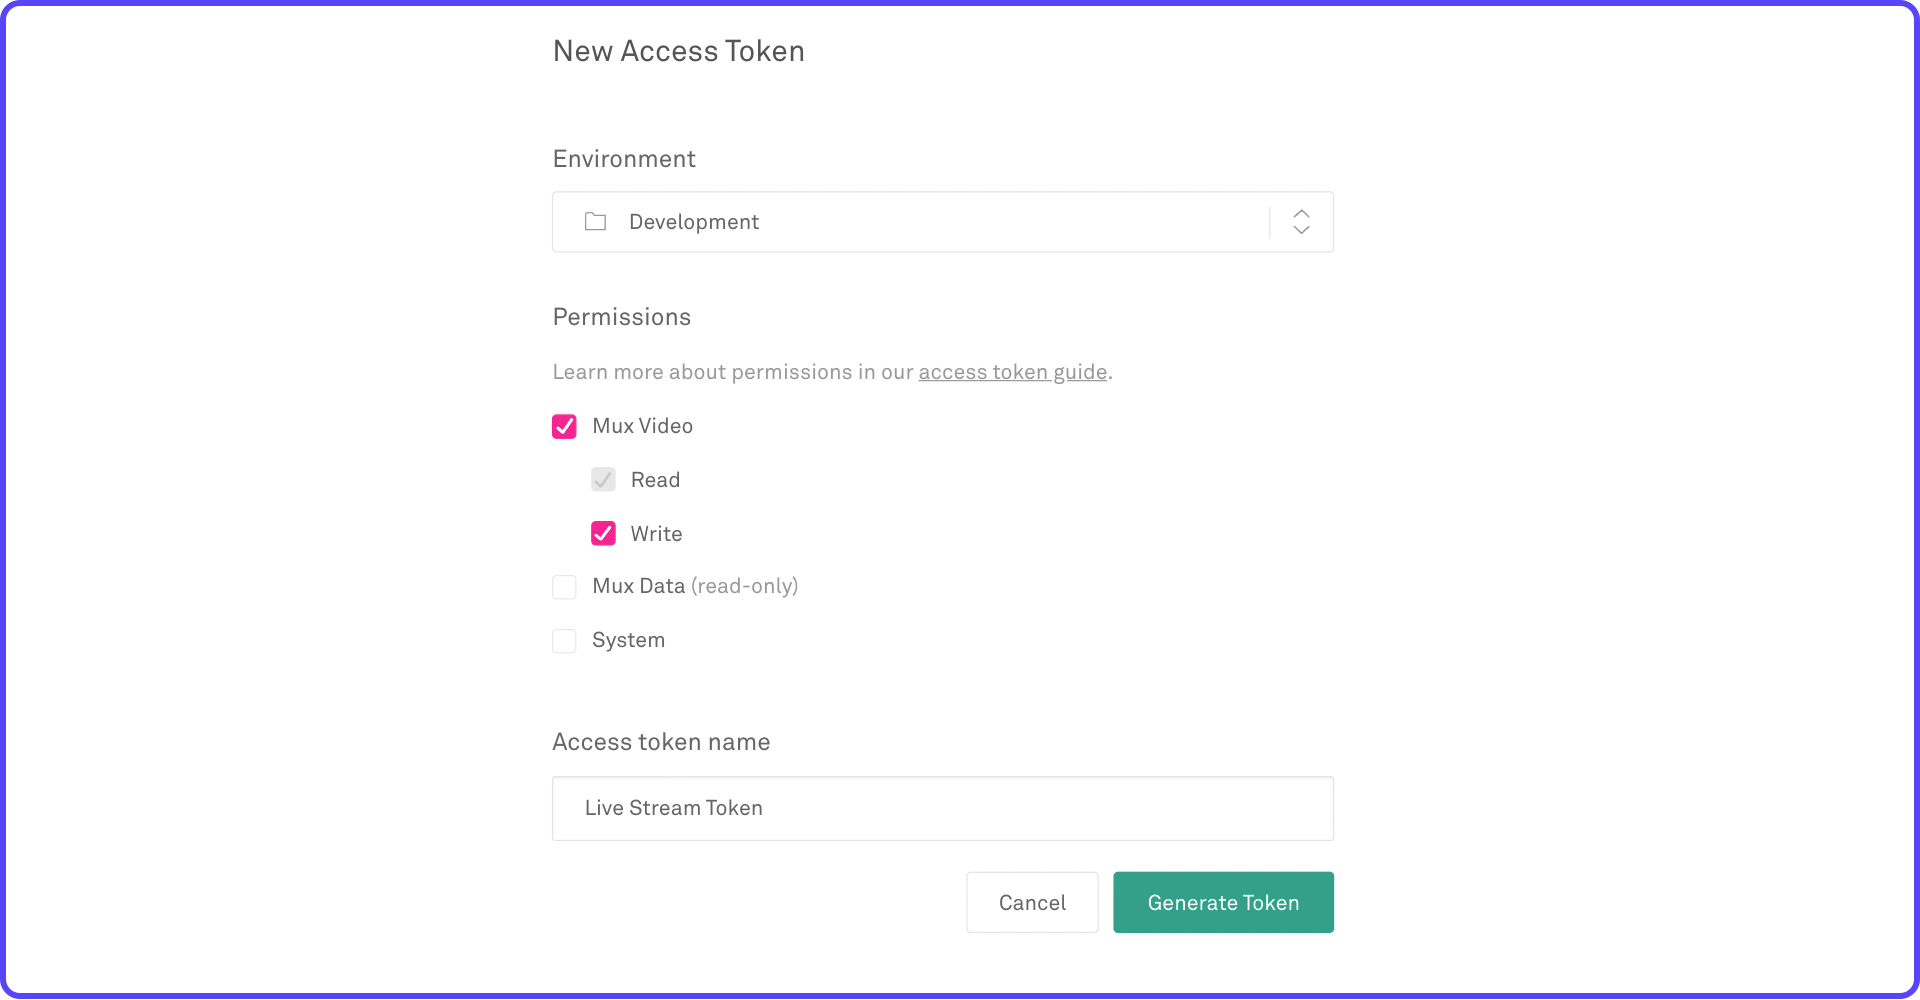
Click Generate new token:
- Choose the Environment as Development.
- Check the Mux Video checkbox and make sure Write is also checked.
- Enter a name for the token, for example, Live Stream Token.
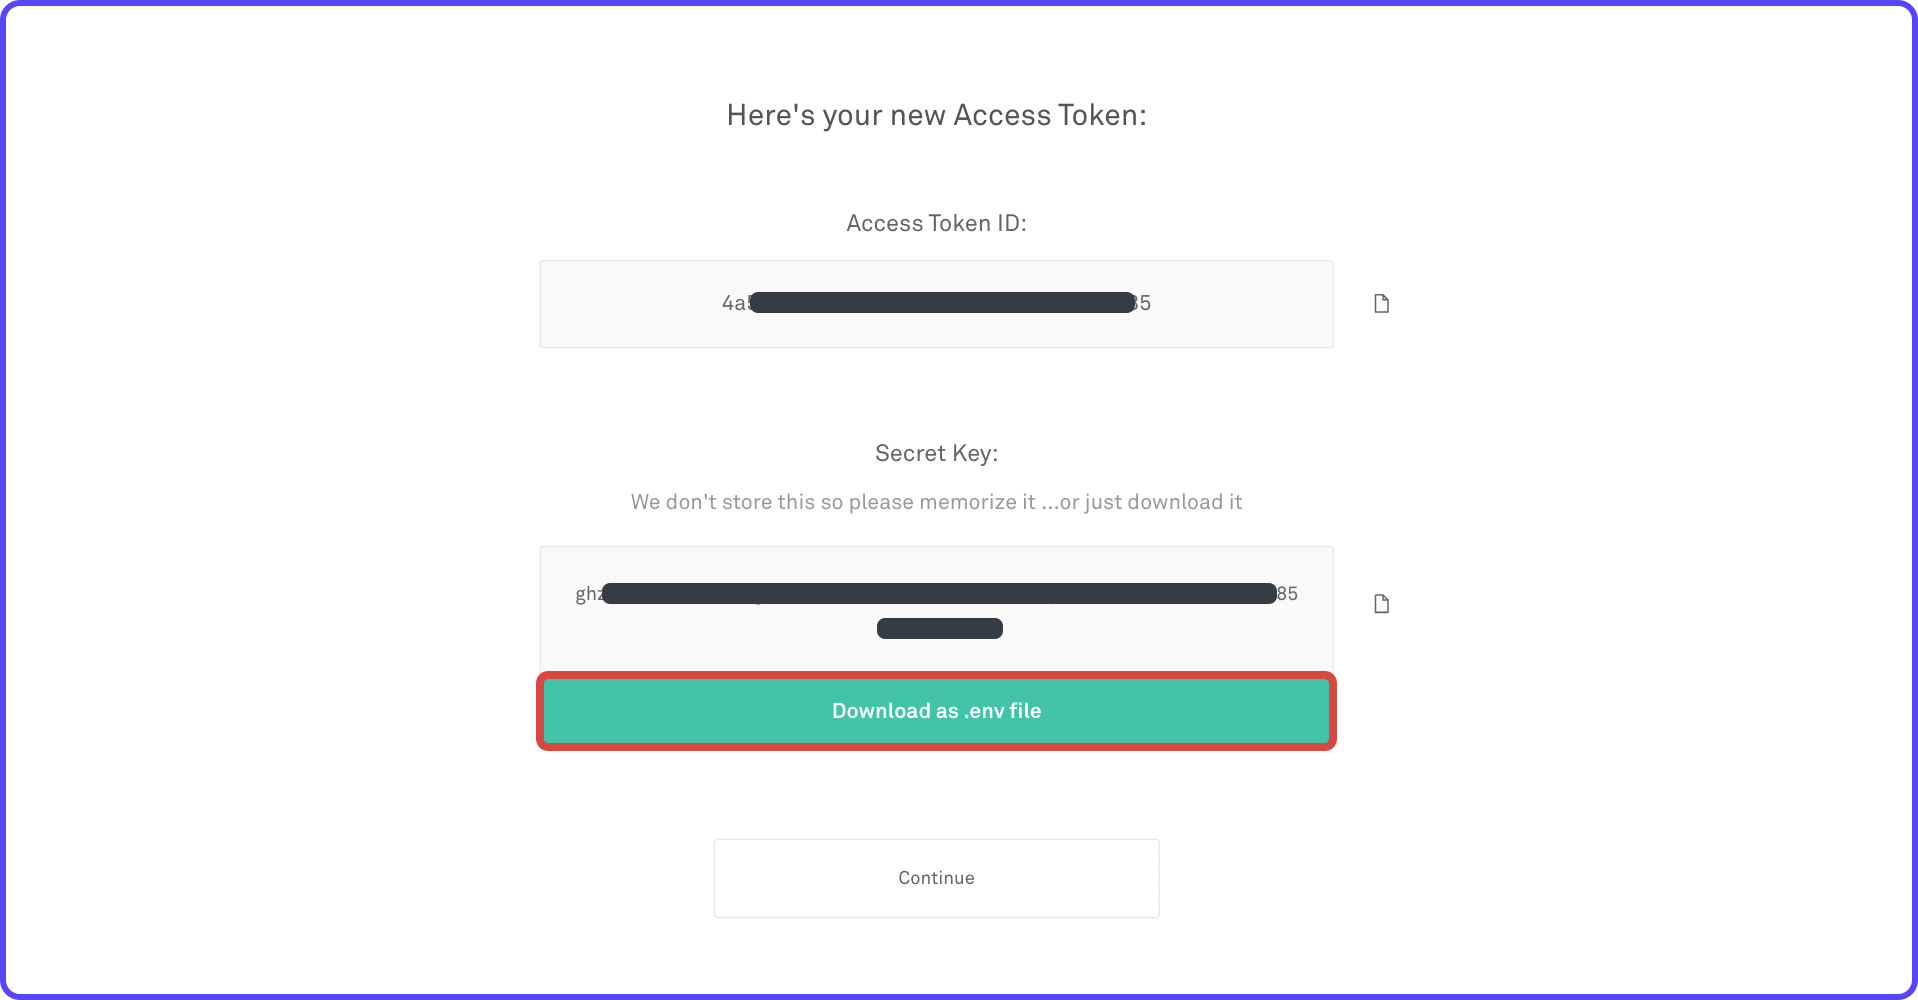
Once the token is generated, click Download as .env file and store it in a secure place. You'll need it while accessing Mux API inside the Cloud Functions.
Create Firebase project
You have to create a new Firebase project for getting access to the Cloud Functions service. Not familiar with Cloud Functions? Here's a brief about it:
Follow the steps below to create a Firebase project:
- Go to Firebase Console. You'll need to log in using your Google account.
- Click Add project.

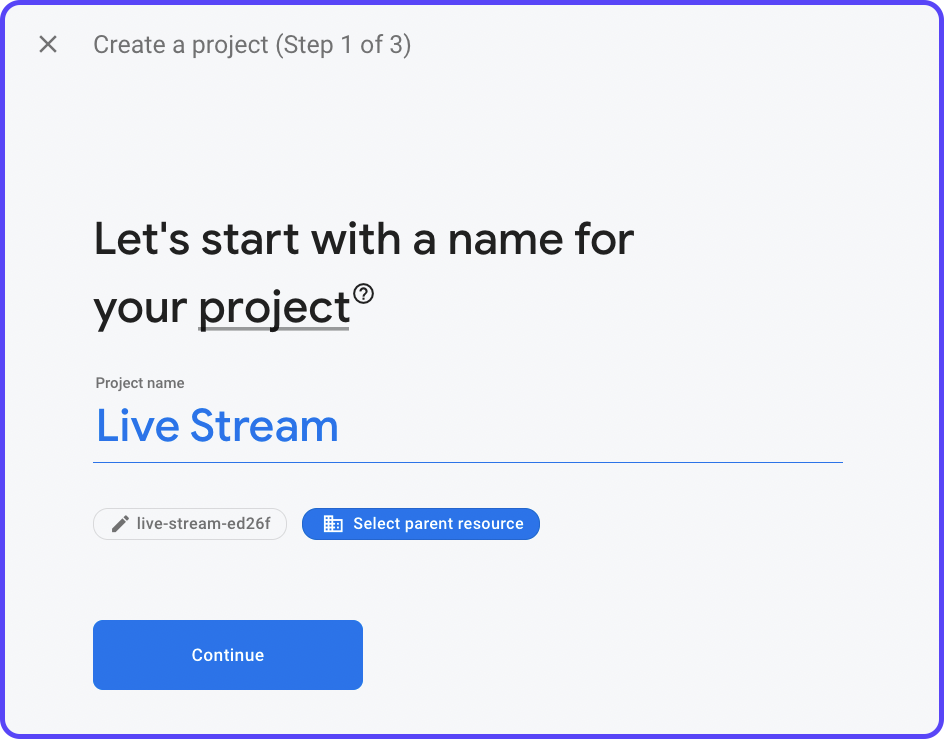
3. Give a name to your project and click Continue.
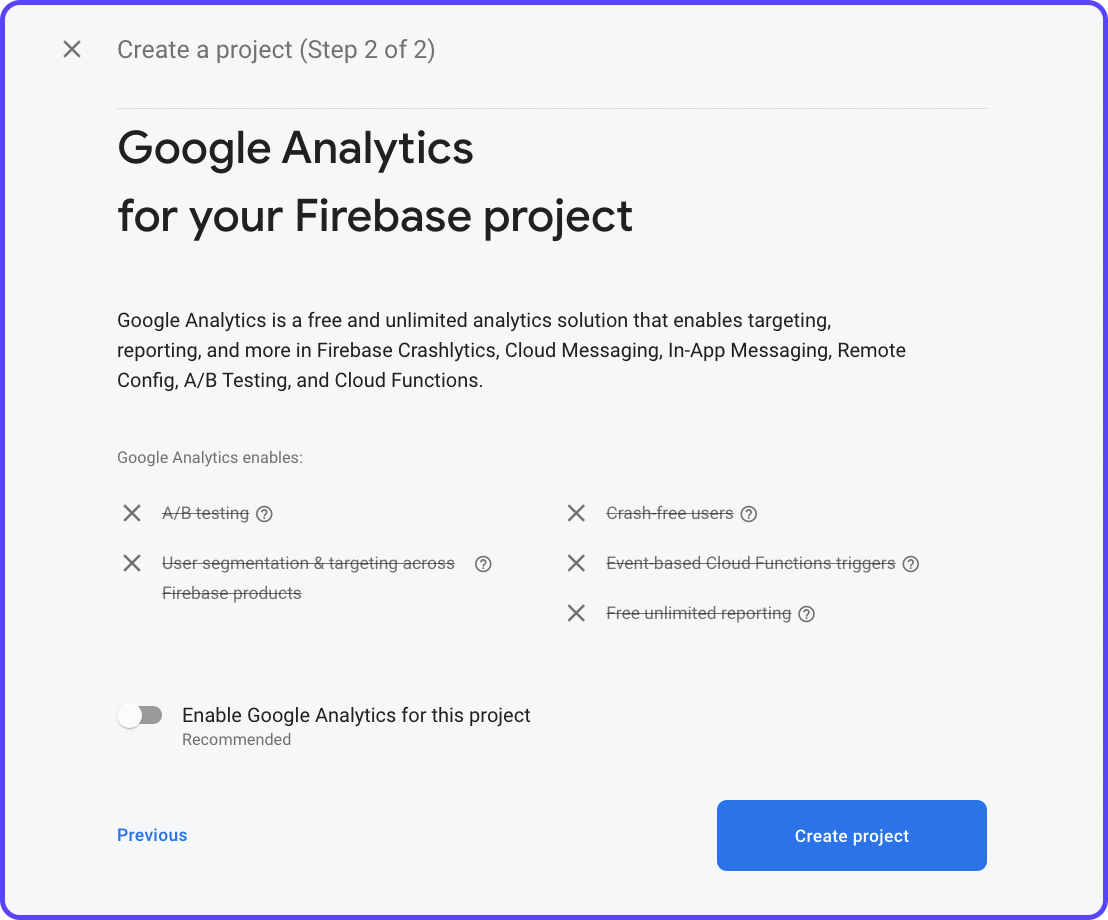
4. Disable Google Analytics as this is just a demo project. But if you are using Firebase for any production application, it's recommended you enable analytics. Click Create project.
5. It will take a few moments to create the project. Once it's ready, click Continue.
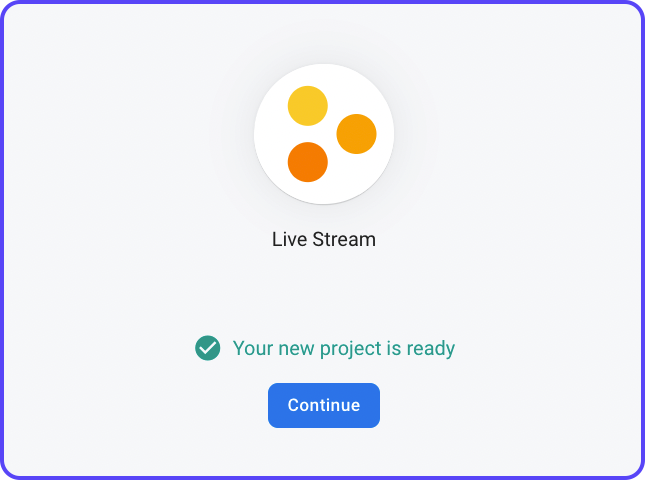
This will navigate you to the Firebase dashboard page.
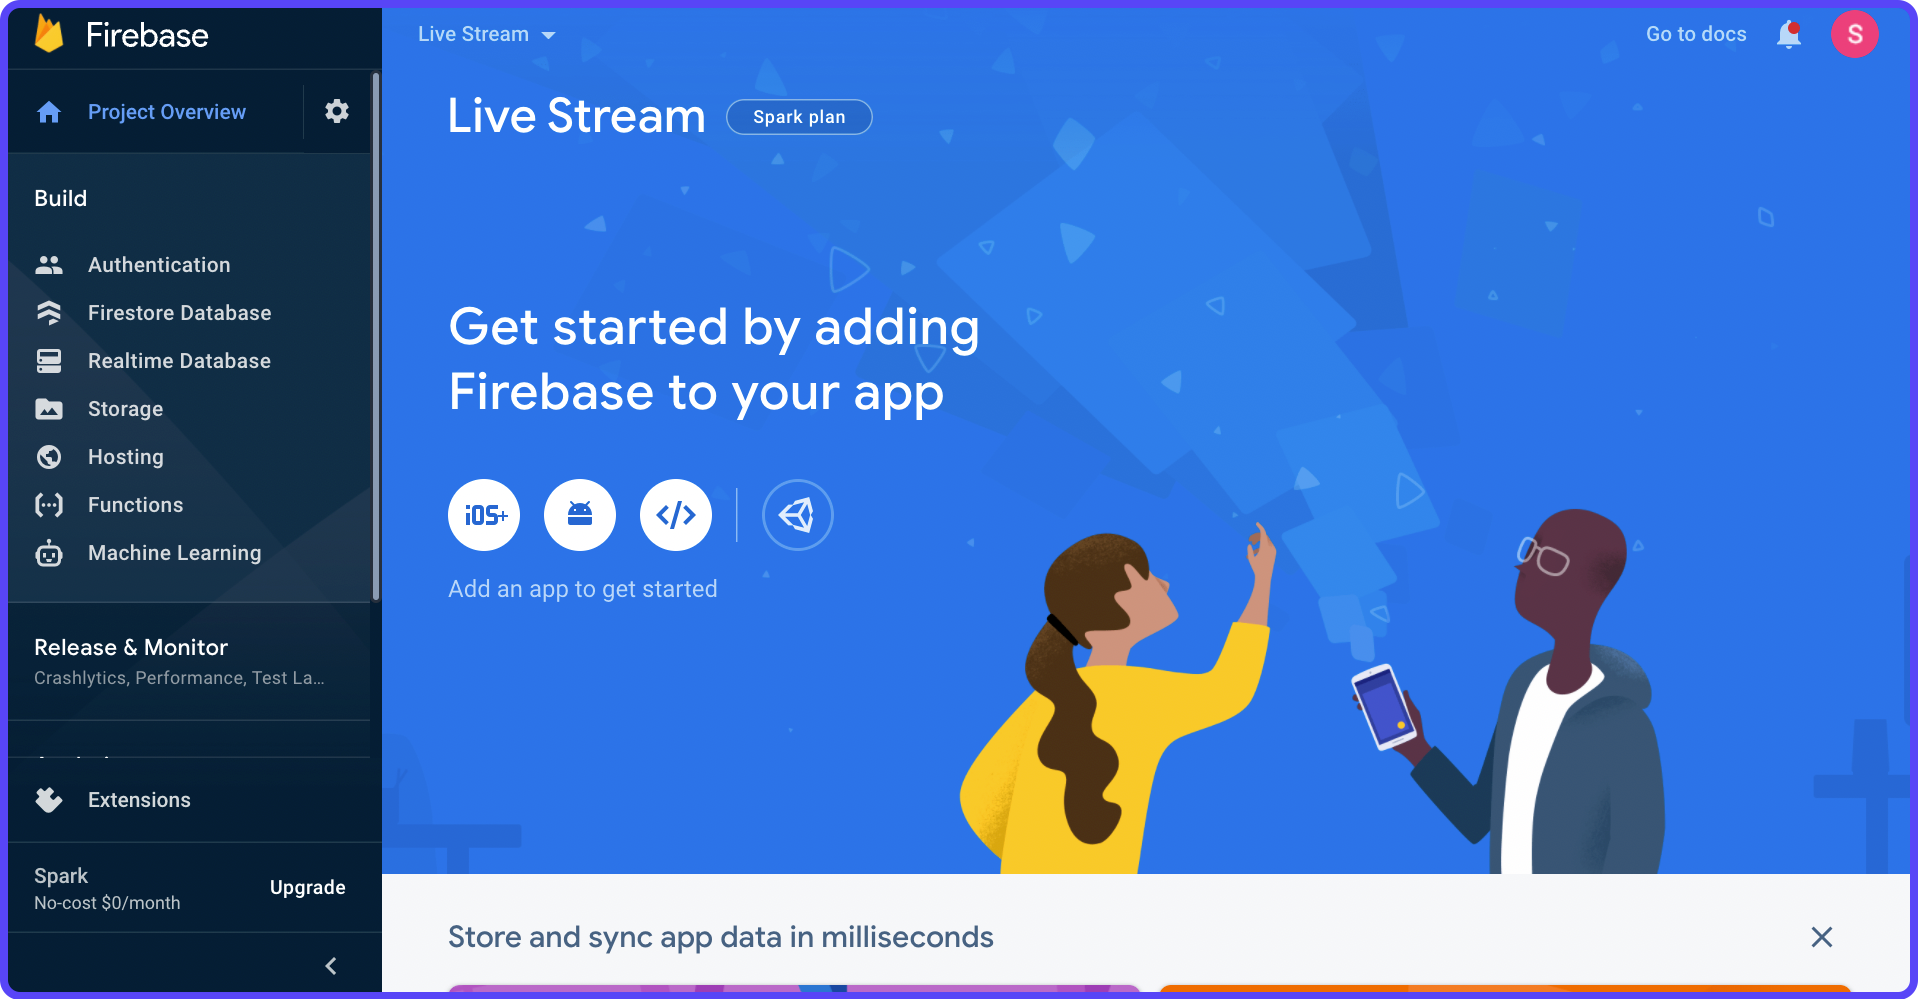
For using Cloud Functions, your project should be in the Blaze Plan. By default, every Firebase project is in Spark Plan.
Click on Upgrade from the left menu, select the Blaze Plan, and configure/choose a billing account.
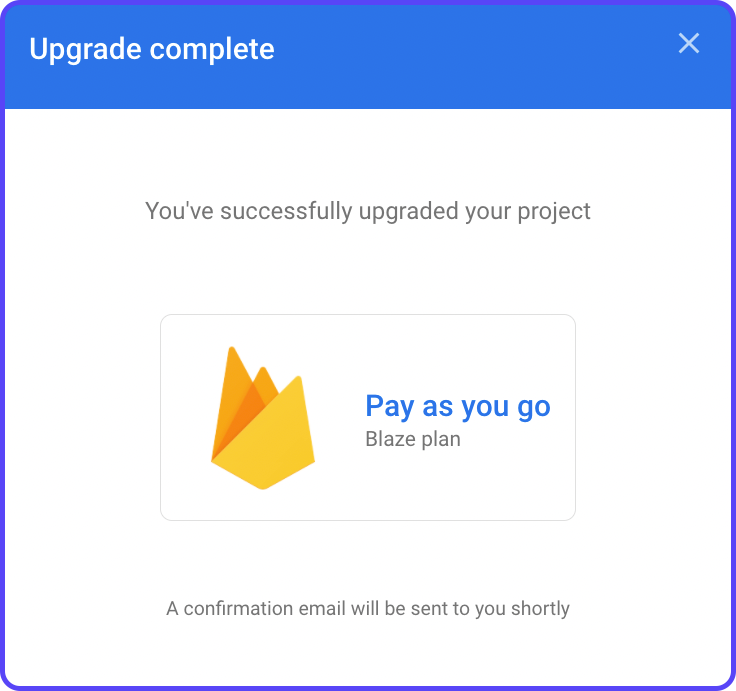
Once the project is upgraded, you are ready to deploy Cloud Functions.
Configure Cloud Functions
To start writing Cloud Functions, you'll need to install Firebase CLI. Follow the installation guide present on this page.
After installing the Firebase CLI on your system, you can access it with the firebase command, run the following to test if it's working:
firebase --versionIf the version is printed on the console, then you are good to proceed.
Log in to Firebase using the following command:
firebase loginThis will open a webpage in your browser from where you have to sign in to the Google account that you have used for accessing Firebase.
The following steps will guide you through the configuration process of Cloud Functions:
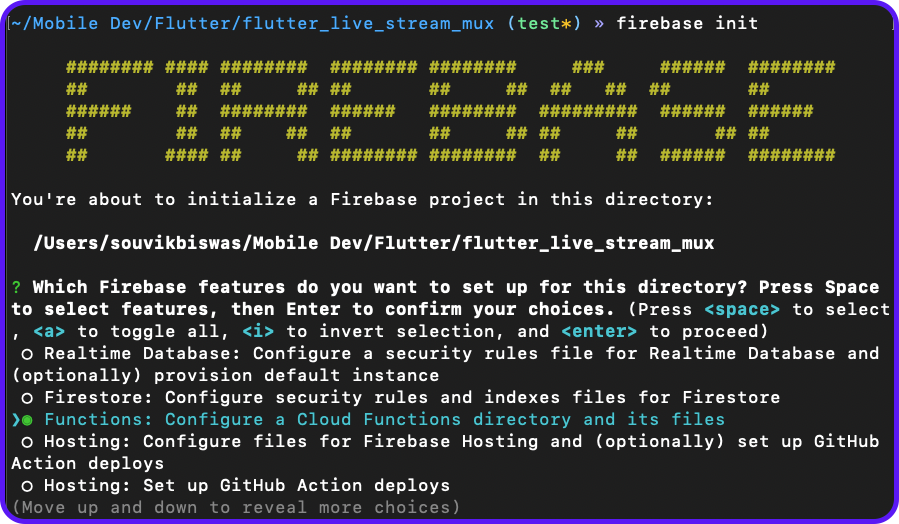
- Navigate to your Flutter project directory and run the following command to start initializing Cloud Functions:
firebase init2. Among the features of setup, select Functions.
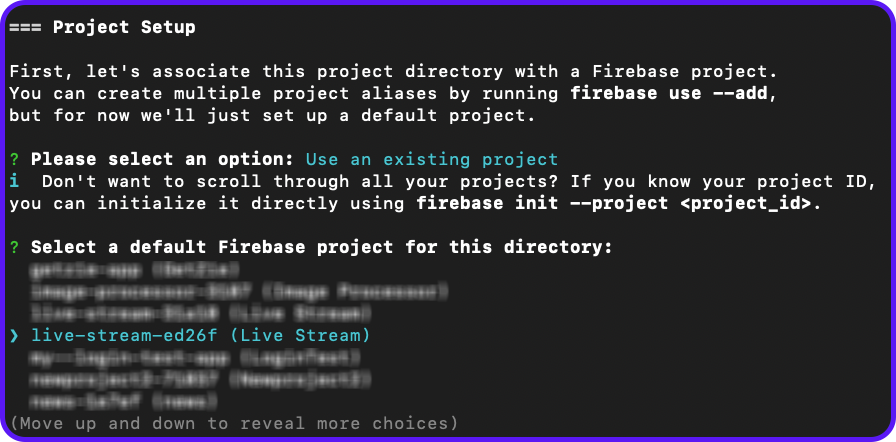
3. In Project Setup, choose to Use an existing project and select the Firebase project you created earlier.
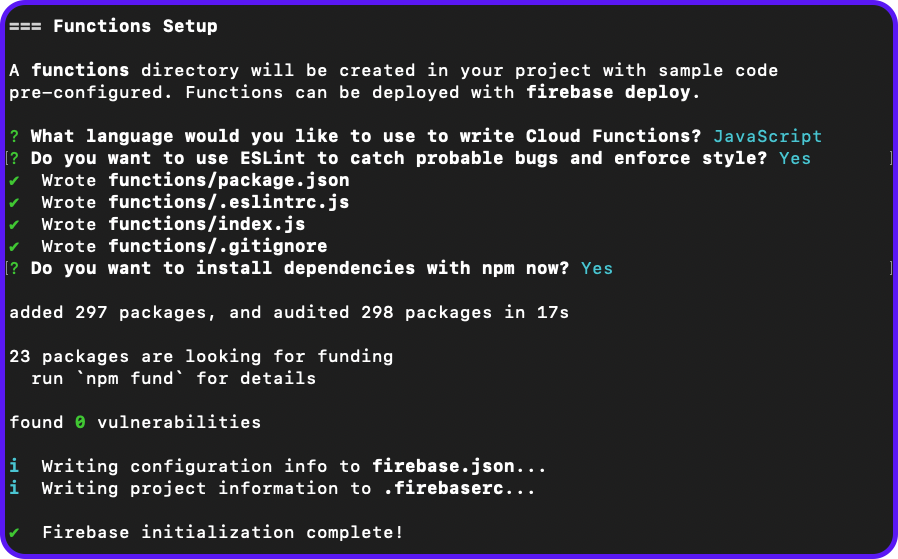
4. In Functions Setup, use the following:
- Language: JavaScript
- ESLint enable: Yes
- Install dependencies: Yes
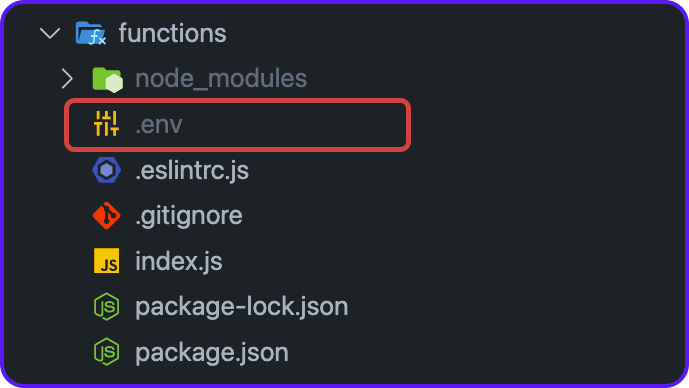
Once the initialization process completes, you will find a new folder is generated inside your Flutter project directory called functions:
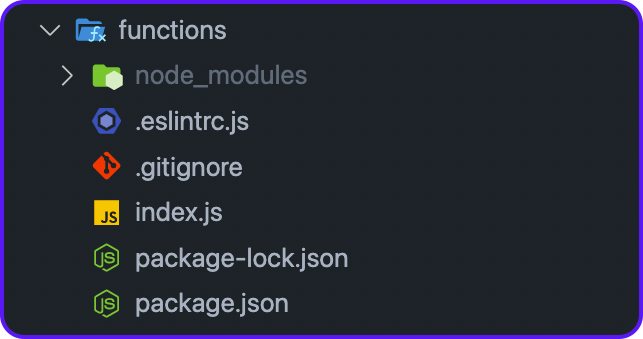
Here, index.js is the file where you have to write the functions. You will find all the dependencies of the Cloud Functions inside the package.json file.
Writing Functions
First, you'll need to add two dependencies:
- @mux/mux-node for accessing Mux API.
- dotenv for reading variables from
.envfile.
Navigate to the functions folder and run the following command to install these dependencies:
cd functions
npm i @mux/mux-node
npm i dotenv
This will add the dependencies to your package.json file.
Open the index.js file and import the required dependencies:
const Mux = require("@mux/mux-node");
const dotenv = require("dotenv");
To load the .env file, add the following:
dotenv.config();Initialize the Video API using:
const {Video} = new Mux(
    process.env.MUX_TOKEN_ID,
    process.env.MUX_TOKEN_SECRET,
);
We'll add three functions:
createLiveStream: To generate a live stream and return the response.retrieveLiveStreams: To get the list of all live streams.deleteLiveStream: To delete a single live stream.
Create live stream
A live stream can be created on Mux by using the create() method on the Video.LiveStreams object:
exports.createLiveStream = functions.https.onCall(async (data, context) => {
  try {
    const response = await Video.LiveStreams.create({
      playback_policy: "public",
      new_asset_settings: {playback_policy: "public"},
    });

    return response;
  } catch (err) {
    console.error(
        `Unable to start the live stream ${context.auth.uid}.
        Error ${err}`,
    );
    throw new functions.https.HttpsError(
        "aborted",
        "Could not create live stream",
    );
  }
});
Retrieve list of live streams
The list of all streams can be retrieved by using the list() method on the Video.LiveStreams object:
exports.retrieveLiveStreams = functions.https.onCall(async (data, context) => {
  try {
    const liveStreams = await Video.LiveStreams.list();

    const responseList = liveStreams.map((liveStream) => ({
      id: liveStream.id,
      status: liveStream.status,
      playback_ids: liveStream.playback_ids,
      created_at: liveStream.created_at,
    }));

    return responseList;
  } catch (err) {
    console.error(
        `Unable to retrieve live streams.
        Error ${err}`,
    );
    throw new functions.https.HttpsError(
        "aborted",
        "Could not retrieve live streams",
    );
  }
});
Each of the objects in the list is mapped to a JSON object, making it easier to use the data inside the app.
Delete live stream
You can pass any data to these Cloud Functions, which is accessible from the data object inside the functions. For deleting a live stream, you'll need to pass the liveStreamId to the functions and then use the del() method over of the Video.LiveStreams object.
exports.deleteLiveStream = functions.https.onCall(async (data, context) => {
  try {
    const liveStreamId = data.liveStreamId;
    const response = await Video.LiveStreams.del(liveStreamId);

    return response;
  } catch (err) {
    console.error(
        `Unable to delete live stream, id: ${data.liveStreamId}.
      Error ${err}`,
    );
    throw new functions.https.HttpsError(
        "aborted",
        "Could not delete live stream",
    );
  }
});
Deploying to Firebase
Before you start deploying the functions, add the Mux API token .env file to the functions folder.
Rename the file to just .env, remove anything before "." (dot). For example, if the file is named as mux-Live Stream Token.env rename it to just .env. Ensure that the file doesn't get uploaded to the version control; add it to .gitignore file.
Run the following command from the functions folder to deploy:
firebase deploy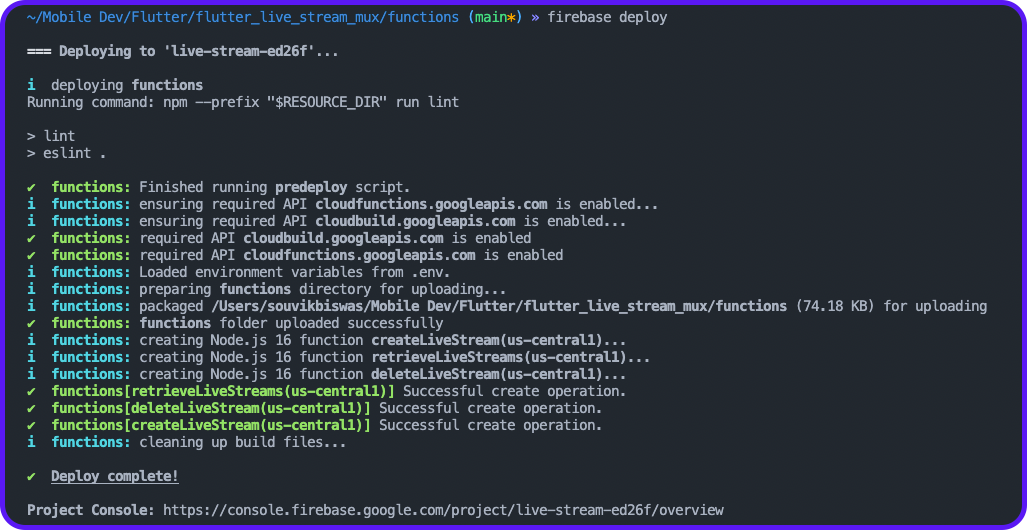
After a successful deployment of the Cloud Function, you should be able to see them on Firebase Functions page.
Integrating Firebase with Flutter
To integrate Firebase with your Flutter app, you should have the following CLI tools installed on your system:
- Firebase CLI: For accessing the Firebase projects (already configured).
- FlutterFire CLI: Helps in the Dart-only configuration of Firebase.
Install FlutterFire CLI using the following command:
dart pub global activate flutterfire_cliBefore configuring Firebase, install the firebase_core plugin in your Flutter project by running the following command:
flutter pub add firebase_coreTo start configuring Firebase, run the following command from the root directory of your Flutter app:
flutterfire configureYou'll be prompted to select the Firebase project and the platforms (select only Android & iOS platform) for which you want to configure your Flutter app.
Once the configuration is complete, it will generate the firebase_options.dart file inside the lib directory.
Now, go back to your Flutter project and open the main.dart file. Add the following inside the main function (mark the main as async):
import 'package:firebase_core/firebase_core.dart';
import 'package:flutter_mux_live/firebase_options.dart';

void main() async {
  WidgetsFlutterBinding.ensureInitialized();

  await Firebase.initializeApp(
    options: DefaultFirebaseOptions.currentPlatform,
  );

  runApp(const MyApp());
}
Triggering Cloud Functions
Let's add all the cloud function triggers inside a separate class called MuxClient. Create a new file inside the lib directory utils/mux_client.dart, add the following:
import 'package:cloud_functions/cloud_functions.dart';

class MuxClient {
  FirebaseFunctions functions = FirebaseFunctions.instance;

  Future<MuxLiveData> createLiveStream() async {
    // TODO: Create a live stream session
  }

  Future<List<MuxStream>> getLiveStreams() async {
    // TODO: Get the list of live streams
  }

  Future<void> deleteLiveStream({required String liveStreamId}) async {
    // TODO: Delete a live stream
  }
}
In the above code, an instance of the FirebaseFunctions is created that will be required for triggering the Cloud Functions.
We will define the respective functionalities to each of these methods but before that, let's define a model class to easily handle the JSON data that will be returned as the response.
Model class
Parsing JSON response becomes simpler using a model class and helps prevent errors. A model class holds the structure of the response data so that it's easier to access the parameters of the JSON object.
We'll add a simple model class for handling the live stream data returned from the Cloud Function calla. Create a new file model/mux_live_data.dart, add the following to it:
import 'dart:convert';

class MuxLiveData {
  MuxLiveData({
    required this.streamKey,
    required this.status,
    required this.reconnectWindow,
    required this.playbackIds,
    required this.id,
    required this.createdAt,
    required this.latencyMode,
    required this.maxContinuousDuration,
  });

  String? streamKey;
  String status;
  int? reconnectWindow;
  List<PlaybackId> playbackIds;
  String id;
  String createdAt;
  String? latencyMode;
  int? maxContinuousDuration;

  factory MuxLiveData.fromRawJson(String str) =>
      MuxLiveData.fromJson(json.decode(str));

  String toRawJson() => json.encode(toJson());

  factory MuxLiveData.fromJson(Map<String, dynamic> json) => MuxLiveData(
        streamKey: json["stream_key"],
        status: json["status"],
        reconnectWindow: json["reconnect_window"],
        playbackIds: List<PlaybackId>.from(json["playback_ids"]
            .map((x) => PlaybackId.fromJson(Map<String, dynamic>.from(x)))),
        id: json["id"],
        createdAt: json["created_at"],
        latencyMode: json["latency_mode"],
        maxContinuousDuration: json["max_continuous_duration"],
      );

  Map<String, dynamic> toJson() => {
        "stream_key": streamKey,
        "status": status,
        "reconnect_window": reconnectWindow,
        "playback_ids": List<dynamic>.from(playbackIds.map((x) => x.toJson())),
        "id": id,
        "created_at": createdAt,
        "latency_mode": latencyMode,
        "max_continuous_duration": maxContinuousDuration,
      };
}

class PlaybackId {
  PlaybackId({
    required this.policy,
    required this.id,
  });

  String policy;
  String id;

  factory PlaybackId.fromRawJson(String str) =>
      PlaybackId.fromJson(json.decode(str));

  String toRawJson() => json.encode(toJson());

  factory PlaybackId.fromJson(Map<String, dynamic> json) => PlaybackId(
        policy: json["policy"],
        id: json["id"],
      );

  Map<String, dynamic> toJson() => {
        "policy": policy,
        "id": id,
      };
}
Mux client methods
Now that we have the model class ready let's complete defining the methods inside the MuxClient class.
Create a live stream session
The createLiveStream function is called to generate a new live stream. The response is returned as a MuxLiveData object.
Future<MuxLiveData> createLiveStream() async {
  final callable = functions.httpsCallable('createLiveStream');
  final response = await callable();
  final muxLiveData = MuxLiveData.fromJson(response.data);
  return muxLiveData;
}
Retrieve the list of live streams
The retrieveLiveStreams function is called to get the list of all live streams. Then the response is parsed to create a list of MuxLiveData objects.
Future<List<MuxLiveData>> getLiveStreams() async {
  final callable = functions.httpsCallable('retrieveLiveStreams');
  final response = await callable();

  Iterable l = response.data;
  List<MuxLiveData> streamList = List<MuxLiveData>.from(
    l.map(
      (model) => MuxLiveData.fromJson(
        Map<String, dynamic>.from(model),
      ),
    ),
  );

  return streamList;
}
Delete a live stream
The deleteLiveStream function is called to delete a live stream. You'll need to pass the live stream ID that you want to delete.
Future<void> deleteLiveStream({required String liveStreamId}) async {
  final callable = functions.httpsCallable('deleteLiveStream');
  await callable.call({
    'liveStreamId': liveStreamId,
  });
}
Creating app UI
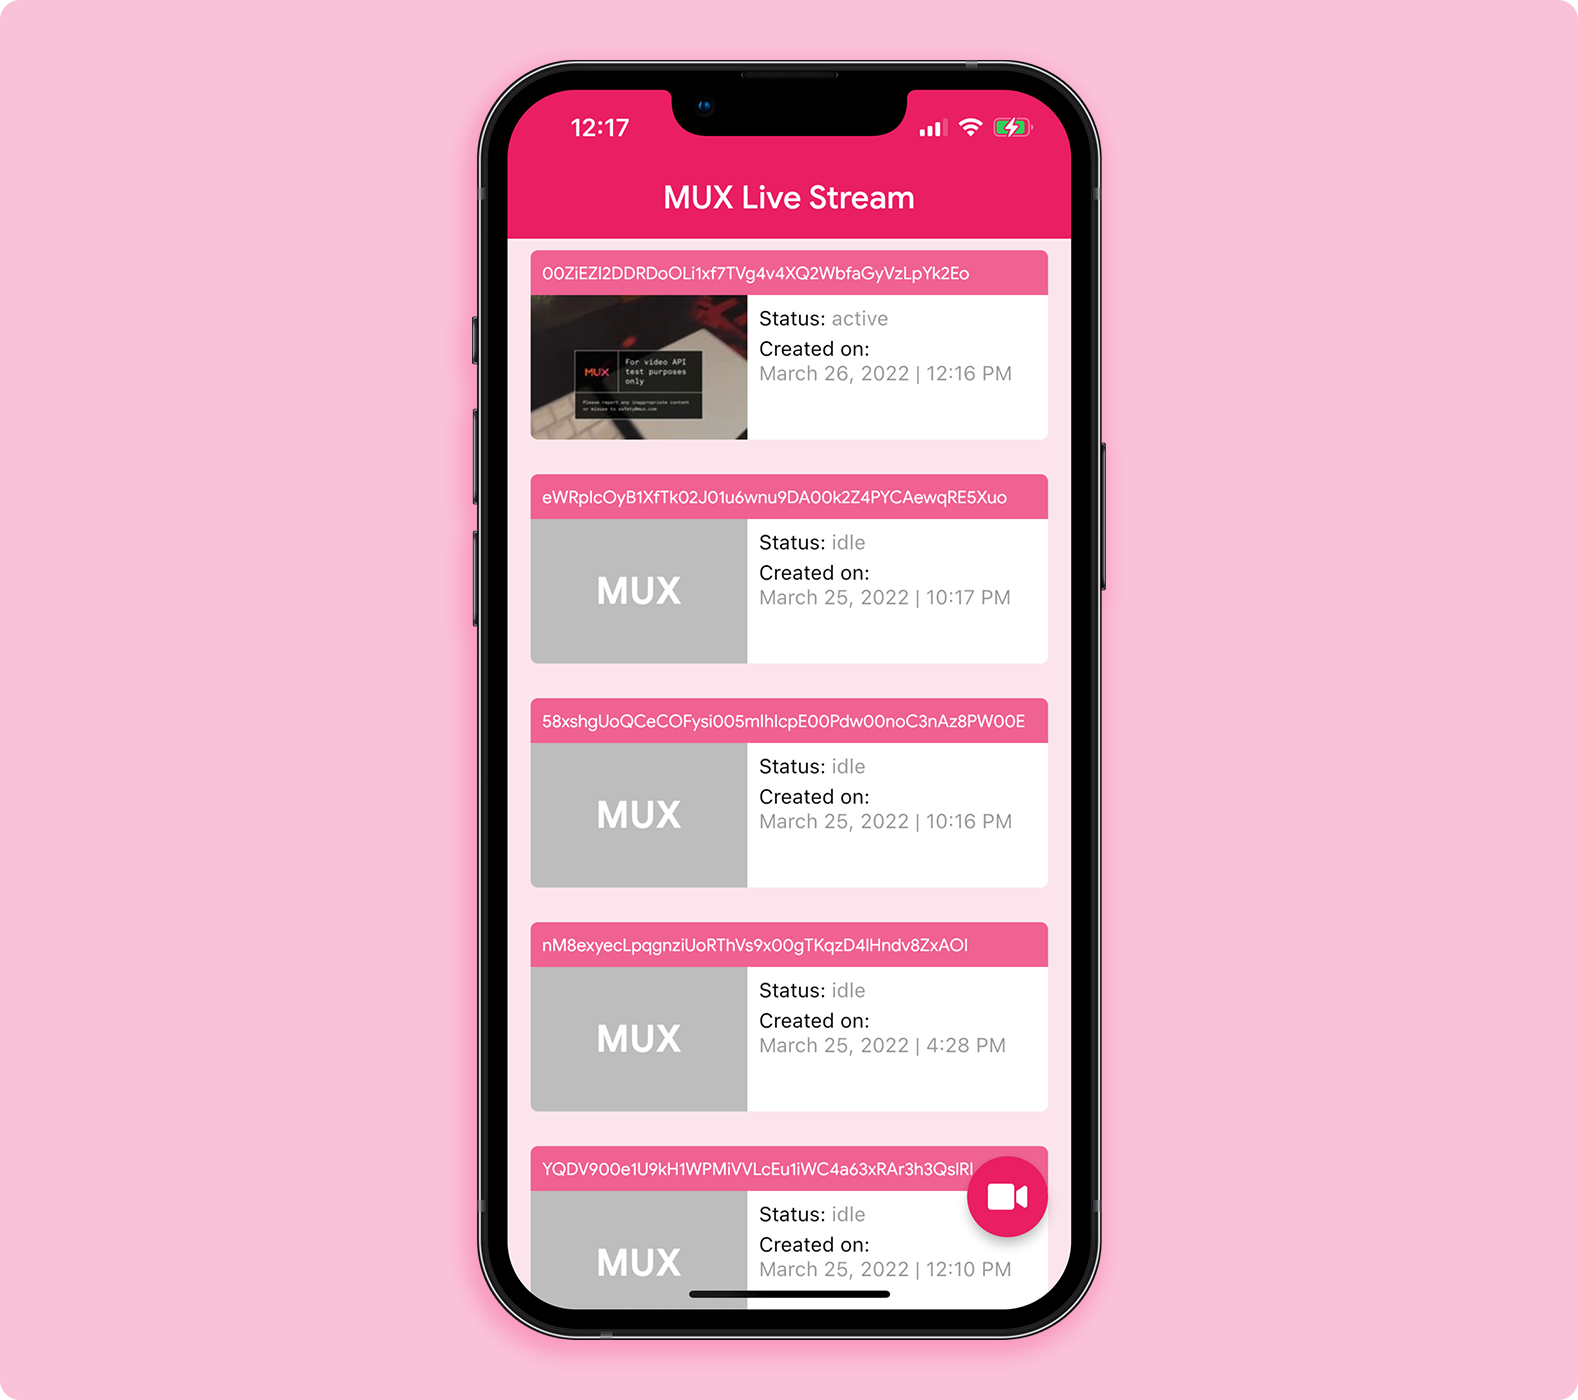
It's time to build the application's user interface. The first page of the app will be the Dashboard Page, where the list of live streams will be displayed.
Dashboard page
Create a new folder called screens inside the lib directory, add dashboard_page.dart file. Inside this file, create the DashboardPage class as a StatefulWidget:
class DashboardPage extends StatefulWidget {
  const DashboardPage({Key? key}) : super(key: key);

  @override
  State<DashboardPage> createState() => _DashboardPageState();
}

class _DashboardPageState extends State<DashboardPage> {
  late final MuxClient _muxClient;

  List<MuxLiveData>? _streams;
  bool _isRetrieving = false;

  _getStreams() async {
    // TODO (1): Call mux client method to get the list of streams
  }

  @override
  void initState() {
    _muxClient = MuxClient();
    _getStreams();
    super.initState();
  }

  @override
  Widget build(BuildContext context) {
    return Scaffold(
      backgroundColor: Colors.pink.shade50,
      appBar: AppBar(
        systemOverlayStyle: const SystemUiOverlayStyle(
          statusBarColor: Colors.transparent,
        ),
        elevation: 0,
        centerTitle: true,
        backgroundColor: Colors.pink,
        title: const Text(
          'MUX Live Stream',
          style: TextStyle(
            fontSize: 22,
            color: Colors.white,
            fontWeight: FontWeight.w600,
          ),
        ),
      ),
      // TODO (2): Display the list of streams
      body: Container(),
    );
  }
}
The _muxClient object will be used for accessing the methods inside the MuxClient class. A boolean _isRetrieving is defined to keep track while fetching data and show a progress indication during that time.
In the _getStreams method, we'll fetch the list of streams and store it inside the _streams variable:
_getStreams() async {
  setState(() {
    _isRetrieving = true;
  });

  var streams = await _muxClient.getLiveStreams();

  setState(() {
    _streams = streams;
    _isRetrieving = false;
  });
}
Add a FloatingActionButton to the Scaffold on tapping which it will navigate to the LiveStreamPage:
Scaffold(
  // ...
  floatingActionButton: FloatingActionButton(
    onPressed: () {
      Navigator.of(context).push(
        MaterialPageRoute(
          builder: (context) => const LiveStreamPage(),
        ),
      );
    },
    child: const FaIcon(FontAwesomeIcons.video),
  ),
Add the following to a new file res/strings.dart:
const String streamBaseURL = 'rtmps://global-live.mux.com:443/app/';

// API for generating thumbnails of a video
const String muxImageBaseUrl = 'https://image.mux.com';

// API for streaming a video
const muxStreamBaseUrl = 'https://stream.mux.com';

// Thumbnail file type and size
const imageTypeSize = 'thumbnail.jpg?time=5&width=200';

// Received video file format
const videoExtension = 'm3u8';
These strings contain some base URLs, the thumbnail size, and the video file extension that you'll require in various places of the project.
To display the list of steams, add the following to the body of Scaffold:
Scaffold(
  // ...
  // Display the list of streams
  body: RefreshIndicator(
    onRefresh: () => _getStreams(),
    child: !_isRetrieving && _streams != null
        ? _streams!.isEmpty
            ? const Center(
                child: Text('Empty'),
              )
            : ListView.separated(
                physics: const BouncingScrollPhysics(),
                itemCount: _streams!.length,
                itemBuilder: (context, index) {
                  DateTime dateTime = DateTime.fromMillisecondsSinceEpoch(
                    int.parse(_streams![index].createdAt) * 1000,
                  );
                  DateFormat formatter =
                      DateFormat.yMMMMd().addPattern('|').add_jm();
                  String dateTimeString = formatter.format(dateTime);

                  String currentStatus = _streams![index].status;
                  bool isReady = currentStatus == 'active';

                  String? playbackId =
                      isReady ? _streams![index].playbackIds[0].id : null;

                  String? thumbnailURL = isReady
                      ? '$muxImageBaseUrl/$playbackId/$imageTypeSize'
                      : null;

                  return VideoTile(
                    streamData: _streams![index],
                    thumbnailUrl: thumbnailURL,
                    isReady: isReady,
                    dateTimeString: dateTimeString,
                    onTap: (id) async {
                      await _muxClient.deleteLiveStream(liveStreamId: id);
                      _getStreams();
                    },
                  );
                },
                separatorBuilder: (_, __) => const SizedBox(
                  height: 16.0,
                ),
              )
        : const Center(
            child: CircularProgressIndicator(),
          ),
  ),
);
The RefreshIndicator widget helps in implementing a pull-to-refresh quickly. When it's triggered, the _getStreams() method is called.
Let's define the VideoTile widget that creates each of the tiles to be displayed inside the list.
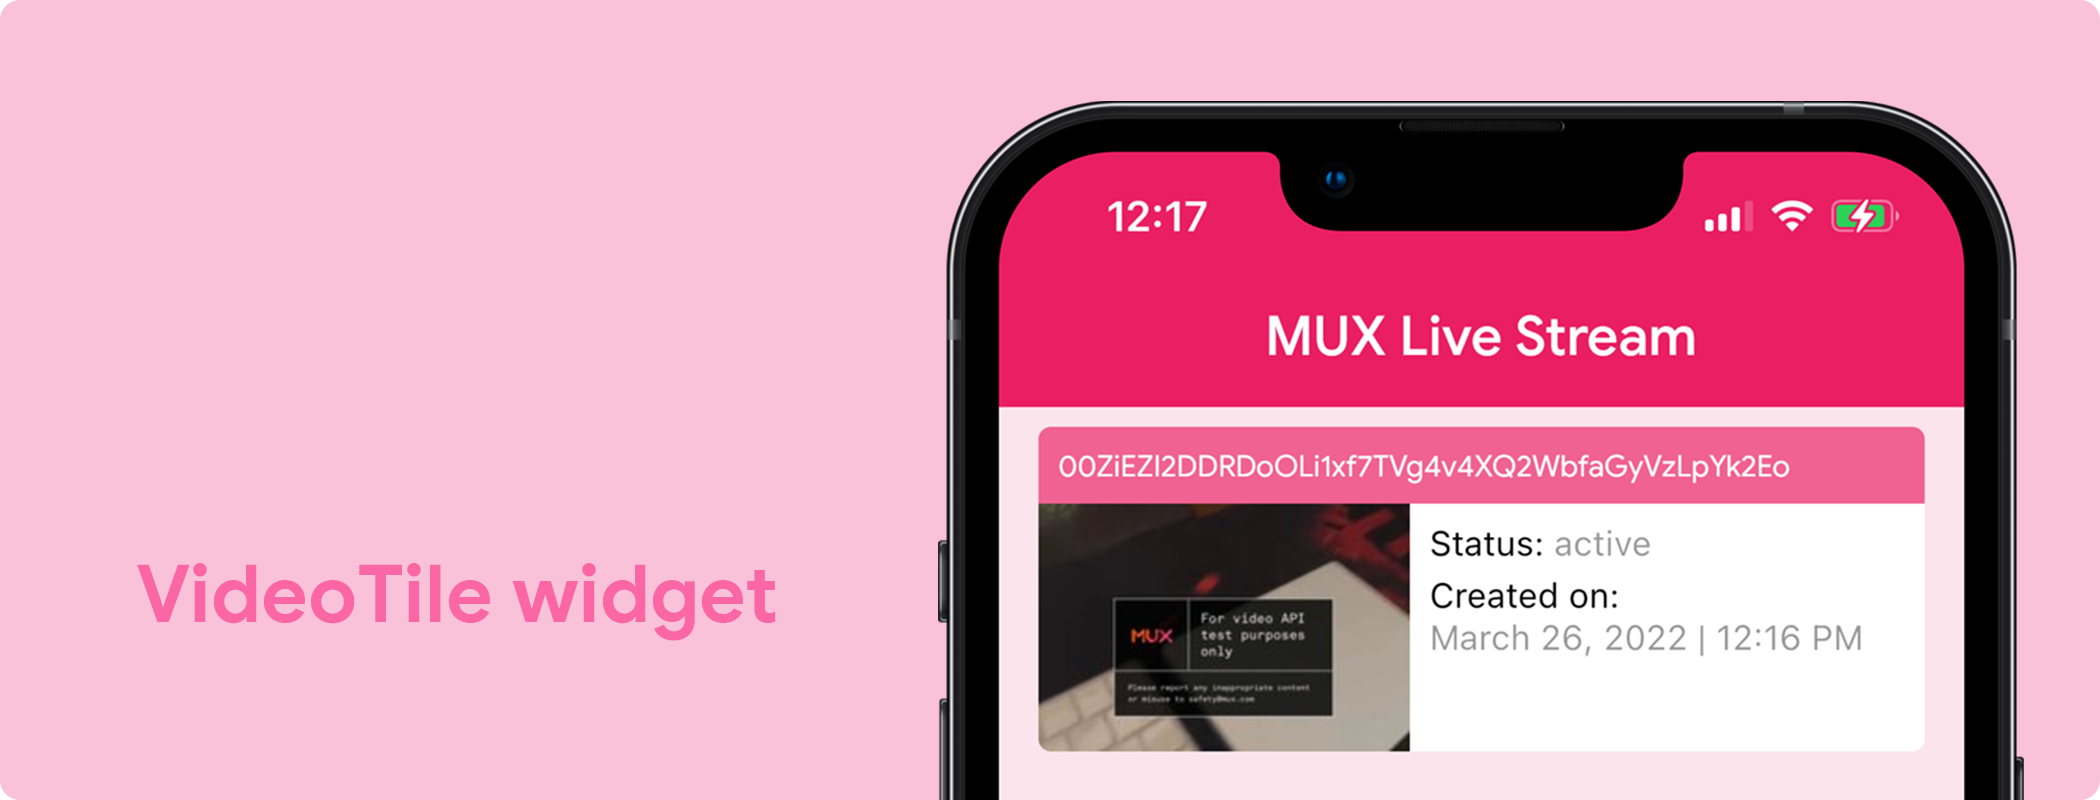
The code for building the widget is as follows:
class VideoTile extends StatefulWidget {
final MuxLiveData streamData;
final String? thumbnailUrl;
final String dateTimeString;
final bool isReady;
final Function(String id) onTap;
const VideoTile({
Key? key,
required this.streamData,
required this.thumbnailUrl,
required this.dateTimeString,
required this.isReady,
required this.onTap,
}) : super(key: key);
@override
State<VideoTile> createState() => _VideoTileState();
}
class _VideoTileState extends State<VideoTile> {
bool _isLongPressed = false;
@override
Widget build(BuildContext context) {
return Stack(
children: [
Padding(
padding: const EdgeInsets.only(
left: 16.0,
right: 16.0,
top: 8.0,
),
child: Container(
decoration: _isLongPressed
? BoxDecoration(
borderRadius: BorderRadius.circular(10),
border: Border.all(
color: Colors.red,
width: 4,
),
)
: null,
child: ClipRRect(
borderRadius: const BorderRadius.all(
Radius.circular(5.0),
),
child: InkWell(
onTap: () {
widget.isReady
? Navigator.of(context).push(
MaterialPageRoute(
builder: (context) => PlaybackPage(
streamData: widget.streamData,
),
),
)
: ScaffoldMessenger.of(context).showSnackBar(
const SnackBar(
content: Text('The video is not active'),
),
);
},
onLongPress: () {
setState(() {
_isLongPressed = true;
});
},
child: Container(
color: Colors.white,
child: Column(
crossAxisAlignment: CrossAxisAlignment.start,
children: [
Container(
width: double.maxFinite,
color: Colors.pink.shade300,
child: Padding(
padding: const EdgeInsets.only(
left: 8.0,
top: 8.0,
bottom: 8.0,
),
child: Text(
widget.streamData.id,
style: const TextStyle(
fontSize: 12.0,
color: Colors.white,
),
),
),
),
Row(
crossAxisAlignment: CrossAxisAlignment.start,
children: [
widget.isReady && widget.thumbnailUrl != null
? SizedBox(
width: 150,
height: 100,
child: Image.network(
widget.thumbnailUrl!,
fit: BoxFit.cover,
alignment: Alignment.bottomCenter,
),
)
: Container(
width: 150,
height: 100,
color: Colors.black26,
child: const Center(
child: Text(
'MUX',
style: TextStyle(
color: Colors.white,
fontWeight: FontWeight.bold,
fontSize: 26,
),
),
),
),
Flexible(
child: Padding(
padding: const EdgeInsets.only(
left: 8.0,
top: 8.0,
),
child: Column(
mainAxisSize: MainAxisSize.min,
crossAxisAlignment: CrossAxisAlignment.start,
children: [
RichText(
maxLines: 1,
softWrap: false,
overflow: TextOverflow.fade,
text: TextSpan(
text: 'Status: ',
style: const TextStyle(
color: Colors.black,
fontSize: 14.0,
),
children: [
TextSpan(
text: widget.streamData.status,
style: TextStyle(
// fontSize: 12.0,
color:
Colors.black.withOpacity(0.4),
),
)
],
),
),
const SizedBox(height: 4.0),
RichText(
maxLines: 2,
overflow: TextOverflow.clip,
text: TextSpan(
text: 'Created on: ',
style: const TextStyle(
color: Colors.black,
fontSize: 14.0,
),
children: [
TextSpan(
text: '\n${widget.dateTimeString}',
style: TextStyle(
// fontSize: 12.0,
color:
Colors.black.withOpacity(0.4),
),
)
],
),
),
],
),
),
),
],
),
],
),
),
),
),
),
),
_isLongPressed
? InkWell(
onTap: () => widget.onTap(widget.streamData.id),
child: Padding(
padding: const EdgeInsets.only(left: 8.0),
child: Container(
decoration: const BoxDecoration(
color: Colors.red,
shape: BoxShape.circle,
),
child: const Padding(
padding: EdgeInsets.all(8.0),
child: Icon(
Icons.close,
color: Colors.white,
size: 26,
),
),
),
),
)
: const SizedBox(),
],
);
}
}In the above code:
- When each of the tiles is tapped, first, it's checked whether the state of the live stream is
active. If it's active, the user will be navigated to thePlaybackPage; otherwise, it shows aSnackBar. - When a tile is long pressed, a delete button pops up, on tapping which the
deleteLiveStreammethod (defined insideMuxClient) is triggered.
Live Stream page
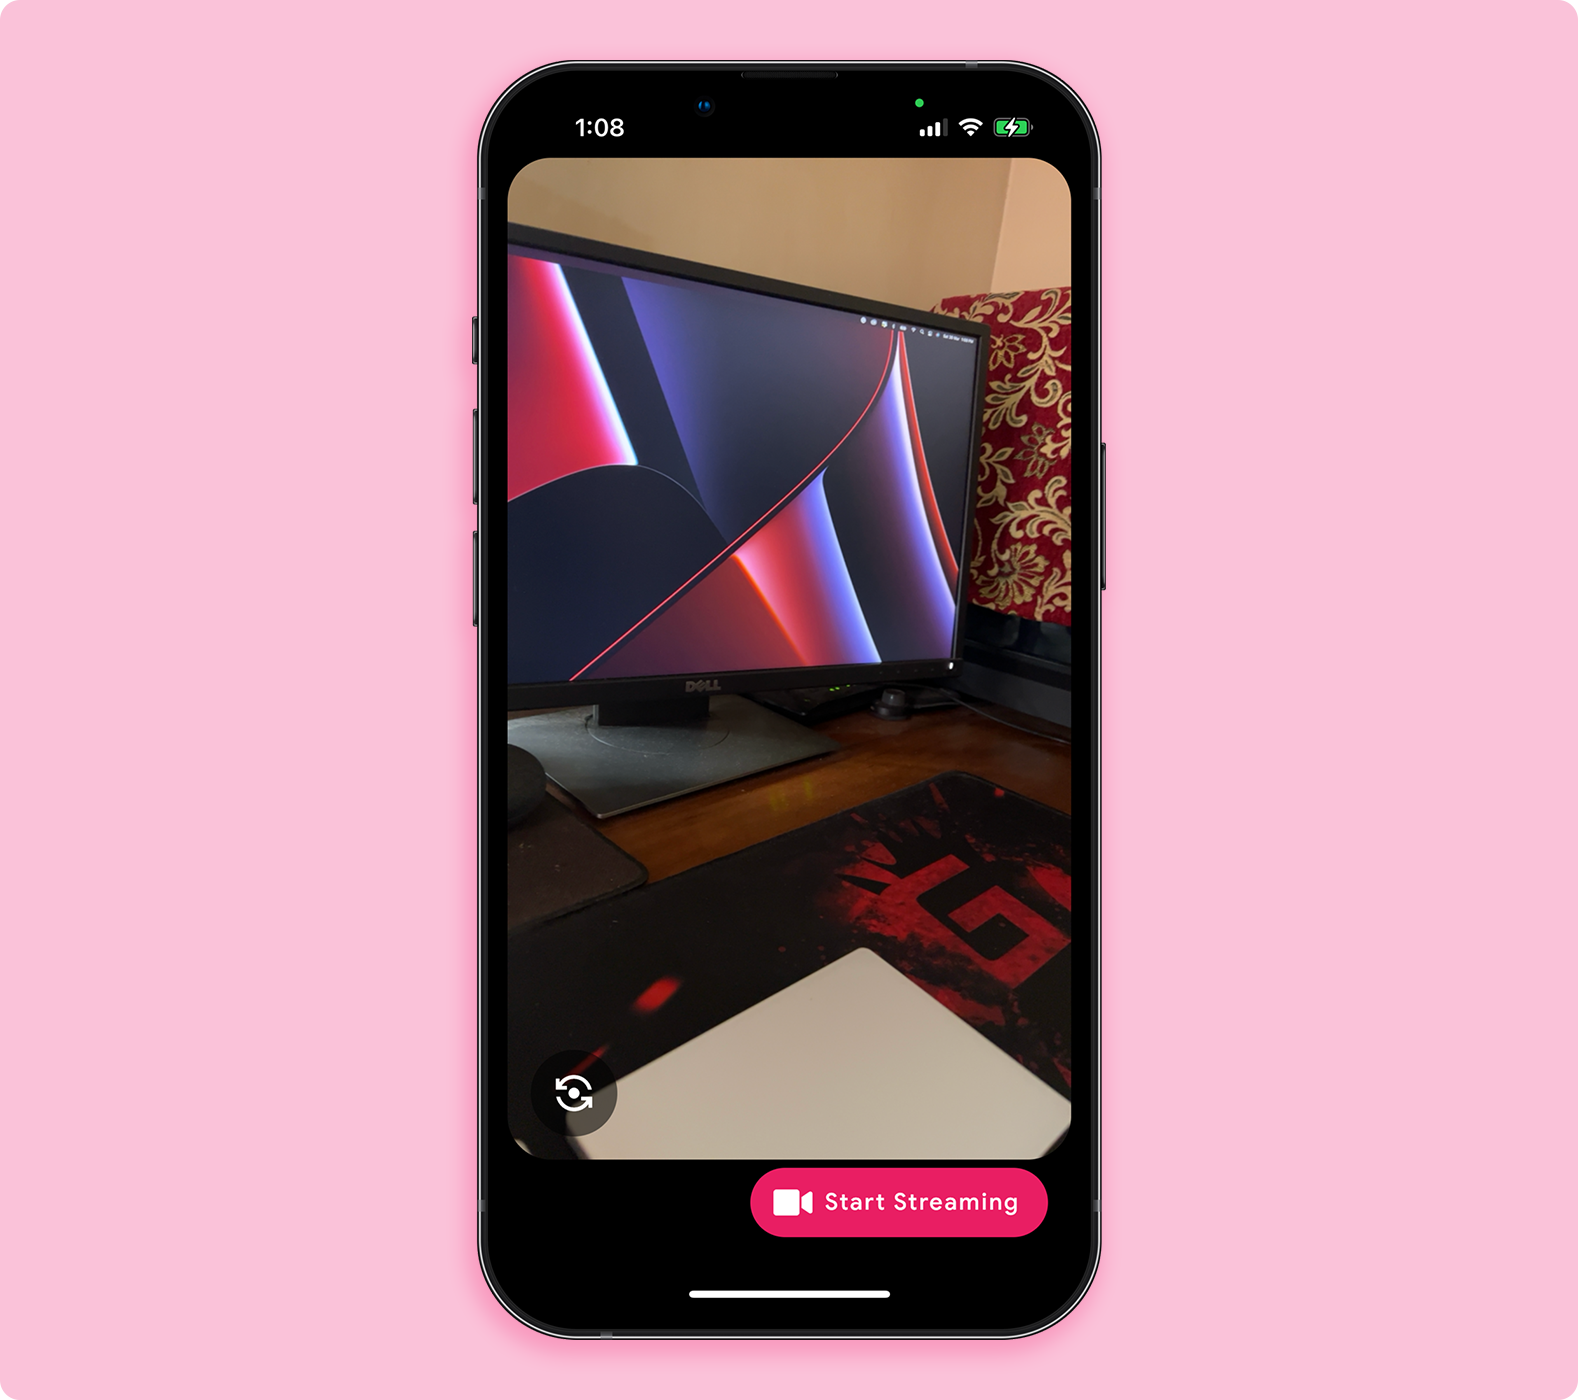
On this page, we'll have the following main functionalities:
- Display camera preview in portrait mode.
- Button to start/stop a live streaming session.
- Button for flipping the camera from front to back and vice versa.
- Duration of the stream (only displayed while the stream is in progress).
Create a new file under the screens folder called live_stream_page.dart. Add the LiveStreamPage class as a StatefulWidget:
class LiveStreamPage extends StatefulWidget {
  const LiveStreamPage({Key? key}) : super(key: key);

  @override
  State<LiveStreamPage> createState() => _LiveStreamPageState();
}

class _LiveStreamPageState extends State<LiveStreamPage> {
  CameraController? _controller;
  late final MuxClient _muxClient;

  MuxLiveData? _sessionData;

  bool _isCameraPermissionGranted = false;
  bool _isCameraInitialized = false;
  bool _isInitializing = false;
  bool _isStreaming = false;
  bool _isFrontCamSelected = true;

  Timer? _timer;
  String? _durationString;
  final _stopwatch = Stopwatch();

  _getPermissionStatus() async {
    // TODO (1): Get the camera permission, if granted start initializing it
  }

  _onNewCameraSelected(CameraDescription cameraDescription) async {
    // TODO (2): Initialize a new camera
  }

  _startVideoStreaming() async {
    // TODO (3): Create the streaming session using the MuxClient
    //          and start the live video stream
  }

  _stopVideoStreaming() async {
    // TODO (4): Stop the live video stream
  }

  _startTimer() {
    // TODO (5): Start duration timer
  }

  _stopTimer() {
    // TODO (6): Stop duration timer
  }

  @override
  void initState() {
    _muxClient = MuxClient();
    _getPermissionStatus();

    super.initState();
  }

  @override
  void dispose() {
    _controller?.dispose();
    _stopwatch.stop();
    _timer?.cancel();
    super.dispose();
  }

  @override
  void didChangeAppLifecycleState(AppLifecycleState state) {
    // App state changed before we got the chance to initialize.
    if (_controller == null || !_controller!.value.isInitialized) {
      return;
    }
    if (state == AppLifecycleState.inactive) {
      _controller?.dispose();
    } else if (state == AppLifecycleState.resumed) {
      if (_controller != null) {
        _onNewCameraSelected(_controller!.description!);
      }
    }
  }

  @override
  Widget build(BuildContext context) {
    // TODO (7): Display the camera preview and the buttons
    return Scaffold();
  }
}
Here, a few methods are mentioned to control the camera and the timer state. The booleans will help in tracking the current state of various components.
Setup camera
It's better to get the available cameras during the start of your app because it doesn't require any permission.
Add the following to your main.dart file:
import 'package:video_stream/camera.dart';

// Global variable for storing the list of available cameras
List<CameraDescription> cameras = [];

void main() async {
  WidgetsFlutterBinding.ensureInitialized();

  // Get the available device cameras
  try {
    cameras = await availableCameras();
  } on CameraException catch (e) {
    debugPrint(e.toString());
  }

  runApp(const MyApp());
}
Now, go back to the LiveStreamPage class, inside the _getPermissionStatus() method you need to get the current permission status of the camera. If permission is granted, a new camera should be initialized.
_getPermissionStatus() async {
  await Permission.camera.request();
  var status = await Permission.camera.status;

  if (status.isGranted) {
    log('Camera Permission: GRANTED');
    setState(() {
      _isCameraPermissionGranted = true;
    });
    // Set and initialize the new camera
    // with front camera
    _onNewCameraSelected(cameras[1]);
  } else {
    log('Camera Permission: DENIED');
  }
}camera[0]: Back camera of the device.camera[1]: Front camera of the device.
The _onNewCameraSelected() method takes a CameraDescription object and initializes the camera:
void _onNewCameraSelected(CameraDescription cameraDescription) async {
  setState(() {
    _isCameraInitialized = false;
  });

  final previousCameraController = _controller;

  final CameraController cameraController = CameraController(
    cameraDescription,
    ResolutionPreset.high,
    enableAudio: true,
    androidUseOpenGL: true,
  );

  await previousCameraController?.dispose();

  if (mounted) {
    setState(() {
      _controller = cameraController;
    });
  }

  _controller!.addListener(() {
    _isStreaming = _controller!.value.isStreamingVideoRtmp;
    _isCameraInitialized = _controller!.value.isInitialized;

    if (_isStreaming) {
      _startTimer();
      Wakelock.enable();
    } else {
      _stopTimer();
      Wakelock.disable();
    }

    if (mounted) setState(() {});
  });

  try {
    await cameraController.initialize();
  } on CameraException catch (e) {
    log('Error initializing camera: $e');
  }
}- A new
CameraControllerobject is created. - A listener is attached to the camera controller for tracking the current state.
- While the live stream is in progress, enable
Wakelockto prevent the device from going to sleep. - Finally, the camera preview is started by calling the
initialize()method on the camera controller.
Starting a video stream:
_startVideoStreaming() async {
  await _createSession();

  String url = streamBaseURL + _sessionData!.streamKey!;

  try {
    await _controller!.startVideoStreaming(url, androidUseOpenGL: false);
  } on CameraException catch (e) {
    log(e.toString());
  }
}
The _createSession() method will be used for creating the live stream by calling the respective method of the MuxClient:
_createSession() async {
  setState(() {
    _isInitializing = true;
  });

  final sessionData = await _muxClient.createLiveStream();

  setState(() {
    _sessionData = sessionData;
    _isInitializing = false;
  });
}
Stopping a video stream:
_stopVideoStreaming() async {
  try {
    await _controller!.stopVideoStreaming();
  } on CameraException catch (e) {
    log(e.toString());
  }
}
Camera preview
For showing the camera preview, check if the permission is granted and the camera is initialized, then you can use the CameraPreview widget:
_isCameraPermissionGranted
    ? _isCameraInitialized
        ? ClipRRect(
            borderRadius: BorderRadius.circular(30),
            child: AspectRatio(
              aspectRatio: _controller!.value.aspectRatio,
              child: CameraPreview(_controller!),
            ),
          )
Flip camera button
To build the button for flipping the camera, you can use the _isFrontCamSelected boolean to check which camera is selected currently and use the _onNewCameraSelected method by passing the new camera to which you want to switch:
InkWell(
  onTap: () {
    _isFrontCamSelected
        ? _onNewCameraSelected(cameras[0])
        : _onNewCameraSelected(cameras[1]);

    setState(() {
      _isFrontCamSelected = !_isFrontCamSelected;
    });
  },
  child: const CircleAvatar(
    radius: 30,
    backgroundColor: Colors.black54,
    child: Center(
      child: Icon(
        Icons.flip_camera_android,
        color: Colors.white,
        size: 30,
      ),
    ),
  ),
)
Manage stream timer
The _startTimer() method can be defined like this:
_startTimer() {
  _stopwatch.start();
  _timer = Timer.periodic(const Duration(seconds: 1), (timer) {
    if (mounted) {
      setState(() {
        _durationString = _getDurationString(_stopwatch.elapsed);
      });
    }
  });
}
The stopTimer() method can be defined like this:
_stopTimer() {
  _stopwatch.stop();
  _stopwatch.reset();
  _durationString = _getDurationString(_stopwatch.elapsed);

  _timer?.cancel();
}
To get the Duration object as a String, you can use this method:
String _getDurationString(Duration duration) {
String twoDigits(int n) => n.toString().padLeft(2, "0");
String twoDigitMinutes = twoDigits(duration.inMinutes.remainder(60));
String twoDigitSeconds = twoDigits(duration.inSeconds.remainder(60));
return "${twoDigits(duration.inHours)}:$twoDigitMinutes:$twoDigitSeconds";
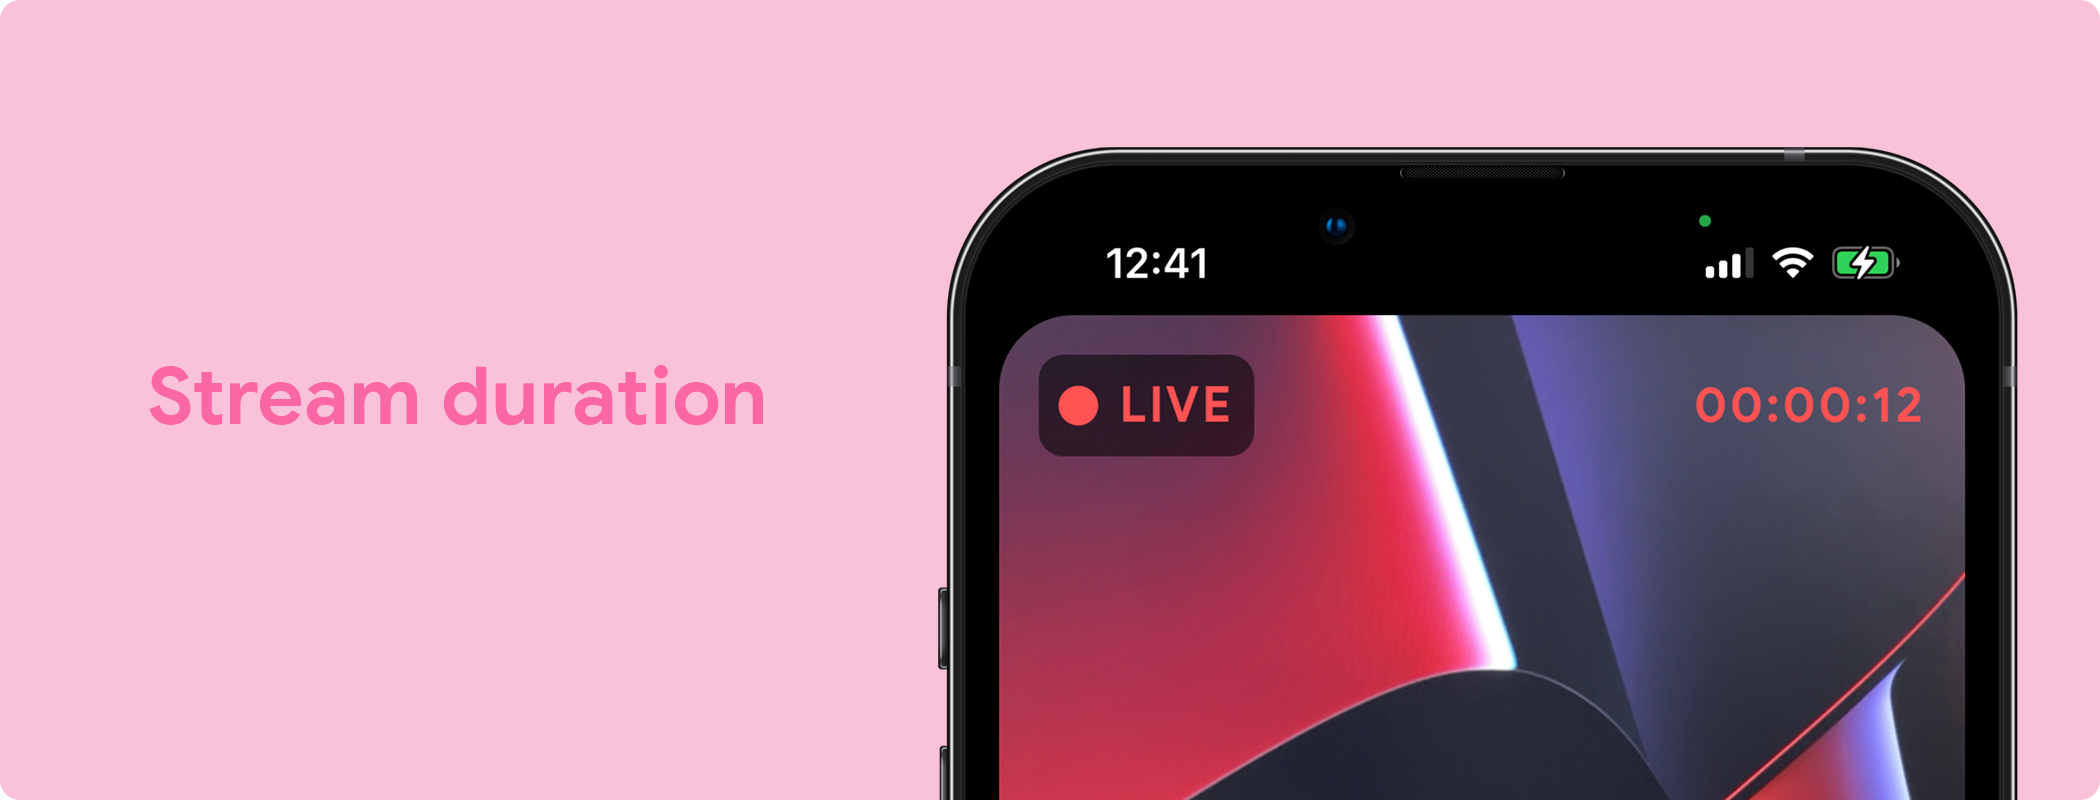
}Display stream duration
While live streaming, an indicator with the text "LIVE" will be displayed along with the duration of the stream.
The code for building it is as follows:
_isStreaming
    ? Padding(
        padding: const EdgeInsets.only(
          left: 16.0,
          top: 16.0,
          right: 16.0,
        ),
        child: Row(
          mainAxisAlignment: MainAxisAlignment.spaceBetween,
          children: [
            Container(
              decoration: BoxDecoration(
                color: Colors.black54,
                borderRadius: BorderRadius.circular(10),
              ),
              child: Padding(
                padding: const EdgeInsets.all(8.0),
                child: Row(
                  mainAxisSize: MainAxisSize.min,
                  children: [
                    Container(
                      decoration: const BoxDecoration(
                        color: Colors.redAccent,
                        shape: BoxShape.circle,
                      ),
                      width: 16,
                      height: 16,
                    ),
                    const SizedBox(width: 8),
                    const Text(
                      'LIVE',
                      style: TextStyle(
                        fontSize: 20,
                        fontWeight: FontWeight.w800,
                        letterSpacing: 1,
                        color: Colors.redAccent,
                      ),
                    ),
                  ],
                ),
              ),
            ),
            Text(
              _durationString ?? '',
              style: const TextStyle(
                fontSize: 20,
                fontWeight: FontWeight.w800,
                letterSpacing: 1,
                color: Colors.redAccent,
              ),
            ),
          ],
        ),
      )
    : const SizedBox(),
Playback page
This page is for displaying the video playback of the live stream.
Create a new file screens/playback_page.dart, add the PlaybackPage class as a StatefulWidget:
class PlaybackPage extends StatefulWidget {
  const PlaybackPage({
    Key? key,
    required this.streamData,
  }) : super(key: key);

  final MuxLiveData streamData;

  @override
  State<PlaybackPage> createState() => _PlaybackPageState();
}

class _PlaybackPageState extends State<PlaybackPage> {
  late final VideoPlayerController _videoController;
  late final MuxLiveData _streamData;

  @override
  void initState() {
    super.initState();

    _streamData = widget.streamData;
    // TODO (1): Initialize the video player controller
  }

  @override
  void dispose() {
    // TODO (2): Dispose the video player controller

    super.dispose();
  }

  @override
  Widget build(BuildContext context) {
    return Scaffold(
       // TODO (3): Show the video playback
    );
  }
}
Managing the video controller
Let's initialize a controller for the video playback inside the initState(). For the playback, you have to use the https://stream.mux.com URL along with the playback ID and the video extension (.m3u8).
@override
void initState() {
  super.initState();

  _streamData = widget.streamData;
  String playbackId = _streamData.playbackIds[0].id;

  _videoController = VideoPlayerController.network(
      '$muxStreamBaseUrl/$playbackId.$videoExtension')
    ..initialize().then((_) {
      setState(() {});
    });

  _videoController.play();
}
The play() method is called on the video controller to start the video playback as soon as the initialization is complete.
Make sure you dispose of the video controller inside the dispose():
@override
void dispose() {
_videoController.dispose();
super.dispose();
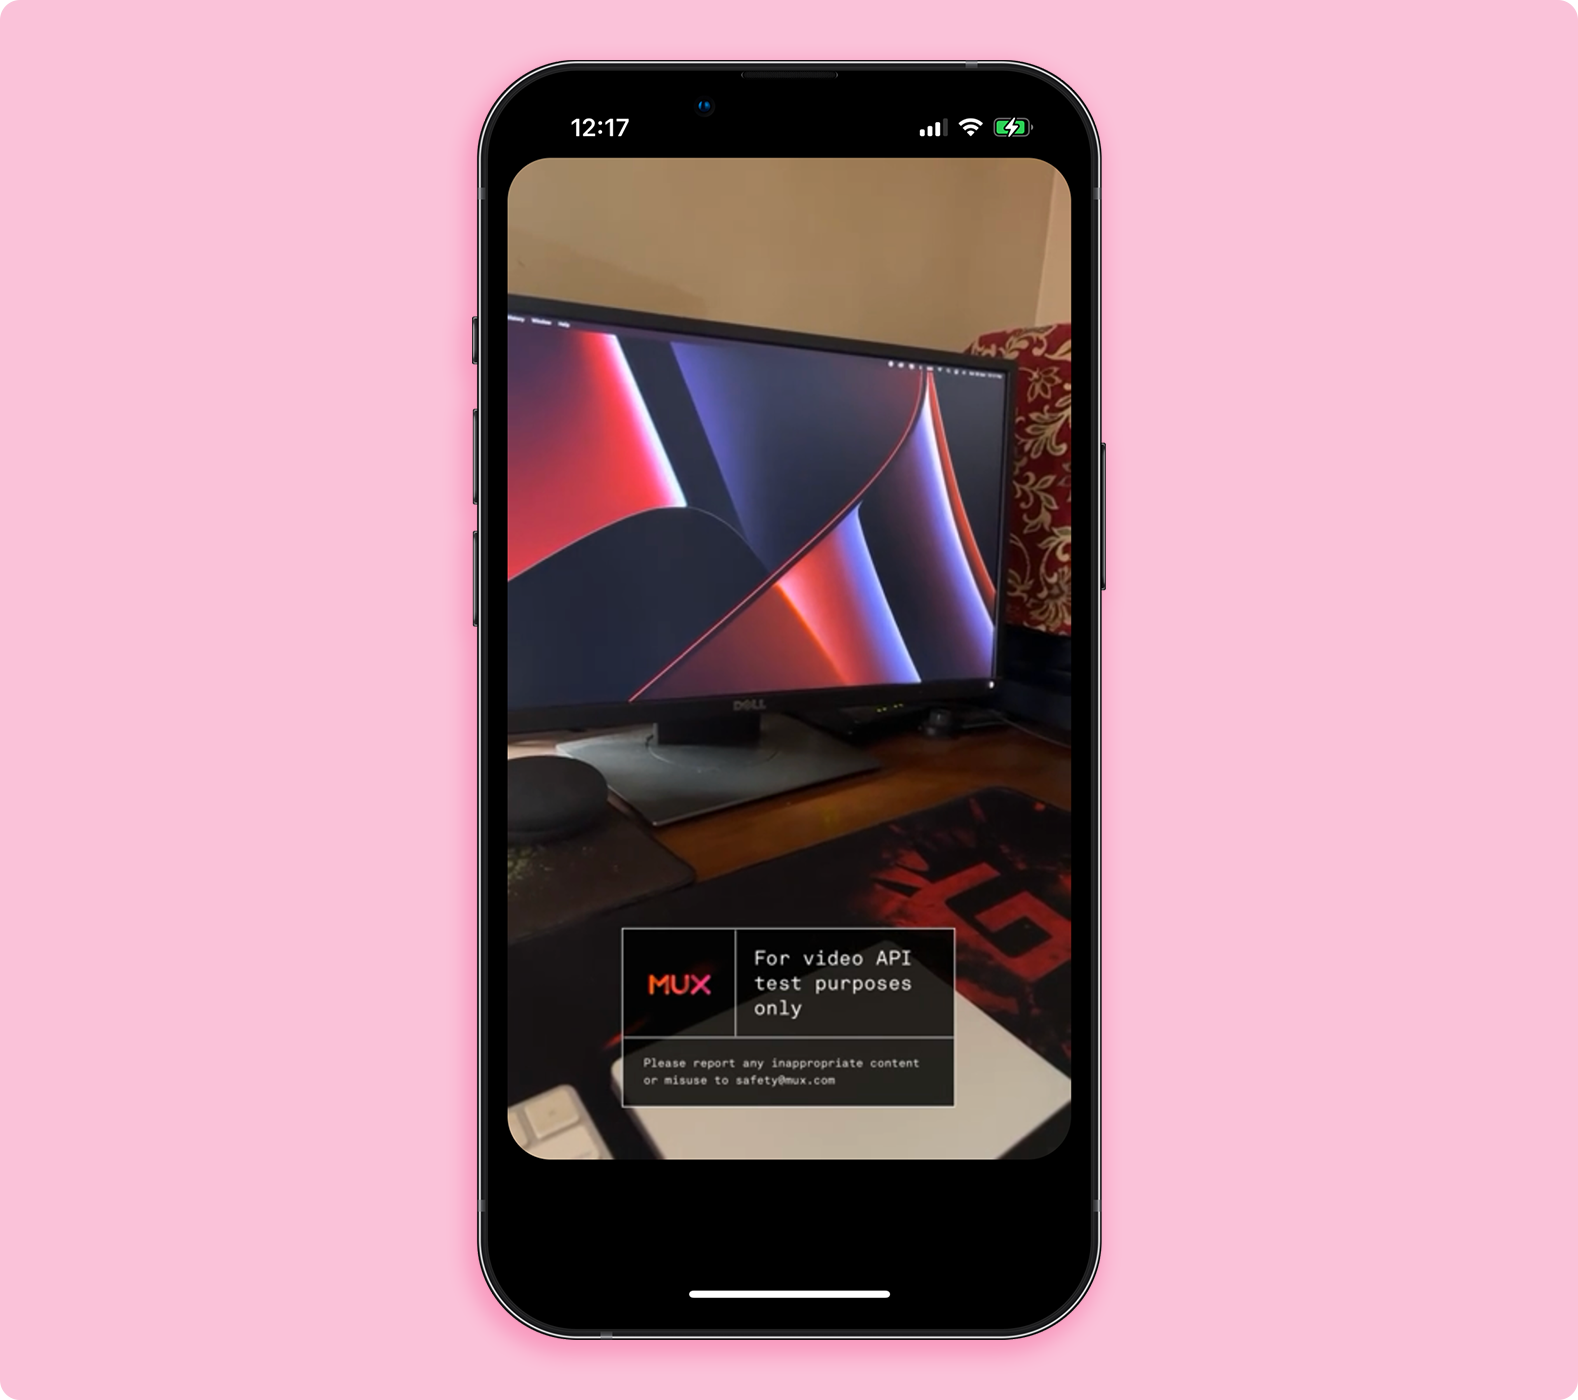
}Displaying live video feed
You can use the VideoPlayer widget to show the video playback. Wrap it with an AspectRatio widget so that the playback area is of the correct size.
@override
Widget build(BuildContext context) {
  return Scaffold(
    backgroundColor: Colors.black,
    body: SafeArea(
      child: _videoController.value.isInitialized
          ? ClipRRect(
              borderRadius: BorderRadius.circular(30),
              child: AspectRatio(
                aspectRatio: _videoController.value.aspectRatio,
                child: VideoPlayer(_videoController),
              ),
            )
          : const Center(
              child: CircularProgressIndicator(
                valueColor: AlwaysStoppedAnimation<Color>(
                  Colors.pink,
                ),
                strokeWidth: 2,
              ),
            ),
    ),
  );
}
With this, you have completed the implementation of the PlaybackPage.
Wrapping up
Congratulations! 🎉 You have successfully created a full-fledged video streaming and playback app in Flutter with the help of Mux. The Mux Video API has more customization options for a live stream, don't forget to try them out.
Mux + FlutterFlow integration
coming soon 🙌
